Flash drives have long become an indispensable attribute of a modern person. They are very compact and have impressive capacity. Quite often we write important data there and do not create a backup copy. But in vain, these devices often fail and can take away all the necessary information.
Let's look at what to do if the flash drive stops working and says that formatting is required.
What to do if the flash drive asks to format
Data recovery
First, let's restore important information from a flash drive.
Please note that self-recovery does not always end in success. If you do not want to risk important information, it is better to take the faulty device to a specialized institution.
For this we will use a special program called Handy Recovery. This is a paid program that has a trial period of 30 days. Let's download and run it. We are not formatting the flash drive yet.
Select the required disk and click "Rapid Recovery". If the program does not see the flash drive, then apply it to it "Quick Format". To do this in the window "My computer" Right-click on the device and select the desired item. After this we will try to restore again.
This program recovers data from removable media, not the device itself.
After this, all the data that was found will be displayed in the left column. Regular folders are exactly the information that was on the flash drive at the time of the breakdown. Those marked with a red cross are files that you deleted from the media.
Select the desired file and click "Restore".
If everything worked out, then you are lucky. Now let’s figure out what to do with the flash drive itself, which has lost its functionality.
First, test it on other computers, preferably with different operating systems, and insert it into a different connector. If the problem is present everywhere then move on to the next point.
Virus check
Very often, the path to removable storage can be blocked by malicious objects. One of these Autorun.inf. To eliminate it we can use the program Anti-Autorun. You need to download it and run it, the rest is automatic.

If the problem persists, we will scan the computer along with the removable media with our antivirus.

Then we use additional funds. First, download and install the Malware utility; it does not interfere with the work of your defender and can be used in parallel. Let's check.
The scan must be run in the entire system area (including the flash drive).
Let's use the portable utility AVZ, which is also effective in searching for various threats.

If nothing is found, let's try using AdwCleaner.

We clear everything that we managed to find and reboot the computer.
Deleting a partition and creating a new one
Let's go to "Administration-Disk Management". Find your device in the list.
Now let's go to the command room Windows string 7 (in the search field write cmd) and enter one by one "diskpart-listdisk", in the resulting list, select the letter of your flash drive; you can determine it by its size. If the wrong section is selected, you will lose all the information on it. Let's introduce "select disk"(Removable media no.).

Now let's go back to "Disk Management", the flash drive area has become unallocated. Right-click to create a new volume.
On the screen you will see "Wizard for creating a new volume", click everywhere "Next". Let's focus on choosing a file system. I will format in "Fat 32".

After these steps, my flash drive began to work normally. If you don't have it, you can use special programs to recover removable media. Just keep in mind that after using such software, you will not be able to return the data, so do this in advance.
Recovering a flash drive using special utilities
The choice of program depends on the brand of your device. Some manufacturers produce specialized utilities, others do not.
If such software is not available, you can use programs that are suitable for most media. For example D-Soft Flash Doctor. Let's download and run the program. It does not require installation. Select your media from the list and click "Restore".

If all else fails, then most likely there is a hardware failure in the device. Take her to a specialized center. Perhaps they can help you there.
One of common problems when formatting SD and MicroSD memory cards, as well as USB flash drives- error message “Windows cannot complete formatting”, and as a rule, the error appears regardless of the file system in which formatting is performed - FAT32, NTFS, exFAT or another.
In most cases, the problem occurs after the memory card or flash drive has been removed from some device (camera, phone, tablet, etc.), when using programs for working with disk partitions, or in cases where the drive is suddenly disconnected from the computer while performing operations with it, in case of power failures or when using the drive with any programs.
The method using DISKPART to clean up a disk can help in cases where the partition structure on a flash drive or memory card has been damaged or some device to which the drive was connected has created partitions on it (in Windows there may be problems if the removable drive there are several sections).
- Run Command Prompt as Administrator (), then use the following commands in order.
- diskpart
- list disk(as a result of executing this command, remember the number of the drive that needs to be formatted, hereinafter referred to as N)
- select disk N
- clean
- create partition primary
- format fs=fat32 quick(or fs=ntfs)
- If, after executing the command under step 7 after formatting is complete, the drive does not appear in Windows Explorer, use step 9, otherwise skip it.
- assign letter=Z(where Z is the desired letter of the flash drive or memory card).
- exit

If the flash drive or memory card still cannot be formatted
If none of the suggested methods help, this may indicate that the drive has failed (but not necessarily). In this case, you can try the following tools; there is a chance that they can help (but in theory they can aggravate the situation).
If the computer no longer recognizes a USB drive (popularly a “flash drive”) and “requires” formatting, this does not necessarily mean that the data on the flash drive is lost forever.
If there is information on the drive that is important to recover, you can try successful solutions that have already been tested by users.
This may seem obvious, but the first thing to try is to insert the USB drive into a different USB port. Over time, USB ports become dirty and wear out. Therefore, there is a possibility that the problem is related to the USB port, and not to the flash drive itself.

Updating the driver on your computer
The problem of recognizing a flash drive may also be related to the system where the flash drive is connected, and not to the drive itself.
To check this option, you need to insert another, known working USB drive into the computer port and see if the other flash drive is detected correctly. If not, it may mean that your computer needs to download a new driver.
To check for a new driver, you need to:
- Open “Computer” (for example, with the keyboard shortcut “Win + E”, the “Win” key is located between the left “Ctrl” and “Alt” on the keyboard).

- Right-click on the icon of the USB drive that needs formatting and click "Properties".

- Next, you need to click on the “Hardware” tab and find “General USB Flash Disc USB Device" Click on this device (select it) and click the “Properties” button at the bottom.

- In the next window that opens, click the “Change settings” button.

- The following pop-up window will appear where you need to click on the Driver tab and click on the Update Driver button.

- Then you need to select the first option " Automatic search drivers for the updated software" And follow the instructions to download the new driver.


Checking errors on a flash drive via Windows
Windows can detect itself on USB drives using its built-in software tool.
If Windows can identify the problem, you must follow its further instructions.
Checking for errors using chkdsk
You can also check for errors in reading a USB drive through the operating system command line by running the “chkdsk” command.

The "chkdsk" command can also be executed by entering the "cmd" command in the Run window and clicking "OK". After launching the command interpreter window, enter in it: “chkdsk H: / F / R” and press the “Enter” key.


Reference! Instead of the letter “H”, you need to substitute the letter with which the “problem” flash drive is “signed” in “Computer”. Substituting the letter “/F” into the command starts troubleshooting file system errors, and the letter “/R” starts troubleshooting problems with bad sectors.
The “chkdsk” command will check the USB drive for errors and, if possible, restore the necessary data, displaying a report on the results when completed.

Recovering data from a USB drive using special utilities
There are specialized programs(utilities) designed for USB scan drives and without the help of Windows.
Recuva
One of the leaders in data recovery programs is free utility Recuva. It is easy to install on your computer and quickly and easily performs all the necessary actions.
Features of Recuva:
- user-friendly interface;
- advanced file scanning;
- recovery from damaged media;
- preview of found files;
- recovery from a recent “quick” format.
Using Recuva:
- Download the program from a reliable source.

- Run the installation file and follow the installer's instructions.


- Launch the program and click “Next”.

- Select "All files" to display. Click "Next".

- Select “In a specified location” and find the USB drive by clicking the “Browse” button. Click "Next".

- Select "Enable advanced analysis". Click "Start".

- After the list of found files appears, check the boxes next to the ones you need and click “Recover”.

- Once the necessary files have been extracted, you can format the USB drive for further work.
Handy Recovery
This utility is paid, but it has a free 30-day period of use.
Using Handy Recovery:

Reference! A convenient feature of Handy Recovery is that red crosses in the program mark files previously deleted from a USB drive, which can also be recovered.
Formatting a USB drive
Perhaps, last step, which makes it possible to recover lost files on an “unreadable” USB drive is to format it.
Important! By default, Windows performs a “full” formatting of storage media. However, in this case it is necessary to perform a “quick” formatting of the drive. Unlike “full”, it does not erase lost files on the media. It only writes a new boot sector and file system table to the flash drive, restoring access to it.

Reference! After performing a quick format and opening access to the USB drive in Windows, you can try to extract files from it using the special utilities described above.
Low-level formatting
If a flash drive malfunctions, the usual, including its complete formatting, is not always feasible and does not always solve the problem that has arisen with it.
In this case, formatting at a “low logical level” can “cure” the flash drive. However, after such formatting, it will no longer be possible to recover files from the media.
HDD Low Level Format Tool
Using the program:

Formatted USB drive operating system will be detected as an unformatted USB device with a capacity of 0 bytes.
To format a drive in Windows, you can quickly format it using the instructions described above.
Note! Considering the serious, including financial, costs of restoring lost information, today experts recommend creating backups important data located on any digital media.
Video - How to open a flash drive if it requires formatting
Hello.
This kind of error is quite typical and usually happens at the most inopportune moment (at least in relation to me :)). If you have new disk(flash drive) and there is nothing on it - then formatting will not be difficult (note: formatting will delete all files on the disk) .
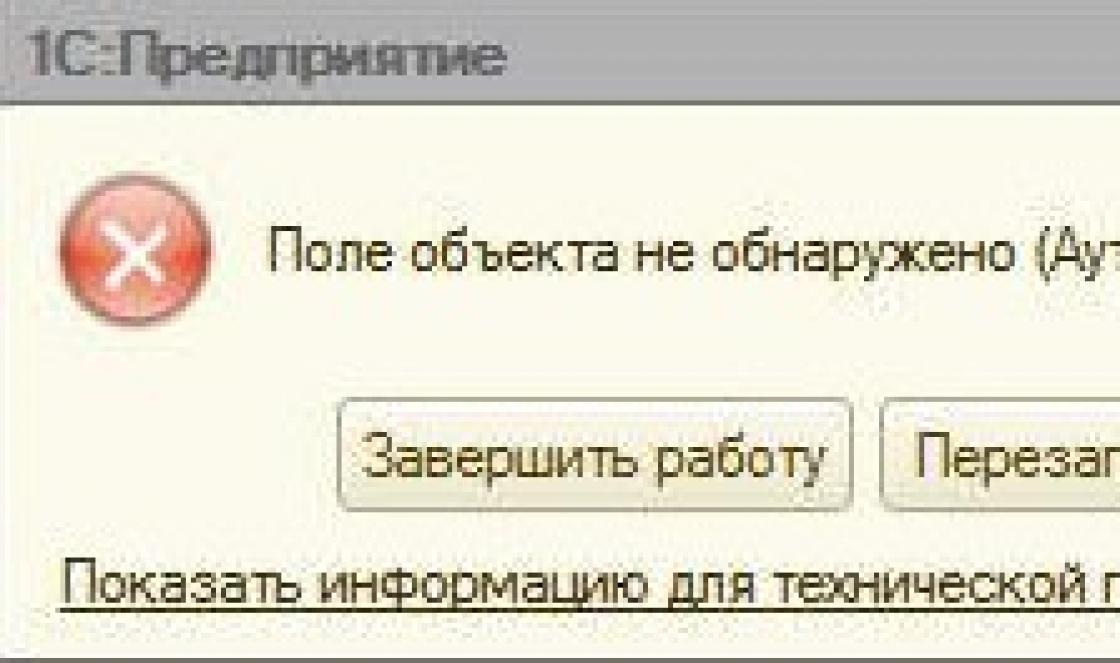
But what should those who have more than one hundred necessary files on their disk do? I will try to answer this question in this article. By the way, an example of such an error is shown in Fig. 1 and fig. 2.
Important! If you get this error, do not agree with Windows to format it, first try to restore the information and the functionality of the device (more on this below).
Rice. 1. Before using the disk in drive G; it needs to be formatted. Error in Windows 7
Rice. 2. The disk in device I is not formatted. Should I format it? Error in Windows XP
By the way, if you go to “My Computer” (or “This Computer”) and then go to the properties of the connected drive, then most likely you will see the following picture: “ File system: RAW. Busy: 0 bytes. Free: 0 bytes. Capacity: 0 bytes"(as in Fig. 3).
SO, SOLUTION TO THE ERROR
1. First actions...
- restart the computer (perhaps some critical error, glitch, etc. has occurred);
- try inserting the flash drive into a different USB port (for example, from the front panel system unit, connect it to the back);
- also instead of a USB 3.0 port (marked in blue) connect the problematic flash drive to USB port 2.0 ;
- even better, try connecting the disk (flash drive) to another PC (laptop) and see if it can be detected on it...
2. Check the drive for errors.
It happens that careless user actions contribute to the appearance of such a problem. For example, they pulled out the flash drive from the USB port, instead safe shutdown (and at this time files could be copied to it) - and the next time you connect you will easily get an error like "The disk is not formatted...".
Windows has a special ability to check the disk for errors and fix them (this command does not delete anything from the media, so you can use it without fear) .
To launch it, open command line(preferably on behalf of administrator). The easiest way to launch it is to open the task manager using the key combination Ctrl+Shift+Esc.
Next, in the task manager, click " File/new task", then in the open line enter "CMD", check the box so that the task is created with administrator rights and click OK (see Figure 4).
IN command line enter the command: chkdsk f: /f (where f: is the drive letter that you are asking for formatting) and press ENTER.
Rice. 5. Example. Checking drive F.
Actually, the check should start. At this time, it is better not to touch the PC and not run extraneous tasks. The scan time usually does not take that long (depending on the size of your drive that you are checking).
3. File recovery using special. utilities
If checking for errors didn't help (or it could simply not start, giving some error) - the next thing I would recommend is to try to recover information from a flash drive (disk) and copy it to another medium.
In general, this process is quite lengthy, and there are also some nuances when working. In order not to describe them again within the framework of this article, I will provide a couple of links below to my articles, where this issue is discussed in detail.

- - a large collection of programs for data recovery from disks, flash drives, memory cards and other storage devices
- - step-by-step recovery information from a flash drive (disk) using the R-Studio program
By the way, if all the files have been restored, now you can try to format the drive and continue to use it. If a flash drive (disk) can't format- then you can try to restore its functionality...
4. Attempt to restore the functionality of the flash drive
Important! All information from the flash drive will be deleted using this method. Also, be careful when choosing a utility; if you take the wrong one, you can ruin the drive.
This should be resorted to when the flash drive cannot be formatted; file system displayed in properties, RAW; There’s no way to access it either... Usually, in this case, the flash drive controller is to blame, and if you reformat it again (reflash it, restore functionality) - then the flash drive will be like new (I’m exaggerating, of course, but you can use it).
How to do this?
1) First you need to determine the VID and PID of the device. The fact is that flash drives, even in one model range, there may be different controllers. This means that you cannot use special. utilities based only on one brand, which is written on the media body. And VID and PID are identifiers that later help you select the right utility to restore the flash drive.
The simplest and quick way to identify them is to go into device Manager (if anyone doesn’t know, you can find it through search in panel Windows management ) . Next, in the manager, you need to open the USB tab and go to the drive properties (Fig. 7).
Rice. 7. Device Manager - Disk Properties
- VID: 13FE
- PID: 3600
2) Next, use Google search or special. sites (one of these is (flashboot.ru/iflash/) flashboot) to find a special utility for formatting your drive. Knowing the VID and PID, the brand of the flash drive and its size, this is not difficult to do (if, of course, there is such a utility for your flash drive :))…
If there are still dark and incomprehensible moments, I recommend using these instructions for restoring the functionality of the flash drive (step-by-step steps):
5. Low-level formatting of the drive with using HDD Low Level Format
1) Important! After low-level formatting, it will be impossible to recover data from the media.
2) Detailed instructions on low-level formatting (I recommend) -
After launching the utility, it will show you all drives ( hard drives, flash drives, memory cards, etc.) that are connected to your computer. By the way, it will show drives and those that Windows does not see (i.e., for example, with a “problematic” file system, such as RAW) . It is important to choose the right disk here (you will have to navigate by the brand of the disk and its capacity, there is no disk name here that you see in Windows) and click Continue (continue) .
Rice. 10. HDD Low Level Format Tool - select the drive that will be formatted.
Next, you need to open the Low-Level Format tab and click the Format This Device button. Actually, all that remains is to wait. Low-level formatting takes quite a long time (by the way, the time depends on the condition of your hard drive, the number of errors on it, its speed, etc.). For example, not long ago I formatted a 500 GB hard drive - it took about 2 hours (my program is free, state of hard disk - average for 4 years of use) .
Rice. 11. HDD Low Level Format Tool - start formatting!
After low-level formatting, in most cases, the problematic drive becomes visible in “My computer” (“This computer”). All that remains is to carry out high level formatting and the drive can be used as if nothing had happened.
By the way, by high level (many are “scared” of this word) we mean a fairly simple matter: go to “My Computer" and click on your problematic drive right mouse button(which is now visible, but which does not yet have a file system) and select the “Format” tab in the context menu (Fig. 12). Next, enter the file system, disk name, etc., complete formatting. Now you can use the disk in full!
Fig 12. Format the disk (my computer).
Addition
If after low-level formatting the disk (flash drive) is not visible in “My Computer”, then go to disk management. To open Disk Management, do the following:
- In Windows 7: go to the START menu and find the Run line and enter the command diskmgmt.msc. Press Enter.
- In Windows 8, 10: press the WIN+R key combination and enter diskmgmt.msc. Press Enter.
Rice. 13. Launch Disk Management (Windows 10)
All you have to do is select the disk and format it. In general, at this stage, as a rule, no questions arise.
That's all for me, good luck to everyone and quick recovery storage performance!
The flash drive does not open and asks to format it: what should I do?Using portable storage media important information- This is a mistake many people make. In addition to the fact that a flash drive can be easily lost, it can fail and valuable data will be lost. An example of this is the situation when it is not readable and asks to start formatting. We'll talk further about how to access the necessary files.
Let us immediately clarify that we are talking about an error, which is shown in the photo below.
It usually occurs when the file system is corrupted, for example due to improper removal of the flash drive. Although it does not work, its contents are not damaged in this case. To extract files we use the following methods:
- Handy Recovery program;
- Active@ File Recovery program;
- Recuva program;
- Chkdsk command.
It should be said right away that data recovery from a portable device does not always end in success. The probability that the above methods will work can be estimated at 80%.
Method 1: Handy Recovery
This utility is paid, but has a trial period of 30 days, which will be quite enough for us.
To use Handy Recovery, do the following:
As you can see, using Handy Recovery is completely simple. If after performing the above procedures the error does not disappear, use the following program.
Method 2: Active@ File Recovery
Same paid application, but the demo version is enough for us.
Instructions for using Active@ File Recovery look like this:
Method 3: Recuva
This utility is free and is a good alternative to the previous options.
To use Recuva, do this:
If you have any problems, you may find a solution in our article on using this program. And if not, write about them in the comments.
If no program sees the media, then you can format it in the standard way, but be sure to check "Quick (clear table of contents)", otherwise the data will not be returned. To do this, just click "Format" when an error occurs.
After this, the flash drive should be displayed.