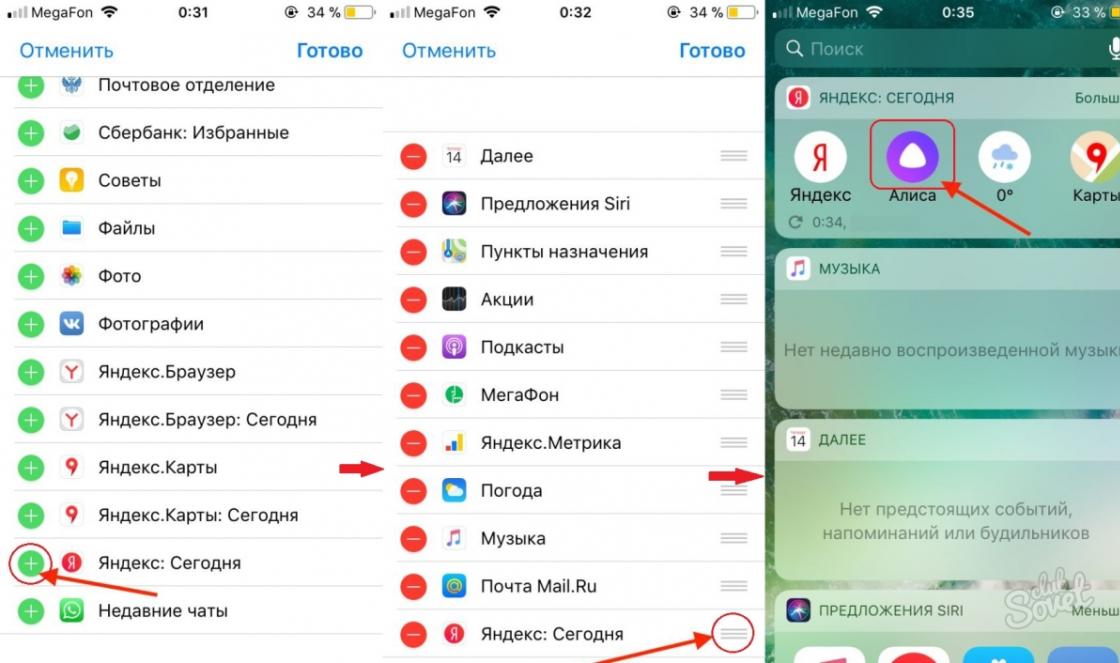


Allows you to listen to the radio in a very wide range. The application offers a convenient interface for using Chinese USB TV tuners as a radio receiver capable of receiving anything in the 60-1700 MHz range (radio stations, TV sound, radio amateurs, pocket radios, aircraft talks with dispatchers, builders, taxis, bugs in your apartment and much more). Install SDR Touch and the driver application, connect the tuner, press the OFF button, confirm - you can listen to the air.
Developer: Martin Marinov
Interface language: English Russian
Compatibility: ™ 2.3.+
State: Full version
screenshot: Original by Dymonyxx
To work with the application you need:
USB-host enabled device
compatible USB TV tuner
driver for connecting the tuner (installed separately; the application itself offers to download from the Play Store from the same author)
for devices with a version earlier than 3.1, and in exceptional cases - root
List of compatible tuners:
FM+DAB USB DVB-T RTL2832U+R820T
Generic RTL2832U (e.g. hama nano)
ezcap USB 2.0 DVB-T/DAB/FM dongle
Terratec Cinergy T Stick Black (rev 1)
Terratec NOXON DAB/DAB+ USB dongle (rev 1)
Terratec Cinergy T Stick RC (Rev.3)
Terratec T Stick Plus
Terratec NOXON DAB/DAB+ USB dongle (rev 2)
PixelView PV-DT235U(RN)
Compro Videomate U620F
Compro Videomate U650F
Compro Videomate U680F
Sweex DVB-T USB
GTek T803
Lifeview LV5TDeluxe
MyGica TD312
PROlectrix DV107669
Zaapa ZT-MINDVBZP
Twintech UT-40
Dexatek DK DVB-T Dongle (Logilink VG0002A)
Dexatek DK DVB-T Dongle (MSI DigiVox mini II V3.0)
Dexatek Technology Ltd. DK 5217 DVB-T Donglev
MSI DigiVox Micro HD
Genius TVGo DVB-T03 USB dongle (Ver. B)
GIGABYTE GT-U7300
DIKOM USB-DVBT HD
Peak 102569AGPK
SVEON STV20 DVB-T USB & FM
The width of the range available for listening depends on the tuner used.
List of compatible devices
Motorola Droid Razr M
Ainolo Novo Flame
Nexus 7
Prestigio 5580c
Samsung Galaxy S3
Samsung Galaxy Note 2
Samsung Galaxy Nexus
Google Nexus 4
Asus Transformer TF101
Galaxy Tab2 GT-P3110
Nexus 10
Asus Transformer TF700
Motorola xoom MZ601 Droid 4.1
Acer Iconia A500
Ritmix RMD750
AMlogic based MINI ANDROID USB PC
Samsung Galaxy Tab 2 GT-P3113
Samsung Galaxy S2
ICOO D70W
Zopo ZP100
Mobistel Cynus T2
Version 7
Geness GT 1230
PIPO Smart S1
Allview Alldro p3
MK 802
Samsung Galaxy Tab 10.1p7510
Samsung Tab2 GT-P5100
Samsung Galaxy Note 10.1
Ainol Novo 7 Aurora
Samsung Galaxy GT P6800
Sony Tablet S
cnm7 touchpad
moto atrix
almost all devices
Turn any phone or tablet into a portable software-defined radio (SDR) system with a spectrum analyzer. Listen and record FM radio stations in stereo along with RDS, weather, emergency services, taxi drivers, analog TV sound, ham radio, digital broadcasts and more! Depending on the equipment you are using, the bandwidth can vary from 50 MHz to 2.2 GHz (to receive below 50 MHz, you need an up-converter to help receive signals from 100 kHz). The following types of modulation are currently supported: FM, AM, NFM, USB, LSB, CW.
The built-in RDS monitor allows you to see the hidden digital data transmitted by FM radio stations. Among them, we accept Data Type (PTY), Broadcast Country (ECC), Date and Time (PT), Station Unique Identifier (PI), Alternative Frequency List (AF) and Forward Information about digital signal RDS.
The SDR Touch receives radio broadcasts using a USB receiver. The application works offline and does not require an internet connection! SDR Touch allows you to catch an interesting radio program anywhere!
To start using SDR Touch, you will need:
USB receiver for digital terrestrial television (DVB-T) based on the RTL2832U chip. Perhaps you already have it. Even if you don't have one, you can buy a new one for less than $20.
- USB OTG (On-The-Go) cable - used to connect the USB receiver to your Android device.
Connect the USB receiver to USB-OTG, then insert the free end of the cable into USB port your device and launch SDR Touch! It's very simple! Now you can listen to live FM radio even if your device does not have a built-in FM tuner!
The application is under development and may be unstable. Please report any bugs you find to us. email address indicated in the help.
By using the RTl2832U driver, you can use the following DVB-T USB receivers:
Generic RTL2832U (e.g. hama nano)
- ezcap USB 2.0 DVB-T/DAB/FM dongle
- Terratec Cinergy T Stick Black (rev 1)
- Terratec NOXON DAB/DAB+ USB dongle (rev 1)
- Terratec Cinergy T Stick RC (Rev.3)
- Terratec T Stick PLUS
- Terratec NOXON DAB/DAB+ USB dongle (rev 2)
- PixelView PV-DT235U(RN)
- Compro Videomate U620F
- Compro Videomate U650F
- Compro Videomate U680F
- Sweex DVB-T USB
- GTek T803
- Lifeview LV5TDeluxe
- MyGica TD312
- PROlectrix DV107669
- Zaapa ZT-MINDVBZP
- Twintech UT-40
- Dexatek DK DVB-T Dongle (Logilink VG0002A)
- Dexatek DK DVB-T Dongle (MSI DigiVox mini II V3.0)
- Dexatek Technology Ltd. DK 5217 DVB-T Dongle
- MSI DigiVox Micro HD
- Genius TVGo DVB-T03 USB dongle (Ver. B)
- GIGABYTE GT-U7300
- DIKOM USB-DVBT HD
- Peak 102569AGPK
- SVEON STV20 DVB-T USB & FM and others on the same chips
- SDRplay RSP
- Hack RF One
-Rad1o
- HackRF Jawbreaker
Note: If you have an Android device (version 3.1 and below), it must be rooted and USB host enabled.
Your use of SDR Touch is at your own risk and you should check your local laws prior to downloading and using. The creators of SDR Touch are not responsible for any consequences of misuse of the application.
Now the painstaking work of installing drivers and control programs begins. As they say, do not "run ahead of the engine", but do exactly as instructed. Step by step.
1. If you purchased an SDR receiver like ours (http://ali.pub/1p0ml2), then it will come with a small disk with drivers. If there is no disk, or you do not have a CD-Rom, it does not matter, here are the drivers https://yadi.sk/d/bjfPakpC3RCZx2
2. Connect the SDR receiver to the computer's USB port. If the computer prompts you to start searching for drivers, refuse.
3. Install the receiver driver by running the Setup.exe file from the disk or by downloading them from the link above. Follow the instructions, there is nothing complicated, everything is standard. Sometimes a warning box may appear saying that Windows cannot determine digital signature driver, it's not scary, click - Install anyway.
4. Now you need to install the second driver, it is called Zadig. Download from here http://zadig.akeo.ie Direct link to the driver http://zadig.akeo.ie/downloads/zadig-2.3.exe Direct link from the Yandex disk if the previous ones for some reason do not work https ://yadi.sk/d/2yDgeQeW3RCas9
5. The SDR receiver must be connected to the computer all this time. Run the downloaded file zadig-2.3.exe In the driver menu, at the top, click Options and check the List All Devices checkbox. This is so that the driver can see your SDR receiver.
6. After that, a list of your all USB devices, including the SDR receiver. It will show as Bulk-In, Interface (Interface 0), choose it.

7. After that, click the big Replace Driver button

8. The Zadig driver will begin installation, after which a window will appear that the driver is installed. Click "Close" and close the Zadig program. On this, the most difficult stage is completed.

Now you need to download, install and configure the program with which you will control your SDR receiver.
There are many programs, all of them differ in functions, convenience, the presence of additional plug-ins, etc. It is definitely impossible to say which of them is better, because. it's the same as arguing that Beeline, Megafon or MTS is better. Each radio amateur, in the process of working with SDR receivers, chooses his own over time. We recommend using the HDSDR program to get started with the SDR receiver. By the way, there is also a program on the driver disk included with the receiver, but it is complete slag, believe me)).
1. So, download and install the HDSDR program http://www.hdsdr.de/index.html At the time of this writing, the current and stable version of the program is 2.76, direct link: http://www.hdsdr.de/download/ HDSDR_install.exe Direct link from Yandex disk, if the official site does not work for some reason https://yadi.sk/d/6Gd2bCjk3RCbqV
2. After the installation of the program is completed - DO NOT run it! There will be a checkmark, they say, "run" - uncheck it. In order for the program to see your receiver, you need to download dll file, this one http://hdsdr.de/download/ExtIO/ExtIO_RTL2832.dll Direct link from Yandex disk to the same file https://yadi.sk/d/5KZTA-K53RCbzZ
3. This file must be placed in the folder where you have installed the HDSDR program. (default C:\Program Files\HDSDR, or C:\Program Files(x86)\HDSDR)
4. Next. It is necessary to download the second DLL file, with the help of which it will already be possible to receive radio amateurs directly. Link to the file https://xa.yimg.com/kq/groups/82400279/47992593/name/ExtIO_RTL_SW_Patch.dll Direct link from Yandex disk to the same file: https://yadi.sk/d/t7XPc0HO3RCcBP
5. It also needs to be placed in the folder where you have the HDSDR program (by default C:\Program Files\HDSDR, or C:\Program Files(x86)\HDSDR).
Now, let's configure the HDSDR program itself
1. Run the program from the shortcut on the desktop. At the time of launch, you everytime this window will appear

This is a window in which the program, as it were, asks you - which DLL should I work with? For starters, choose the patched DLL, i.e. SW_Patch. With this DLL, your SDR receiver will be able to receive radio waves from approximately 3 to 12 MHz, i.e. hooligans at 3 MHz and two amateur bands 80m and 40m. Then, when you purchase or solder the converter yourself, you will run the program using a regular DLL.
2. So, the HDSDR program has started and, if you did everything exactly according to the points, as we wrote, you will hear the noise of the air, your SDR receiver is working! Connect the antenna and try to tune in the stations

3. Program for English language, but is intuitive. Most importantly, remember this path in the program settings: Options / Misc Oprions / Reset to factory settings. This is a function that resets all program settings to factory defaults. You will definitely need it to reset the settings when you experiment;)

That's all. In the following articles, we will share our experience with the program settings.
As you know, I am interested in the topic of walkie-talkies, and sometimes I even review some of my devices.
So today I decided to tell you about a rather interesting thing. RTL-SDR signal receiver based on R820T 8232.
I will also tell you how to set up this receiver to work on a computer and on an android phone/tablet.
So, there are already several reviews about SDR receivers. Therefore, I will not go into detail about what it is.
I can only say that you can buy a cheaper version of the receiver, and finish it with a soldering iron.
Like this: 
You can buy a kit. Like this: 
()
And assemble the receiver, spending several evenings on it, at the same time pumping the soldering skill.
Or do it like me: buy ready-to-receive all the necessary product that can be used without dancing with a tambourine. The price difference isn't that big, so I bought a ready-made receiver, with an extra board, all the right jumpers in the right places, and even two antenna outputs.
This particular receiver can receive signals and cover all HF amateur bands:
covers VHF and UHF 24-1766 MHz
up to 3.2M sampling rate (~2.8MHz stable)
Receiver modes, IFM, FM, USB, LSB and CW
What does it mean? And this means that we can listen to transmissions on the following ranges:
13-15MHz these are distant broadcasters in the likeness of the voice of America.
15-28MHz you can hear amateur radio.
27.135MHz this is the channel of truckers (it is convenient to listen on long trips).
30-50MHz there may be an ambulance.
87.5-108MHz it's a normal FM radio.
109-500MHz The most interesting)
108-136MHz this is the air range (pilots are talking here, not without jokes and gags)
137-138MHz this is the NOAA satellite band (satellite weather in low resolution)
144MHz again radio amateurs
150MHz this is the range.
433MHz also radio amateurs, walkie-talkies, key fobs of signaling, barriers and other ethereal garbage
446MHz talkers too
further it depends on the city, by the way, the police are also somewhere here) but I won’t say where)
~900MHz cellular.
More information can be found on the website
Now directly about the receiver.
The receiver was ordered from Banggood. (it was available there at the time of purchase. And the price was good.) I ordered 2 receivers: 
Delivery took 30 days. I received a parcel in the mail with two boxes. One box with the receiver is still lying until better times (later I will put it in the car) and the first one is used for testing and tuning.
The receiver comes in a regular box. Which also suffered a little: 
Inside there is a receiver, antenna, mini-usb cable: 
Essentially nothing more is needed.
Details.
Cable:

The cable is the most common mini-usb. By the way, I didn't even use it. Since I have my own, longer and better.
Antenna:

Has a magnetic platform. The magnet is pretty strong. Adheres well to vertical metal surfaces. 
Myself receiver:
Nothing special about the box. 

Has dimensions 90*50*22mm: 


On the one hand, there are connectors for connecting two antennas: 
On the other hand, a mini-usb connector for connecting to a computer and a power indicator LED: 
If you don’t know for sure, you don’t even understand what kind of device it is. Moreover, there are no identifying inscriptions on the box. ( yes they are not needed)
A couple of photos in the interior, along with a wouxun walkie-talkie: 

The kit comes with only 1 antenna, despite the presence of two connectors for different frequencies.
To work at frequencies of 100khz-30MHz, you need to buy a second antenna. Provided that you want to listen to something in this range.
Before using, I decided to disassemble the receiver. The reason is simple. Inside, something strange was dangling. (chatter is present on both copies of the receivers I purchased) 
The whole process of parsing consists of unscrewing 4 screws: 


Even in the photo you can see that everything is soldered neatly. No traces of flux or other crime are visible.
It can be seen that this is a DVB receiver soldered on the board. Main Chips R820T and 8232: 
I can't tell you more. Since I am not strong in circuitry. Everything is visible in the photo.
Now about what rattled inside. This is the board itself. It is slightly smaller than the body slots and slightly shorter. That's why I hung out inside. I solved this issue simply. I glued foamed 2-sided tape inside the case, and put the board in place: 
Everything spun tight. Backlash and chatter are gone.
Now I'll tell you about setup and testing:
To work with the receiver on a Windows computer, we need to use the program sdrsharp
To install the correct drivers, you need to run the zadig.exe program
If you do not have it in the assembly with sharp,
Run, select options - list all devices
Select the Builk-In, Interface (interface 0) item and click the Reinstall Driver button: 
After that, the necessary drivers will be installed in the system, and you can run the SDRSharp program.
Everything is simple here. In the settings, select the desired port, and press the start button: 

Frequencies can be entered either manually or using various scanning plugins.
(working with the program will take a separate article, there are already a lot of opportunities in it. Therefore, I show superficially, and those interested can already find details on the Internet)
What is the purpose of such a receiver?
Despite the comments about all sorts of atrocities, and about what to do, this receiver is actually quite legal. And you can use it for legal purposes. And besides, listening to the broadcast is NOT FORBIDDEN with us. And it is impossible to transmit something on the air using this receiver. Therefore, with the help of a receiver, we can listen to the radio. Yes, regular radio. Suddenly, you don’t have a single device that can receive signals from local radio stations, and listen to the radio as terribly as you want, the receiver will help.
Even with the help of the receiver, you can listen to radio amateurs broadcasting at frequencies of 15-28 MHz
But you need a more powerful antenna. The one that comes with the kit will allow you to receive a signal only when you are close to the source of this very signal.
Even with the help of the receiver, you can check the walkie-talkie. A classic situation: they brought an old walkie-talkie without a display. Working, but it is not known at what frequency. You can use this receiver to detect. (of course there are separate devices for measuring frequency and power, but if you have a receiver, you can get by with them)
Well, for example, we went on a long journey. On your own by car. Why don't we tune the receiver to the frequency of CB truckers ( 27.135 MHz) to listen to the talks? To know what's going on on the road? Where is the traffic police ambush, where are the accidents, where is the detour, etc.
By the way, it is not necessary to connect the receiver to a laptop to listen to the CB range. You can use an android phone. And not only for this range.
I connected the receiver to my Xiaomi Mi5 via a cheap OTG adapter. Here the setup is even easier than on a computer:
We go to w3bsit3-dns.com and download the program
Together with the program, download Rtl-sdr driver 3.06 and the key to get full functionality. ( you can certainly buy a key on the market, but I'm an old pirate who hates to pay for software)
Install on phone: 
Screenshots from the application: 


As you can see, everything works fine, and also allows you to listen to the broadcast. 
I tested this receiver with my Baofeng, Wouxun, WLN radios. Everything is perfectly captured.
Also, with the help of a scanner, I was able to find several frequencies on which there were conversations. This confirms that the receiver is working.
I have the receiver mainly for a hobby, but there is an interest in listening to shortwaves from other countries, so now I am choosing an antenna for this receiver (I would be grateful if you suggest your options in the comments)
Conclusion:
This receiver is a great option for people interested in radio. It allows you to learn a lot of new things, as well as listen to the broadcast without buying expensive equipment.
I cannot dissuade or recommend this product. Too specific item. I am personally very pleased with the purchase. And this is the most important thing.
Next month I have a long trip by car planned, and I'm looking forward to it not so much for the purpose of the trip, but for the opportunity to listen to the conversations and test the receiver in the field.


