Users watch videos on Youtube per month and on average spend more than 1 hour per day on it. Companies cannot afford to ignore this platform as a source of traffic. If your business does not yet have a YouTube channel, we recommend starting one.
The design of a Youtube channel does not play such a critical role as the cover of a business page on Facebook. The video attracts many times more attention than a static channel header. But it also helps to brand the channel, convey a message to users and gain subscribers.
If you already have a great YouTube cover, you should add variety and update it from time to time. We’ll tell you how to do this easily and where to get ideas in this article.
What size is a YouTube banner?
Header sizes depend on the platform. The banner you see on your monitor is significantly different from what you see on your mobile screen. Here's a little guide:
The text should be located in the center of the banner, then it will not be cut off different devices. If you want to add a logo to it, place it in this “safe area”. Follow the recommendations from Google:
- Minimum uploaded image size: 2560x1440 pixels
- Size of the “safe zone” for placing text and logo: 1546x423 pixels
- Maximum width: 2560 pixels. Edges will be cut off on different devices.
- Upload file size: maximum 6 MB
What is a good YouTube banner?
A good Youtube channel header is another chance to tell people who visit your page about your company. Therefore the header should be:
1. High resolution
2560 x 1440 is a file large size. Some people watch YouTube videos on TV, so the banner should look good on large screens as well.
2. In brand style
A YouTube channel is an opportunity to promote your brand, but it should be done carefully. Don’t put everything on the banner at once: logo, slogan, call to action and contact information. Place your logo in a “safe area” so that it is visible on all devices. Use your brand colors, fonts and overall style.
3. Relevant to content
It's easy to get carried away with creating a design and sometimes you may forget the main message. The banner design should be relevant to your brand and the content you post.
How to create a banner for Youtube
To avoid creating a Youtube header design from scratch, find a simple graphic editor with ready-made templates. For inspiration, you can look at the collection of themed Youtube banner templates from Crello. To create a banner, select a template, add text and your logo.
Crello very handy tool- you don’t need to select sizes and worry about lack of ideas. You can take a ready-made design as a basis and change it as you need.
7 examples of great Youtube banners
Let's take a look good designs YouTube headers from famous brands.
- GoPro
Tip: The image should contain objects that represent your brand. If in doubt, add images of people in the context of using your product.
2. TripAdvisor B2B

Tip: use a banner to clearly show the functionality of your product.
Tip: make your banner bright, add personality - this will make it different from others.
Tip: if you can't choose one image, make a collage. Place your company logo or one short message in the “safe area”.
Tip: Remember your target audience. Lego's audience is children, and the designs are designed specifically to attract their attention.
Tip: Read about basic design tips. You will learn how to correctly combine colors, objects and fonts.
Advice: keep it simple. The LinkedIn banner has a black and white image and the logo is part of the text. Despite the lack of bright colors, the banner evokes emotions and is memorable.
Even if you don’t have the opportunity to order a banner from a designer, you can design your Youtube channel professionally. Take an example from big brands, look for ideas among ready-made templates and try it out. Good luck!
Good day, dear subscribers and guests of the blog. Today we will talk to you about how to create a channel on YouTube. Today, YouTube is the most popular video hosting service, which allows you to learn not only about anything and everything, but also make decent money for the most active, interesting and popular channels.
Therefore, I will help you get one step closer to increasing traffic to your channel and tell you how to tastefully, beautifully and even correctly design your profile. We will talk about the design of the main page of the video channel, I will pay special attention to the header and the main profile icon. Next, we'll discuss how to organize your main content and how to create a great video. Let's start in order!
Let's start designing the main page
As they say, you meet someone by their clothes. This rule of life applies in all areas. Therefore, it is important to pay attention to the design of the main profile page. It should give a clear idea of the content of the channel, its direction and maybe specifics. It should also have a neat appearance and conveniently placed content.
Let's start with the avatar
The first thing the service will immediately offer you is to put a profile photo. Don't ignore this step. The avatar must be square, with a resolution of more than 250 by 250 pixels. Try to choose a picture that matches the theme of your channel.
If the platform is used to publish your videos, then it is advisable to put your photo or company logo. If you are creating a vlog for a company or company, then the answer is obvious - put the company logo.
Let's decorate the hat
Now let's take care of the hat. To the right of the profile photo there is a button “Add channel design”, which you should click. The service offers a free catalog of images. However, I encourage you to upload your own screensaver.
Be sure to include a themed image. If this is a beauty blog, then it would be relevant to put a screensaver with cosmetics, a beautifully made-up girl or a modern manicure design.
If this is a channel about fishing, then fishing gear, types of fish in a certain area, etc. are best suited.
Again, if you already have your own corporate logo, then it will perfectly decorate home page.
Please note that it is better to select photos in a resolution of 2560x1440 pixels. They will ensure a clear display of the screensaver as if viewed through a phone (via special application for Android, iOS), and on a laptop and plasma TV.
Let’s overcome the “letter bullshit” once and for all
For each channel, YouTube generates its own name, which looks something like this:
Apart from the perception factor, this name does not affect anything, but it is still better to change it to something more attractive (the name of your profile, for example). So the name of the channel will constantly appear before users’ eyes, and the link will become readable.
The URL changes without any additional programs. In the YouTube channel settings, click on the “Advanced” link and then select “Create a custom URL.” I would like to note that such actions can only be performed once. After changing the default name, this function will become unavailable.
Trailer recording time

It is very interesting that with right side A standard checklist should be displayed with a list of all the things you need to do to complete your profile. And after you set up the link and connect social networks (if you see the need for it), the next step is to add a trailer.
I think everyone knows that this is such a short video that introduces viewers to the main essence, the main concept of the channel and captivates them so much (at least it should) that they certainly want to subscribe to vlog updates.
So, in the review settings you need to enable the display of this kind of video and then on the main page click on the “Channel Trailer” button to download the video.
And that's not all
Yes, yes, that's right! YouTube also suggests that you organize your videos from different categories and groups according to a specific template. On the main page you can place only objects from previous subchapters or add a block with a specific heading(s) there, placing them as you wish.
What about the information?
It is more common to call this section “About the channel”. This tab will contain brief description your profile. Why short? And all because the text is limited to 1000 characters. To improve the promotion of your channel, I advise you to add keywords that are usually used to search for information in your chosen industry.

It is also worth adding your address email or other contacts through which you can be contacted in the event of an agreement on advertising placement, ordering a video or discussing other partnership activities.
Please note that anchors inserted into the text will be inactive.
By looking at the “Details” tab, you can find out the date the channel was created, the number of subscribers and views. By the way, if desired, the second parameter can be hidden.
Secrets to Creating Videos That Get Attention
To create a video that many YouTube users will want to watch, you just need to do 3 things:
- Select a hot topic for an audience of listeners that fits the specifics of your channel;
- Come up with an intriguing title that conveys the main theme of the video. For example, “Monetization on YouTube: who pays how much”, “Are animals bored while we’re not at home?”, “Is Apple that big?” etc.;
- Create a unique opening screensaver on a video that would catch your attention with its staged plot or a question of interest to the viewer.
That's all the secrets. And believe me, most of the random videos that you watch on the described video hosting site are selected precisely according to these criteria. You saw the request you needed in the title of the video, then you assessed the quality of the screensaver, its plot, and only then did you decide to turn on the video. This way, by your standards, low-grade content is filtered out from carefully produced videos.
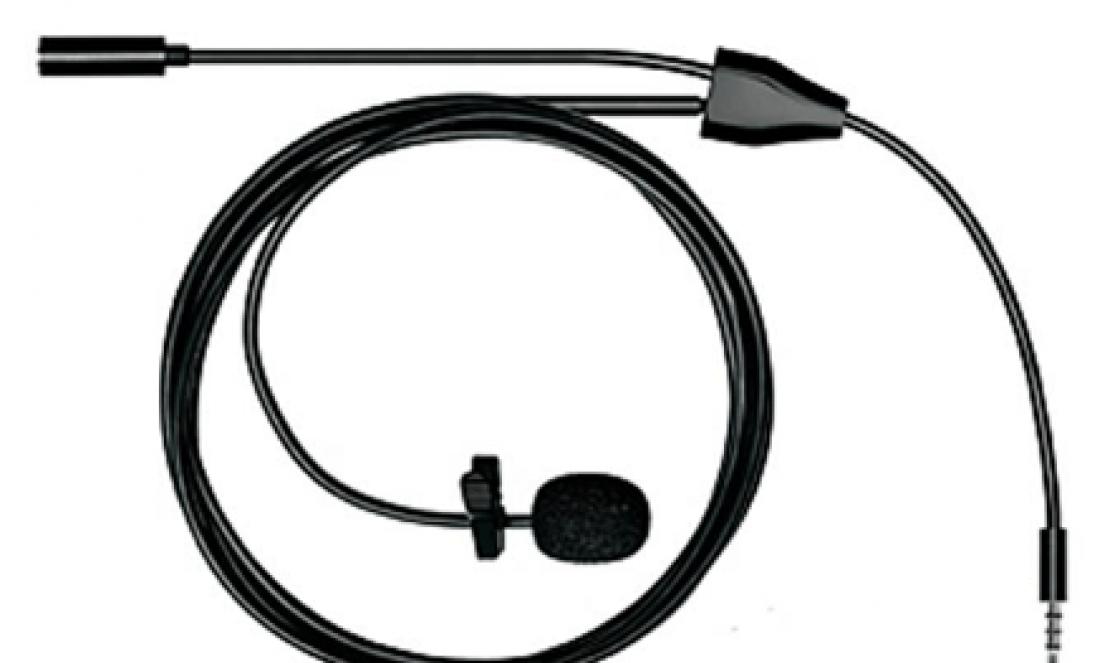
After passing the first test, it is important for you not to lose the viewer after a few seconds of watching the video. To do this, pay attention to the sound of the recording. If it hisses, is filled with noise, or your voice is practically inaudible, then no one will watch such a video. Therefore, during recording, create the most quiet and comfortable place for shooting, and also prepare everything you need for work.

Another important action that you should definitely do is organizing your videos into playlists. Shiva Rajaraman himself, YouTube's chief product officer, said back in 2014 that organizing playlists is the most important thing you should work on. And after that, in 2015 and 2016, more and more new functionality was introduced into the application to optimize the operation of profiles.
So, be sure to sort your videos into playlists by topic. Think about the name. There is no need to make complicated and long sentences here. It is enough to give the name after the fact so that users can immediately understand in which folder they should look for the necessary information.
A few words about corporate identity
If you want to promote your channel and be among the top interesting vloggers, then think about a personal corporate style, a highlight that would set you apart from all other profiles.

Today, having your own is considered very fashionable.
With its help, many people increase their self-esteem, try themselves as directors and even earn a lot of money.
However, many do not know where exactly to start creating their channel. And it needs to start with the design.
Why is proper formatting necessary?
Beginners often make mistakes with channel design at the initial stage. More precisely, they simply ignore this question. And this is important. A well-designed channel plays a big role in attracting subscribers.
 Moreover, the graphic design must reflect the video it contains.
A simple example of this is a channel about jokes. Agree, graphic design in the style of nature will not work for such a channel, since, to put it mildly, it will look ridiculous.
It is worth noting that coming up with a stylish design is not so difficult, but installing it is a more difficult matter.
Recent changes in YouTube have made the registration procedure a little more complicated, and it will be very difficult for beginners to cope with it.
Step-by-step setup instructions
Channel setup procedure looks like this:
- Setting up the graphic part.
- Competent description of the channel.
- Creating a playlist, sections, and so on.
Let's consider each point separately.
If you have not yet registered an organization, then easiest way do this using online services, which will help you generate all the necessary documents for free: If you already have an organization, and you are thinking about how to simplify and automate accounting and reporting, then the following online services will come to the rescue, which will completely replace an accountant in your company and save a lot money and time. All reporting is generated automatically and signed electronic signature and is sent automatically online. It is ideal for individual entrepreneurs or LLCs on the simplified tax system, UTII, PSN, TS, OSNO.
Everything happens in a few clicks, without queues and stress. Try it and you will be surprised how easy it has become!
Setting up the graphic design of the channel
Cap
If the channel is created for the first time, then under the banner with the name of the channel there will be a proposal for the design of the header. After clicking it, a new window will open in which you should upload the picture.
The image must have size 2560x1440 pixels. The uploaded image will be the header itself instead of a boring gray background.
The best option would be if the image is created exclusively for the content of the channel. 
Avatar
The avatar will be located in the channel header, which the owner has already set.
Now it looks like a small square in the upper left corner. If you point at it and the pencil will be highlighted, after clicking, a download window will open.
Links
This procedure is not mandatory, but if you have your own website or group on a social network, it will not hurt on the channel and will help either visitors to the site.
To do this, you need to hover your cursor over the header and select “edit link”. After this, you need to select “link” or “social network” and click the add button.
At the last stage, insert the address of the site or group and confirm the action. 
Creating a background
To do this, go to the “Themes and Colors” section in the channel settings.
In the new tab that opens, just select the most suitable background and confirm your choice.
Many vloggers create an exclusive background for themselves, but for a beginner, the standard ones that YouTube offers are enough.
The rules for preparing images for channel design are outlined in the following video tutorial:
Preparing a competent description of the channel and information about it
The text is best source information that is used by search engines.
That is why, including video, plays an important role in its effective development.
It is enough to spend 20 minutes once writing an effective description, and then only make the necessary adjustments to it as necessary.
The channel description itself should reflect the theme of the channel. It must indicate everything about the channel in order to interest users.
It is worth noting that the channel description should be no more than 1000 characters. Best design The text will be broken down into small paragraphs. Initially, you can type it in normal text editor, and then copy it into the appropriate field.

Channel settings allow you to view the page in several modes, namely as:
- administrator;
- guest;
- subscriber
To add a channel description, go to the “About Channel” tab and select “Channel Description”. In the empty window that appears, text is inserted and confirmed by clicking “Finish.”
Selection of keywords
Compiling a semantic core together with the selection of keywords, similar to site building.
Herself YouTube structure includes:

Selection of keywords for YouTube is selected in this way:
- High-frequency queries are selected for the channel name;
- for playlists – mid-frequency;
- for video – low-frequency queries.
Once the theme of the site has been determined, you need to start selecting keywords.
Many people use wordsstat.yandex.ru for this.
How to correctly enter keywords into a channel
In order to record the main keywords for the channel, you need to go to the “Advanced” page. To do this, initially go to the “Video Manager” section. Then you need to go to the “Channel” tab. In the line labeled “channel keywords” you should write down all the main keywords. Each word or combination is placed in quotation marks and separated by commas.
It is worth noting that you can enter as much as the service itself allows.
In order to enter keywords in the playlist, you should go to the “Video Manager” tab, then select the “Playlists” subsection, and ultimately go to the “Add Description” tab.
 Basic rules are as follows:
- You must use a search query in the title and subtitle;
- repetition of keywords is allowed no more than 10%;
- It is mandatory to use synonyms, word forms and other diluted keywords;
- The last keyword should be written in the last paragraph.
The process of recording tags for a newly uploaded video occurs in a similar way.
It is also worth noting that you can look for keywords in popular channels that are competitors in terms of topics.
Adding sections, playlists, creating a trailer
Creating a trailer on the main page of the channel, including adding sections, significantly increases promotion and allows you to get a sufficient number of subscribers in a short period of time.
Creating a trailer
To add it, you need to return to the main page of the channel. This can be done by simply clicking on the house icon below the header.
After that, just click on the “Channel Trailer” section. After clicking, a page with all the videos on the channel will open. All you have to do is select the appropriate one and confirm the action.
After this, every visitor who visits the channel will see this trailer on the main page.
Experienced video bloggers create exclusive trailers. This is done in special programs according to video editing, then, like a regular video, it is uploaded to the channel and added to the main page.
If a beginner decides to try his hand at creating his own trailer, you need to pay attention to the following: recommendations, How:

Adding sections to a channel
Below the previously installed trailer you can see all the content. It's under sections.
You can leave everything in its place, or you can do everything again.
How to do this? Elementary. To do this, click “delete all partitions”, and then, in the empty window, click “Add partition”. Here you can select the parameters by which the videos will be displayed.
An example of this is the sections “Popular”, “Liked” and so on. It is worth noting that several sections can be placed on the main page at the same time.
Other important appearance settings
The remaining important settings in the channel design are change of his address.
 By default, YouTube assigns it the following approximate address: http//www.youtube.com/channel/UCIZ_fgfh_fgfh_gg, where UCIZ_fgfh_fgfh_gg is the name of the YouTube channel itself.
Agree, the best option there will be a replacement. To do this, just go to the “Advanced” section, then enter the “Account Information” subsection.
Once a new window opens, you need to click “Create a custom URL.” Where the URL is, you should enter a new name.
It is worth noting that the new name can be the direct name of the channel itself.
Besides this, important point in attracting video views is to link the channel with social networks.
To do this, just go to the “Linked Accounts” section and select social network, which contains a page.
Each time a new video is added, the information will be transmitted to the social network with which the channel is associated and thereby attract new visitors and thereby increase the number of views.
Hello friends. Vasily Blinov is in touch and today we will start making high-quality design for the channel on YouTube.
Let's break down the entire registration process step by step, dividing it into two stages. At the first stage, I will tell you how to beautifully design the main page of the channel, and at the second - about the design of the videos themselves so that they bring in new viewers, subscribers and are remembered with a unique style.
First of all, I think, you need to think about your unique style (design) not only for the channel header, but also for future and existing videos, so that they are somehow remembered by the audience, and they immediately recognize them by their appearance.
If possible, it is better to make a technical specification of how you imagine the design of your channel, and turn it over to professional designers who can do it beautifully. Or do it yourself for the first time; I will provide you with video tutorials.
Still, designing a channel on YouTube is not a permanent matter; after a while you will discover new ideas, understand what subscribers like and don’t like, and improve your channel in terms of design and quality of videos.
Design of the main page of the channel on YouTube
Let's start with appearance the channel itself, the setup of which can be divided into 4 stages:
- Creating and installing an avatar.
- Creating and installing a header.
- Creating playlists and customizing their display on the main page.
We could also add here, which we did in the previous lesson. They are also displayed on the main page and play a small role.
Channel icon
1. The first is the channel icon or avatar. It could be your photo, a project logo, or just some kind of picture. Remember that it will appear under all your videos, in the header, comments, similar channels, search, subscriptions, statistics sites, advertising, etc.
Instructions -
You will find all the details on how to do it correctly in a separate instruction.
Background image

2. The background (header) of the channel plays a more informational role for visitors; it usually complements the information about the channel. Shows visually whose channel it is and what it’s about. In a separate instruction, I will tell you how to make a header and why the size of the picture must be 2560 x 1440. I will also give you a bunch of ready-made templates to make it yourself.
Instructions -
Trailer
3. In the next step, we will make a channel trailer, which will be shown to new viewers who have not subscribed to the channel. It will need to tell and show in detail what the channel is about and make it clear what the person who subscribes to it will receive.
But we’ll get into it a little later, when we start filming, editing and uploading videos.

Instructions -
Creating and organizing playlists
4. The last thing we will configure for the main page is the location of the playlists, but first we will need to create them. This is done so that it is convenient for the subscriber to view your videos, divided into separate sections.
Instructions -
With this, we have designed the main YouTube page; all that remains is to prepare the design for future videos.
Making video recordings on the channel
Not everyone has the patience to take YouTube so seriously that they can also create videos. For many, the design of the main page is enough, but the video is uploaded in a clunky way, making a simple installation.
I suggest making all the blanks for the design of each video, then just insert new material into them and you’re done.
Corporate identity (channel logo)
5. The channel logo, so you understand, is an icon that appears in the lower right corner when watching a video.

Instructions -
Screensaver (icon, preview) for video
6. Background icons for videos are also an important part of the design. It's worth making several design templates for video screensavers. A beautiful and, most importantly, catchy icon plays a big role in promoting the video and the entire channel.

As you can see in the screenshot, the video on the left has a video icon, and the three on the right simply have a frame taken from the video itself. They look much worse. Therefore, it is worth paying special attention to this point.
Instructions -
Video intro (intro) at the beginning of the video
7. This and last step are not so important, you can do without them, but these video screensavers have many advantages.
Please note that absolutely all films and TV series have an initial video, from which you can immediately understand who made this film or what kind of series it is. Any channel on YouTube is like a TV series, as new episodes (videos) are constantly uploaded to it. Therefore, it will be cool if you make your own unique intro.
Instructions -
End screen
8. The splash screen at the end of the videos plays a slightly different role. It is usually done so that the viewer starts watching other videos that are announced at the end of the video, or does a simple action. For example, I subscribed to a channel, another social network. network, etc.
For example, I sometimes use the end screen as a navigator for video tutorials. A person immediately watches the next lesson, rather than looking for it somewhere in a bunch of videos.

If you don’t make an intro, then YouTube, as soon as the video ends, offers you to watch similar videos, and the viewer may leave your channel.
Instructions -
When you complete all these 8 points, you can consider your channel 100% designed. All you have to do is not be lazy and process each new video.
Designer services and how much does design cost?
All that remains is to tell you how much it costs to design a channel on YouTube and where you can find a designer. Prices, as always, are different, someone can make a background banner for 300 rubles, and someone for 5,000.
You will essentially need to order:
- logo;
- hat;
- a couple of templates for video icons;
- preview;
- end screen template.
A simple design will cost you approximately 2 - 3 thousand rubles. For a preview, you may have to contact specialists skilled in video editing separately, but any designer can do the rest. You just need to think through and write down what you want to see.
You can find specialists at. Just register, create a task and choose the designer you like.
Or you can contact my designer, I’ll post a link to him here a little later.
I hope you liked this article, subscribe to blog updates and ask your questions in the comments.
That's all for me today, let's move on to step-by-step lessons for each design item. I wish everyone good luck!
“They meet you by appearance, you see them off by video” - this is how, paraphrasing a well-known saying, we can characterize the topic of this article. No matter how interesting the videos you make, the inexpressive appearance of your channel, especially at the initial stage, can scare off potential fans of your work. Therefore, we will analyze in detail the question - how to design a channel on Youtube and give your virtual brainchild an attractive look. In addition, a channel with an original design is remembered faster and is easier to distinguish among the huge mass of other similar projects.
The newly created channel doesn’t look so great - a gray standard background, a faceless icon, and therefore we will change all this. After all, you must agree - it’s one thing to contemplate this
And something completely different - something like this

And we will start designing the YouTube channel by changing the background or, as it is also called, the header. This is the top banner that all visitors to your page see first. Bright and original - it will make the channel recognizable, indicate the theme and style.
How to make a header for a Youtube channel
There are two options to change the background. First, click on the big blue button right on the header with the inscription “Add channel design” and you will be taken to the image selection page.

Second, move the mouse cursor over the gray background. A pencil icon will appear in the upper right corner. 
Click on it, then click on the white menu that appears with the inscription “Change channel design” and get back to the header editing window.

You can use pictures to design your YouTube channel:
- Upload from computer.
- Select any photo saved in your Google profile as the background.
- Select a photo from the standard gallery, which contains free pictures. It is worth noting that the choice here is very scarce, and therefore this option should be used only as a last resort, when there are no other photos at hand.
If we select the “Upload photos” option, then either click on the “Select a file on your computer” button and look for the desired photo, or drag the already selected photo directly into the browser window in the area marked with a dotted line.
Optimal hat size for Youtube channel— 2560 x 1440. It is an image with this resolution that allows your background to be displayed correctly on all devices. Minimum – 2048 X 1152 px. In addition, the file size must be within 4 megabytes.

If you are not satisfied with what you see, for example, the company logo, slogan or contact information is not visible, click on “Crop” in the lower left corner and go to editing the photo visibility area for all users. 
We move the visible part to the desired place, again look at how it looks on different devices. If you are satisfied with the result, confirm with the “Select” button and admire the result.

To make the header even more attractive, you can work on the image in Photoshop. Add captions, effects, or make a photo collage to the central part of the picture, which is visible on all devices. There are also online editors images that allow you to quickly create suitable headers for your Youtube channel.
Ava on YouTube channel
An avatar or icon is another way to add uniqueness to your project. You can use your photo or company logo as an avatar for your YouTube channel.
Again, point the mouse at the standard icon in the form of a stylized man. An icon with a pencil will appear - click on it.

We are asked to go to our Google+ profile. Click on “Edit” and go to settings, where we can upload an avatar.

We upload the image you like, if necessary, crop it and save it. The service recommends uploading square images in JPG, BMP, JPG, GIF (not animated), BMP or PNG format with a resolution of 800 X 800 px. It is prohibited to upload photos of celebrities, erotica or pornography, or images protected by copyright as an avatar.

Google promises that the channel icon will update automatically within a few minutes, but sometimes this process takes a little longer. To see the changes, just refresh the page after a while.

We figured out how to beautifully design a channel on Youtube, all that’s left to do is set it up and start filling it with interesting content.
Save