Along with cloud services We very often use regular flash cards to store photos and movies. We connect it to other people's computers and laptops, which carries the risk of infection with viruses and other malware. The statistics are inexorable: every 10th computer is a direct threat. The question arises: how to protect a flash drive from viruses without reducing the comfort of its use?
Standard Windows Methods
Most often, a USB drive is infected through a file autorun.inf. This file serves a very specific purpose: automatically launching or installing applications from a flash card to a computer. It is hidden, but is present on any flash drive. As in other areas of life, early protection and prevention are better than time-consuming treatment that does not guarantee a 100% positive result. Therefore, the main task is to make the autorun.inf file invulnerable to attempts to infect it.
It is extremely important: the methods described below will protect the media from malware that uses USB flash as a means of spreading itself (it is they who seek to overwrite the mentioned file in their own way). Viruses, Trojans and other troubles in program installers will not go away: use antiviruses to detect them.
Disabling startup
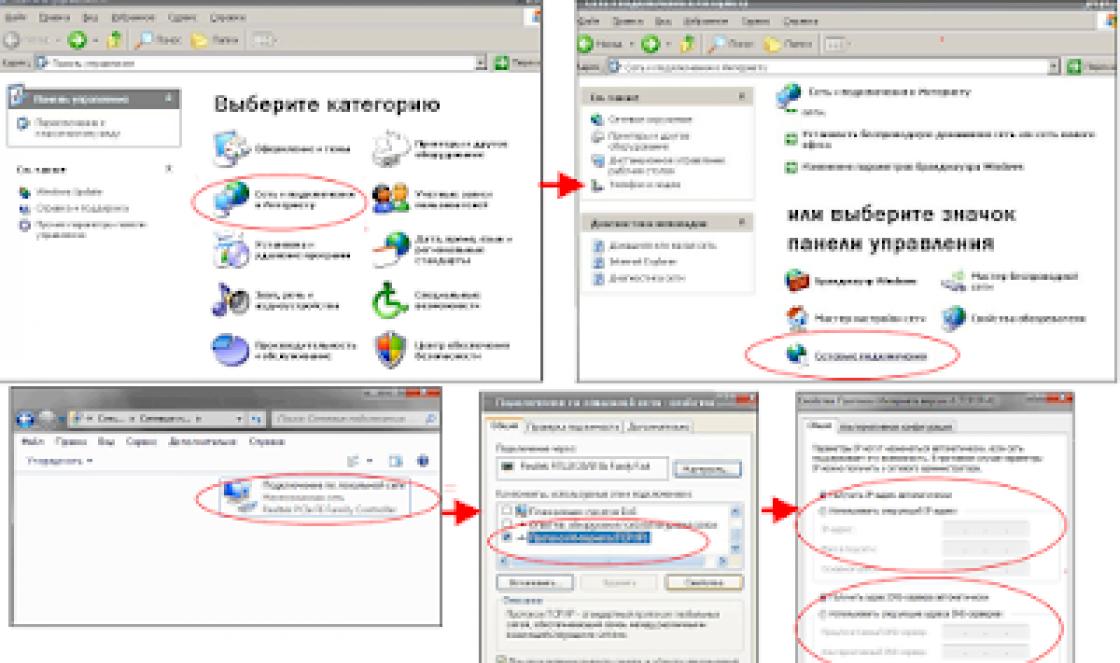
This is a method of protecting the computer itself from a possibly already infected flash drive, both yours and someone else’s. The easiest way to do this is to follow the steps below. For Windows 7:
- Press key combination Win+R.
- In the “Run” window that opens, enter gpedit.msc and click on OK.

- Click on "Allow" when a message appears asking you to perform an action as an administrator. You may also be required to enter an administrator password.
- In the Local Group Policy Editor window that appears, expand the “Computer Configuration” list, and then “Administrative Templates”.
- Select "All parameters".

- In the list that opens on the right, right-click on the line “Disable autorun”.

- Click “Change”, make the “Enable” item active, the value “All devices” should be set below.

- Click "Apply".
Please note: in some Windows versions(8.8.1) the sequence in steps 4-6 may be slightly different and look like this: “Computer Configuration” – “Administrative Templates” – “Windows Components” – “Autorun Policies” – “Disable Autorun”.
A reboot may be required for the changes to take effect. That's all - now any flash drives connected to the computer will not run on it automatically and will not cause harm without user intervention.
Autorun file protection
Now there is a way to protect the flash drive itself from malware distributed using physical storage media. We are talking about the same autorun.inf.
In the good old days, it was enough to create an empty write-protected file on a USB drive. That is, with read-only rights. Today such measures are not enough. But the essence of the actions is similar. On a flash drive that has been scanned by a good antivirus, after making sure that there are no dangers, create a special file. Open a regular notepad and copy these lines into it:
attrib -S -H -R -A autorun.*
del autorun.*
attrib -S -H -R -A recycler
rd "\\?\%~d0\recycler\" /s /q
attrib -S -H -R -A recycled
rd "\\?\%~d0\recycled\" /s /q
mkdir "\\?\%~d0\AUTORUN.INF\LPT3″
attrib +S +H +R +A %~d0\AUTORUN.INF /s /d
mkdir "\\?\%~d0\RECYCLED\LPT3″
attrib +S +H +R +A %~d0\RECYCLED /s /d
mkdir "\\?\%~d0\RECYCLER\LPT3″
attrib +S +H +R +A %~d0\RECYCLER /s /dattrib -s -h -r autorun.*
del autorun.*
mkdir %~d0AUTORUN.INF
mkdir "?%~d0AUTORUN.INF..."
attrib +s +h %~d0AUTORUN.INF
Save the result to a USB flash drive, naming the file locker.bat. After the dot there is an extension, it is extremely important and should look exactly like this .bat. Open the flash drive through Explorer and launch the newly created file with a regular double-click. It will run as a small program and create a secure folder called AUTORUN.INF.
What does this give? By inserting a USB Flash Drive into an infected computer, you don’t have to worry about the viruses on it that spread via USB. Such a virus will rush to overwrite the autorun.inf file, but it’s not there! Instead, a folder, and one that is protected.
It is also important: viruses can write themselves to other places on a flash drive by changing other files. Therefore, when inserting it into your computer, check it with an antivirus before opening it.
Radical way
If you have to connect a flash drive to someone else's computer, but only to download files from it, the option of switching the file system to read-only mode is suitable. This is an effective, but, in most cases, inconvenient method, making the “send to a removable disk” option and similar operations inoperative.
In order to apply this method you must:
- Format USB drive to file system NTFS. Please note: all data from the flash drive will be deleted! If the flash drive is already in NTFS, skip this step.

- Write down all the necessary data and put them in one folder.
- Open the properties of the flash drive (right-click) and in the “Security” tab, click on the “Change” button.

- In the “Allow” column, uncheck all the boxes except for the “List folder contents” and “Reading” items.
Click "OK".

Now no virus can be registered on a flash drive.
Using third party programs
You can also protect your USB drive from malware using programs specially created for this purpose. For example, Panda USB Vaccine. This free utility is designed specifically to protect removable media.
After downloading and launching it, connect the flash drive you want to protect to your computer. Follow 2 simple steps:
- In the drop-down menu, install the desired USB drive;
- Click on the Vaccinate USB button.
That's all! The flash drive is protected from overwriting the autorun file. Essentially, the program simply disables autorun, but does this by pressing a couple of buttons in a convenient interface.
Conclusion
Unfortunately, you will not be able to 100% protect your flash drive from viruses. The measures described in the article only prevent malware from automatically penetrating first onto a USB drive and then onto your PC. Always keep your antivirus up to date and scan flash drives before opening them in Explorer.
Not many people care about protecting a flash drive from viruses, because we don’t want to do anything until something happens. In this article I will tell you in detail which program you need to use to determine malware on flash cards.
And if you don’t like installing new programs on your computer, then I’ll show you how to put a good “alarm” on a flash card, with the help of which you will immediately know if a virus has entered the flash card.
A short introduction and my thoughts on this topic.
Dear readers, this is not the first time we have been fighting viruses that try to penetrate our computers around the clock. Today we will look at the situation of viruses getting from flash cards. This is a very common event nowadays. After all, almost each of us goes to our friends and transfers information to each other using convenient flash drives, which are easily susceptible to any infections.
The principle of operation of such an infection is very simple. Your computer is fully functional and not infected with malware, and you also have a flash card, which also works well and is not infected. For example, you went on a visit, where friends showed you new photographs or advised you to watch an interesting film. You decide to download the information you are interested in onto a flash card and everything seems to be fine.
But when you arrive home, you insert your flash drive into your computer and listen to how your antivirus “tears” the speakers from threat alerts, and this is the best option. But perhaps the antivirus is not ready for such a level of attack and viruses are easily downloaded from the flash drive to the computer and infect the system. It’s even difficult to imagine what malware can do; its functionality is known only to its creators or people well versed in programming. For the average user, this is a “dark forest” and almost everyone, after getting into such a situation, comes to the same conclusion - they will have to reinstall Windows.
Friends, my task is to teach you how to avoid such a situation and if you do end up in it, how to get rid of unnecessary problems without much difficulty and reinstallation. Let's move on to practice.
To protect against viruses, as always, we need a program that will quickly identify possible threats and quickly, and most importantly, effectively eliminate them. This is where the technology for success will lie.
Securely connecting flash cards to your computer will help ensure USB program Disk Security.
The advantage of this utility is that it does not conflict with the current antivirus at all. Effectively monitors threats that may come through connected flash drives and quickly eliminates them. In addition, the USB Disk Security program uses a minimum of your system resources, thereby organizing autonomous, almost unnoticeable work. .
You can see how to install it and use it correctly in the video review at the end of the article. After launch, the program is activated and will be a reliable protector of your computer from all types of threats with external devices. Looks like this moment she's like this:
If for some reason you don’t like installing additional utilities, then move on to the next step and I will teach you how to set an anti-virus alarm on a flash drive.
Installing an alarm on a flash card
Another great way to protect a flash drive from viruses is to set up an alert or alarm. Under the word alarm, I hide one fairly simple way of setting up, which will notify us of a violation in the data structure on the flash drive, and this is 99% an attack by virus programs. That is, if in simple words when you plug in a flash card into any computer, you should see a certain icon; if it’s not there, it means you’ve “caught a virus,” let’s get down to business.
In fact, we will change the standard image at startup to our own, and if during startup we do not see the image that we set for the flash drive, it’s time to run a virus scan. We look at the picture clearly. (click to enlarge)
As an experiment, I installed the dragon icon; if it ever disappears, it means there have been changes to the files on the flash drive. Accordingly, if you haven’t changed them yourself, there is reason to think about it.
Conclusion: the dragon disappeared (picture during loading) - the virus was caught.
The image is installed in several stages.
1) You need to configure the display of extensions for applications. To do this, go to the Start menu - Control Panel - Folder Options. Click the View tab and scroll to the very bottom of the table - uncheck the item: “Hide extensions for registered file types”
2) Now go to the flash drive and create text file with title autorun.inf- this is a configuration file that will perform the task of interest to us.
3) Having created such a file, open it in a regular notepad and add the code (action) that must be executed upon startup.
We write the code: icon=011.ico
Naturally we save.
4) Now we need to make an icon that will be shown during startup. The basic rule is that it must be square for correct display and must have “.ico” resolution. You can easily download it on the Internet, fortunately there are plenty of sites with icons. Or just do it in Photoshop. Name the icon the same as in the configuration file - 011 and upload it to the flash drive.
Now we take out the flash card and insert it back, at startup the autoload is triggered and we see the picture we installed:
Now, in the future, when you start, always pay attention to this picture; if one day it disappears, it means your files have been changed and most likely become infected. The point is that it’s as simple as that, a regular picture will signal you that the flash drive is working normally.
Video on the topic: How to protect a flash drive from viruses?
If you have any questions or something didn’t work out, write to me in the comments, I will try to help solve your problem as soon as possible. If it helped someone, don't hesitate to write your feedback, good luck.
If you often use a USB drive - transfer files back and forth, connect the flash drive to different computers, then the likelihood that there will be a virus on it is quite high. From my experience repairing computers for clients, I can say that approximately every tenth computer can cause a virus to appear on a flash drive.
Most often, malware is distributed through the autorun.inf file (Trojan.AutorunInf and others); I wrote about one example in the article. Despite the fact that this is relatively easy to fix, it is better to protect yourself than to deal with virus treatment later. Let's talk about this.
As has already been said, everything free programs, which help protect a flash drive from viruses, act in approximately the same way, making changes and writing their own autorun.inf files, setting access rights to these files and preventing writing malicious code on them (including when you work with Windows using an administrator account). I will note the most popular of them.
Bitdefender USB Immunizer
The free program from one of the leading antivirus manufacturers requires no installation and is very easy to use. Just run it, and in the window that opens you will see all connected USB drives. Click on the flash drive to protect it.

You can download the BitDefender USB Immunizer flash drive protection program on the official website https://labs.bitdefender.com/2011/03/bitdefender-usb-immunizer/
Panda USB Vaccine
Another product from the antivirus developer software. Unlike the previous program, Panda USB Vaccine requires installation on a computer and has an expanded set of functions, for example, you can configure the protection of a flash drive using the command line and launch parameters.

In addition, there is a function to protect not only the flash drive itself, but also the computer - the program makes the necessary changes to Windows settings in order to disable all autorun functions for USB devices and CDs.

To install protection, in the main program window select USB device and press the “Vaccinate USB” button to disable autorun functions in operating system use the “Vaccinate Computer” button.
You can download the program from the page http://research.pandasecurity.com/Panda-USB-and-AutoRun-Vaccine/
Ninja Pendisk

Ninja Pendisk does not require installation on your computer (however, you may want to add it to startup yourself) and works as follows:
- Detects that a USB drive is connected to the computer
- Checks for viruses and, if found, removes them
- Checks for virus protection
- Makes changes if necessary, writing your own Autorun.inf
At the same time, despite the ease of use, Ninja PenDisk does not ask you whether you want to protect a particular drive, that is, if the program is running, it automatically protects all connected flash drives (and this is not always good).
Official website of the program: http://www.ninjapendisk.com/
Protecting the flash drive manually
Everything that is needed to prevent a flash drive from becoming infected with viruses can be done manually without the use of additional programs.
Preventing Autorun.inf from being written to USB by viruses
In order to protect the drive from viruses spread using the autorun.inf file, we can create such a file ourselves and prohibit its modification and overwriting.
Run the command line as Administrator, to do this in Windows 8 you can press the Win + X keys and select the Command Prompt (Administrator) menu item, and in Windows 7 go to “All Programs” - “Accessories”, right-click on the shortcut “ Command Line" and select the appropriate item. In the example below, E: is the letter of the flash drive.

IN command line enter the following commands sequentially:
Md e:\autorun.inf attrib +s +h +r e:\autorun.inf
Done, you have done the same actions that the programs described above perform.
Setting write permissions
Another reliable, but not always convenient option to protect a flash drive from viruses is to prohibit writing to it for everyone except a specific user. Wherein, this protection will work not only on the computer where it was done, but also on other Windows PCs. And this can be inconvenient for the reason that if you need to write something from someone else’s computer to your USB, this can cause problems, since you will receive “Access Denied” messages.
You can do this as follows:

After this, writing to this USB will become impossible for viruses and other programs, provided that you are not working as a user for whom these actions are allowed.
It’s time to finish here, I think the methods described will be enough to protect the flash drive from possible viruses for most users.
Surely every computer user has at least once picked up some kind of virus on their flash drive. And, despite the fact that there are both specialized utilities for protecting drives and entire anti-virus complexes, this does not give confidence in absolute protection. Today we will look at a somewhat labor-intensive, but very effective method Protect your flash drive from viruses once and for all.
Let's make a reservation right away, it is only suitable for flash drives for computers, USB drives for cell phones or digital cameras, this method will not protect.
So, first of all. We have already considered this issue, so let's move on to further actions.
Create any folder on the flash drive, call it, for example, Files. From now on, we will store all files only in this folder.
Right click on the flash drive icon in the My Computer window, open the context menu and select Properties - tab Safety. Here we delete all groups and users, leaving only the group All.
If you receive an error message when trying to delete a group, click the button [Additionally] and uncheck the Inherit from parent object permissions applicable to child objects checkbox, adding them to those explicitly specified in this window.

If groups All not in the list, create it by pressing a button [Add] and enter it manually.

An alternative way to add the Everyone group: click the button [Additionally] in the window Choice: Users or Groups and then [Search], in the list we find the item All, select it and click [OK].

For a user group All configure access rights - in the column Allow check the following boxes:
- Reading and execution;
- List of folder contents;
- Reading.
Let us remind you again: we perform these settings for a flash drive.

Now right-click on the folder Files and choose Properties - Security. In the window already familiar to us, we repeat the steps to delete unnecessary groups, if any, and for the group All enable all options in the column Allow.

This is where all the settings actually end. Let us now consider several points related to the use of a flash drive protected by the described method. As already mentioned, all files and folders must be saved and copied only in the created folder. Neither we nor viruses can write anything to the root of a USB drive. There is one drawback: the Send menu, although active, will not allow us to copy files to a flash drive; instead of the expected result, we will receive an error message:

However, any other methods of copying files to a protected flash drive will work (for example Select – Copy – Paste). Only, as already noted, it will not be possible to write data to the root of the disk. And in the folder Files you can perform all the usual actions: create other folders and files, copy, delete, rename, etc.
Viruses, which usually create an autorun.bat file in the root of a USB drive, will no longer be able to write any data to the flash drive after applying the described protection methods. And therefore, our drive will remain completely protected once and for all: we won’t catch the viruses themselves, and we won’t infect the computers of other users.
Good day... Viruses are dangerous, and every computer user should know this. EIn principle, this is enough to install an antivirus and update it regularly fall. Protecting your computer is a common thing.I installed the antivirus, updated the database and forgot about the virus for some time until the next update of the antivirus database or the antivirus itself. But it's time to think about protecting your flash drive. How to protect a flash drive from viruses, or vaccination for a USB flash drive. Today we will talk about this topic.
How to protect a flash drive from viruses
Typically, the authors (virus creators) of malware distribute their creations through the World Wide Web. with updated databases, in most cases it perfectly repels attacks from infected sites.There are other popular ways to spread infection. Through memory cards, flash drives, removable drives and other external storage media.When a flash drive is infected with a virus, it creates the Autorun.inf file on it.And when the user opens a memory card connected to the computer, the flash drive instantly activates autorun.
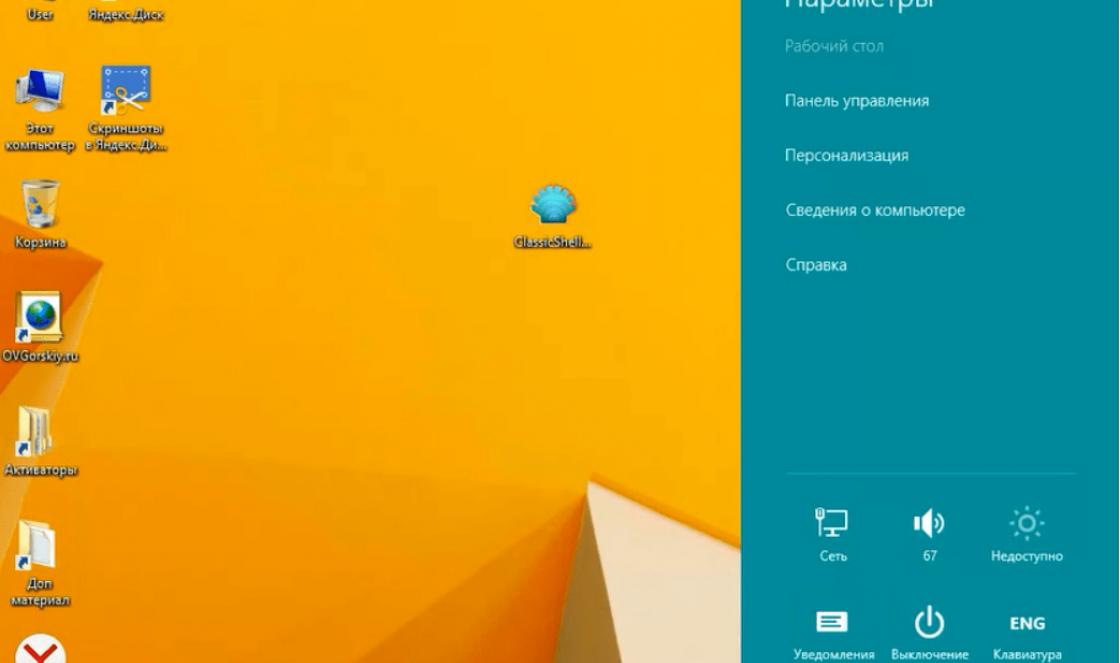
This feature can be disabled. Open the Start Menu. Here we write gpedit.msc
In the editing window group policy open one by one: “Computer Configuration”, “Administrative Templates”, “Windows Components”, “Autorun Policies”, double-click “Disable Autorun”.
In the window that appears, select “Enable”. Below we also select all devices. Or “CD drives and removable media devices.” I recommend selecting all devices. Click "Apply" and "OK"...
For Windows XP users, there is a slightly different scheme for disabling this function. After you have entered the administrative templates, go to the system and in this tab find disable autorun. We also select “Enable”, “All drives”. "Apply" and "OK"...
Now, when connecting flash drives, this autorun window does not work. And it won't appear. Therefore, even if the flash drive was infected, the virus will not begin to do its dark deeds of distributing its files or deleting user data from the flash drive.If you want to disable autorun only for flash drives, you will have to edit the system registry.
Grafting for USB flash drive
But this particular procedure is difficult even for experienced users.It’s easier to “vaccinate” on your memory card, flash drive, in other words, administer the vaccine. So as not to catch any virus.There are several useful ones for this procedure, and most importantly free utilities. Before using these utilities, you need to completely format this flash drive.
Panda USB Vaccine
First utility Panda USB Vaccine. When installing the program, the following window will appear. Where you need to check two boxes and click “NEXT”.
Now you need to insert the formatted flash drive into the computer and click “VACCINATE USB”...
This utility creates its own file AUTORUN.INF on the flash drive. Which the virus cannot remove or change. To be sure that the file has been created, go to “My Computer” - “Arrange” - “Folder and Search Options” - “View”. We go down to the very bottom and check “Show hidden files, folders and drives”.
Now open your flash drive. We see the created file AUTORUN.INF. That is, you created a “graft” for a USB flash drive...
Second utility. There is no need to install this utility. Just copy it and paste it onto the flash drive, “Run”...
There are only three points in the program...
- Disable disk startup automatically through the registry
- Protect a flash drive from Autorun viruses, according to the utility principle Panda USB Vaccine
- Just prohibit anything from being written to the flash drive.
We do all functions upon request. You need the second point. Protect your flash drive from Autorun viruses. Press 0 (ZERO) - “Enter”. Next, press two. “Enter” again. We complete this procedure by pressing ZERO - “Enter”. As a result, the AUTORUN.INF file will be created on the flash drive. With road brick icon.
If it doesn’t appear when you connect again, then the flash drive is infected. But the virus still won't work...
Third utility There is also no need to install anything here. Let's launch the utility. It's even simpler here. Protect button - protect the flash drive. UnProtect button - remove protection...
The peculiarity of the program is that the AUTORUN.INF file turns out to be super hidden. It is not visible on the flash drive. In fact, the vaccination for the flash drive has been introduced. This can be verified through any file manager, For example .