Microsoft Word is a text editor that can be part of the package Microsoft Office or a program installed separately on your computer. The program can be used to record letters and various types of documents, which may include graphics and images. This guide explains how to open Microsoft Word, launch, create, and save a new document using operating system Windows 7.
Don't be afraid that something might not work out or go wrong. This program was created for users, and it is thought out to the smallest detail to make it as convenient as possible for you to use it. And of course, the main thing in every task is training, don’t be afraid to make mistakes. If you accidentally click the wrong button, there is always a curved arrow in the upper left corner that allows you to undo your last action. You can also do this using the Ctrl and Z key combination.
One last piece of advice before you start detailed instructions for using a Windows text editor - . This is especially important when working with large texts or serious documentation. Anything can happen: the electricity may be cut off, the laptop may discharge and turn off, and no one is immune from breakdowns. Losing important files and then spending hours restoring them is not the most pleasant experience. All you need to do is click on the floppy disk in the upper left corner from time to time.
The program can be found in the Start menu under Microsoft Office. Follow these step by step instructions to launch the document in Microsoft Word.

Program navigation

How to select (highlight) text
Selecting or highlighting text allows you to change the selection in terms of style, font and/or color, and even replace words if necessary. Follow these step-by-step instructions to select text in your document.
Step 1. The mouse is used to select text. The pointer will change as you move it.
Step 2. Move the pointer to the beginning of the desired fragment. Click and hold the left mouse button. While doing this, move the pointer to where you want to stop the selection. As you move the mouse, the text will be highlighted. When you are finished with your selection, release the left mouse button.

The selected text can now be formatted or modified.
You can copy text using the Ctrl+C keys. Delete text - Backspace.

Changing the size and font
The following steps can help make your writing more interesting and engaging. The text can be changed in different ways.


Text alignment
Sometimes the document you are creating may require a different arrangement of paragraphs. By default, text is aligned left. However, text can be aligned to the right or center.

Note! Select all text Ctrl + A.

You can change the selected text using a combination of keyboard shortcuts, which is sometimes easier:
- Center - select the text, press Ctrl + E.
- Align to the right - Ctrl + R.
- Fit width - Ctrl + J.
- Left - Ctrl + L.

How to make text bold, italic, or underline
The ability to change the font style can make your document more interesting. Different text styles, such as bold or italic, can make it stand out. Underlining can be useful for headings.

- bold - Ctrl + B;
- italics - Ctrl + I;
- underline - Ctrl + U.
Copy and paste
There is no need to talk about the importance of these two functions. They save our time significantly and allow us to insert without retyping it, as was the case in the days of typewriters.

This can also be done using hotkeys. Everything is the same as last time: press Ctrl and C at the same time to copy the text, and Ctrl and V to paste.
How to Create a Numbered or Bulleted List
Using numbered or bulleted lists can help highlight items or show important steps, hierarchy, or sequence of something.

To stop adding new elements and return to standard text, click the numbering icon again at the top of the document.
A bulleted list is created using the same principle, the only difference is 1 step. Instead of the “Numbering” button, click on the “Markers” button, it is located to the right.
There is another way to create a list. First, the user enters all the list items, each one necessarily on a new line. When all the items have been typed, select them all and click either on the numbering or on the markers, depending on what kind of list you need.

You will get the same result. This different ways and there is no right or wrong here, the main thing is that the goal is achieved. Use the method that is convenient for you.

They help structure information and present it in a more presentable form. You can't do without this skill.
- Step 1. IN top panel tools, go to the “Insert” tab.
- Step 2. Click on the table icon. A window will open in front of you in which you need to select the number of cells. This can also be done by entering the numbers manually. To do this, in the panel that appears, click on the “Draw table” area.

All you have to do is fill out the fields. If you suddenly need additional rows or columns, you don't have to redo the whole thing. Left-click in the table area. In the menu that appears, click “Insert” and select the appropriate option.

This basic knowledge should form your basic principles for working with text. Let's highlight the main ones:
- The text is entered where the blinking cursor is located and nowhere else.
- To change a character, word, line, paragraph, or entire text, you first need to select it. It is necessary that the computer understands what exactly it must perform actions on.
- Once you select the text, you can do whatever you want with it. You can practice, select a fragment and alternately click on the buttons located on the “Home” tab. You'll notice which features can be used together and which are mutually exclusive.
- Don't forget to save your changes to protect yourself.
- Use those methods of solving the problem facing you that are convenient for you.
Video - Word for Beginners
And most importantly, the lessons for novice users are described in as much detail as possible, which makes them accessible and understandable for those who are learning from scratch. I write every lesson or article with pictures and explanations for them. If you have any questions, be sure to write them in the comments at the end of the article. The MS Word program is very common and in demand, but it is not the only one of its kind. Having studied it, you will be able to easily use its analogues by analogy.
Good luck and all the best.
This is already the third post on this topic. In the first, we looked at how to make an announcement yourself, in the second, there is a ready-made template with tear-off leaves, and in the 3rd, this is a template with leaflets and a photograph.
A little skill and knowledge and a ready-made ad with sheets of paper to tear off. We make a table and arrange the text vertically.
One of additional features text editor MS Word is saving files in various types including saving in PDF format
Part 2: How to Use SmartArt for Diagramming, Editing and Leveling
When working in MS Word, it is important to know how to speed up the text layout process (format it to give it the desired appearance). In order to speed up work in Word and make it faster, we need to remember some keyboard shortcuts so as not to have to drag the mouse to the toolbar once again
Previously, I wrote a lesson on how to type an advertisement in a table yourself, now for those who are lazy and need to download it urgently, I’ve made it a separate lesson.
Another easy and useful trick that can be used not only in Word but also in other Microsoft Office applications. This is a quick zoom in and out of the page.
If, as a result of illiterate editing, we end up with text with extra spaces between words and paragraph marks, then they can be very quickly removed using the “find and replace” command.
Another lesson schedule template for schoolchildren in the table. Simple, nothing extra, no pictures. Nice color scheme.
Some simple options(quickly) business cards. In 3 styles: text only, color, with picture, with picture and color
Sometimes there is a slight need to simultaneously view and edit two parts of one MS Word document. Read how to do this in this lesson.
Schematic arrangement of line spacing and paragraph indentation in the text. How to change. Which parameter is responsible for what.
In addition to the spacing between paragraphs, which we looked at in the next lesson, there are distances between lines ( line spacing). We'll look at how to change them in this lesson.
One of the text parameters in MS Word is the spacing between paragraphs. Often when copying from the Internet it is either too small or too large. Learning to change the distance between paragraphs.
One of the correct ways to format text in MS Word is to use a page break to ensure that the text always starts at new page without pressing the Enter key several times
We are studying the most popular text editor, Microsoft Word. In this material, you will learn how to create a new document, enter, edit and format text, create lists, apply styles and much more.
With this article we are opening a whole series of training materials with which you will learn how to create high-quality text documents in the most popular application in this area - Microsoft Word (Word). The presentation here will be in a rather primitive language, which may at first scare away readers who are already partially familiar with this editor. But believe me, you will most likely find useful information in this series.
Microsoft Word is a text editor (processor) used to create professionally designed documents. The name Word was not chosen by chance, because translated from English it means “Word”.
Due to the fact that Word combines the most modern text formatting tools, it can be used to easily create documents of any complexity and organize them. In addition, with powerful editing and modification tools, this application provides a convenient environment for collaboration several users on one document.
In the first part of the Word tutorial series, you will learn how to create a new document, enter and edit text, and get acquainted with some basic types of formatting. Here we will begin our acquaintance with the newfangled ribbon interface of the editor. We'll also look at creating bulleted and untagged lists, changing document fields, and much more.
PROGRAM WINDOW
When you open Word, the program window displays its two main parts: the ribbon located at the top (highlighted in red in the figure below) and a blank document that occupies almost the entire program window.
The ribbon includes a set of buttons and commands that can be used to perform various actions over the document and its contents (for example, changing the text size or printing it). The document window itself looks like an ordinary white sheet of paper and is intended for entering all kinds of test information.
Also above the ribbon on the left is the quick launch menu, in the middle is the name of the document, and in the upper right corner there are buttons for minimizing, resizing and closing the program window.
In the document that opens, in the upper left corner of the page you will see a cursor, that is, a small blinking vertical line. This line indicates that, starting from this place, the characters you enter will appear.
ENTERING AND EDITING TEXT
After opening the program, simply start typing and the letters, words and sentences you entered will begin to appear on the document page. To start typing on the same page, but one line down, you must press the Enter key. The number of times you press Enter will correspond to the number of lines skipped. As you enter text, the cursor gradually moves to the right. Once you reach the end of the line, simply continue typing letters. The characters and insertion point will automatically move to the next line.
If you need to start a new paragraph, press Enter to do so. As a result, the cursor will automatically appear at the beginning of a new line. If you need to make the spacing between paragraphs a little larger, press the Enter key again before starting to enter a new paragraph.
If you need to correct an error in typed text, just place the cursor to the right of the unnecessary letter and press the Backspace key. In this case, the cursor will delete the character to the left of it. If you need to erase an entire word, press the indicated key as many times as possible until the word disappears. There is another option for deleting an error: place the cursor at the beginning of the word, that is, to the left of it and press the Del key the required number of times.
Practice your text entry and editing skills by typing a few random paragraphs, or type the version we suggested.
.jpg)
BUG CORRECTION
As you enter text, Word warns you if there are grammatical or spelling errors by highlighting them with a wavy green or red line. A green underline indicates that you need to check your grammar, and a red underline indicates possible spelling errors or that a word (for example, a proper name or place name) is not recognized, that is, it is not in the Word editor dictionary.
What to do with such underscores? To do this, you need to move the mouse cursor over the underlined word and press the right button. As a result, a small window will appear with suggested correction options. Select the required word and click on it with the left mouse button. The word will be replaced and the underline will be removed. If the word is not recognized, Word will not offer any options. Please note that if these underlines are not corrected, they will not appear on the printed pages of the document.
Similar actions can be done with green underlines. But keep in mind that Word is good at recognizing spelling errors, most of which are fairly easy to correct, but finding grammatical and usage errors on your own is much more difficult. If you think you're right and Word gives you the wrong options, simply skip the correction by selecting the appropriate option from the right-click menu and the underline will be removed.
If you don't feel comfortable paying attention to each underline, you can ignore them while typing, and once you're done typing, check the spelling and grammar of the entire document at once. To do this, open the tab Review at the top of the ribbon and select Spelling in the group Spelling.
If working with the tape still raises questions for you, return to this point later, as a description of working with it will be given below.
HIGHLIGHTING FRAGMENTS OF TEXT
In order to perform any actions with text in a document, you need to select it, and then apply the desired command to the selected area. To select an entire word or a preposition, just double-click on it, after which the selected area will be highlighted in blue.
To select an arbitrary piece of text, you can use two methods. In the first case, place the blinking cursor at the beginning of the fragment that you want to select. Then press the Shift key and, without releasing it, click at the end of the desired fragment. After this, the desired text will be highlighted with a blue background to indicate that it is selected. Click anywhere in the document to deselect.
In the second case, also place the blinking cursor at the beginning of the fragment, but this time hold down the left mouse button and move its pointer to the end of the desired fragment. After achieving the desired result, the button must be released.
If you need to select several fragments in different parts of the text, use the Ctrl key. Select the first section of text in any way, then press Ctrl and, without releasing it, select the next section, after which you can release the key. If you need to select another fragment, press the Ctrl key again and continue.
FORMATTING TEXT
To draw attention to important information For example, you can make text bold, italic, or underlined. But these are minor things. You can change its size, style, color, background and apply animation elements to it. And even this is not the entire list of capabilities that Word provides to users when working with text.
Now is the time to remember the ribbon (ribbon interface), which was discussed at the very beginning of the article, and find out how you can use it.
There are several tabs at the top of the working window. Each of them contains a specific set of actions. We need to select the second tab - Home(if it is not selected, you need to left-click on it).
Each tab contains several groups with commands that combine several elements. On the tab Home find the group Font(the names of the groups are on the bottom line of the feed). This group contains several commands and buttons that allow you to make various changes to the text.
In our case, select an arbitrary section of text or an entire word, then click on the corresponding buttons in the above-mentioned group to change its style.
.png)
As can be seen from the figure, after pressing the button Bold, the selected text has changed its style. Now let's make it more slanted and underlined by clicking on the buttons Italics And Stressed.
In this case, the underline can be either regular solid or wavy, dotted, double, etc. Use the triangle button on the right to see the full list of possible options.
.png)
From our example you can see that you can apply several types of formatting to one selection.
As you may have already noticed, the group Font contains quite a lot of different useful buttons, which make it possible to change the font type and color, its size, strike out the font or convert it to superscripts and subscripts, add animation or background. Select a piece of text and try to apply all these formatting options to it yourself by clicking on the appropriate buttons.
STYLES
The method of making changes discussed in the previous section is convenient only if you need to change the format of just a few characters, words or sentences. To apply several types of formatting to the entire document at once styles.
Different kinds of styles are available on the tab Home in the group Styles. It is enough to select a style to automatically change the font, text size, attributes and paragraph formatting. For example, you can change the font style, make the text larger, and add bold formatting at the same time.
.png)
As you can see from the picture, after selecting a style called Heading 1, our first paragraph was transformed into a heading (the font size increased, its color and thickness changed).
To experiment, on the tab Home in the group Styles Hover your mouse over the different styles one by one. This way, you can see the changes that will happen to the document after you want to apply any option. To finally apply the selected style, simply click on it with the left mouse button. To view other styles, you can open the collection by clicking the button in the lower right corner of the arrow block Other.
CREATING LISTS
If you need to create a list in a document, you can also do this on the tab Home in the group Paragraph(which is to the right of the group Font).
Let's practice. First of all, separate the text that will be converted into a list into different paragraphs using the Enter key. At the same time, these can be either individual words or entire sentences.
In our example, we decided to format the last paragraph as a list.
.png)
Now select the text you want to convert into a list. In the Paragraph group, click the button Markers. The text will be converted to bulleted list. Without deselecting the list, press the button Numbering to create a numbered list.
.png)
.png)
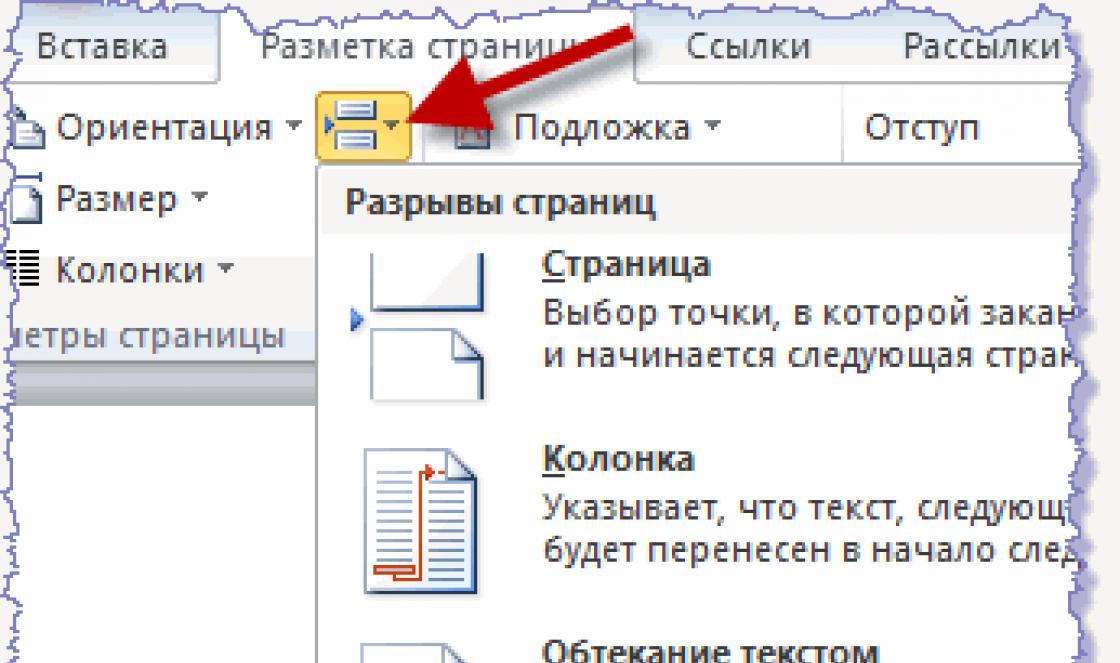
PAGE FIELDS
Page margins are the empty space around the edges of the page. By default, the margin widths at the top, bottom, left and right of the page are 2 cm, 2 cm, 3 cm and 1.5 cm respectively. This is the most common margin width and is often used for most documents. But if you need fields of a different size, you need to know how to change them. Other margin sizes may be useful, for example, when creating short letters, recipes, invitations, or poems.
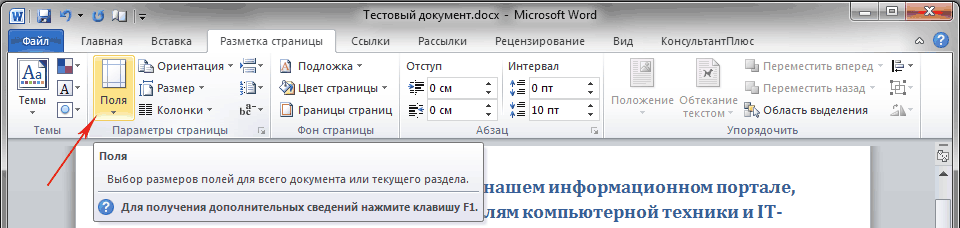
The ribbon is also used to change the size of the fields. Only this time use the tab Page layout. You must first click on it to select it, and then in the group Page Options select item Fields. Images (icons) of fields and their sizes will appear in front of you.
The first value of the list is a field Normal, which is active in at the moment. To create narrower margins, you must click the button Narrow. If you want to make the left and right margins much wider, click Wide. When you select a margin type, it will automatically be applied to the entire document.
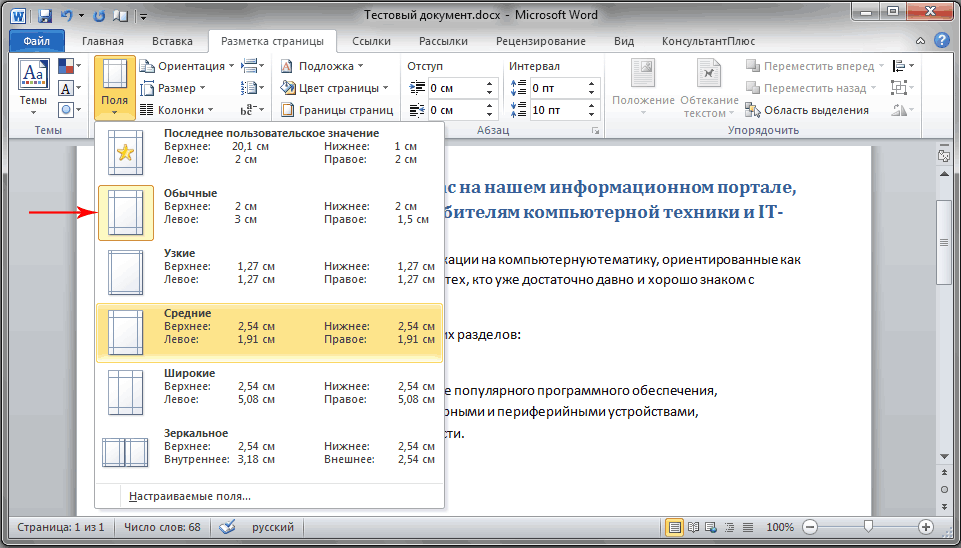
When you select fields, the background color of their icons will change. When you press the button again fields, Thanks to this change in background color, you can determine what size margins are set.
WINDOWBACKSTAGE
In order not to lose the changes made in your work, you need to save them, and the sooner you do this, the better. To do this, open the very first tab on the ribbon File. A large window called Backstage will appear, in which you can perform various operations, for example, save, open, print documents, and so on.
In the left area of the window that appears, select Save. A new, smaller window will appear. In this window you need to indicate where on the computer you want to save the document, as well as what name it will have. After saving the document, continue working by saving it periodically. It is also very convenient to save a document at any time by pressing the Ctrl+S key combination.
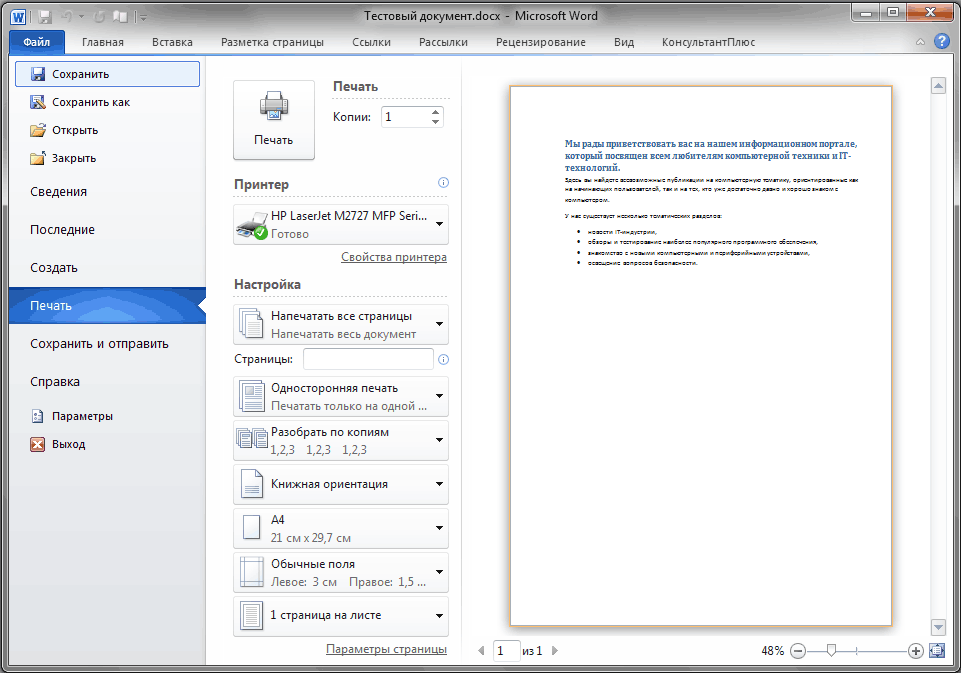
If the document is ready to be printed, open the tab again File. In the left area of the menu that opens, select the command Seal. A large window will appear in which you need to click on the line Seal. Of course, a printing device - a printer or MFP - must first be connected to the computer. As in many other cases, you can print a document using hot keys - in this case, the key combination is Ctrl + P.
After work on the text document is completed and the document is saved, close the file. To do this, open the tab File and in the left area click Close.
To find a document after you've closed it, view the list Latest documents . Click a document in the list and it will open.
To finish working in Word in the tab File select a team Exit at the very bottom of the menu or just click on the cross in the upper right corner of the program window.
CONCLUSION
With this, let me finish the first part of the training materials dedicated to the most popular text editor, Microsoft Word.
To consolidate the acquired skills, be sure to practice your acquired knowledge by typing several short texts yourself and applying various formatting elements in them.
In the next part, we'll learn how to cut and paste chunks of text, change line spacing, do alignment, use formatting marks, and much more.
Read also:
Microsoft Office is the most popular software package for working with various types of documents on a PC based on the operating system. Windows systems. There are both built-in versions for home use, which are supplied with a licensed OS, and versions with extended functionality for office use, which are purchased for an additional fee. The main applications that are needed both in work and in private life are the Microsoft Word text editor and the Microsoft Excel spreadsheet editor.
Microsoft Word Features and Capabilities
The Word text editor (translated from English as a word) is an absolutely irreplaceable software product. Using Word, files are opened in .doc format, which is used for creating, reading and editing text documents. You can write articles, notes, scientific papers and dissertations, make to-do lists, read books downloaded from online libraries, and write appeals, statements, commercial proposals and other documents.
MS Word is widely used in business document management. It is convenient to edit text, set the size of margins and indents in accordance with GOST standards for texts for various purposes, including business and scientific, and also print the document with a preview. The application makes it possible to format large amounts of text at once, for example, add page numbers and change the font.
For advanced users, there is also an extensive SmartArt visual toolkit, with which you can build diagrams, diagrams, and visualize logical chains of relationships. Another interesting feature is built-in templates that allow you to create documents of various formats - from business cards and invitations to invoices and protocols.
What you need to know to become a confident Microsoft Word user:
- Toolbar: appearance, structure and settings;
- Page structure, margin and line spacing parameters;
- Alignment, columnarization, creating bulleted lists;
- Font size, color and types;
- Reviewing, correcting errors, searching and replacing certain words;
- Working with visual objects - inserting tables, pictures, shapes and other elements;
- Hot keys - combinations for quickly performing various operations;
- Saving and printing documents.
Word and Excel - the standard for everyday use
Set ownership office applications, especially word and excel, today is a necessary, and in some cases mandatory, skill in many professions and areas of life. Our word program and excel training for beginners, is intended primarily for those who need to master these programs comprehensively and thoroughly, with detailed description all the necessary tools and settings. Word and Excel courses are the minimum, having mastered which, you will be able to work independently in almost any industry, performing basic office tasks for the circulation of documents and various types reporting. Many people believe that learning Word and Excel for dummies is something insufficient to quickly advance in education and in the profession, but under this somewhat humorous name lies a well-developed program for learning Word and Excel, which allows you to master the subject easily and effectively, and most importantly, the Excel training program for beginners step by step allows you to clarify the direction you are mastering at each stage.
Microsoft Excel Features and Capabilities
 MS Excel is a universal and multifunctional spreadsheet editor whose functions are not limited to creating and editing spreadsheets. By using this application You can significantly increase the efficiency and speed of solving a wide range of professional tasks - from creating databases, analyzing and grouping them using filters to complex calculations with various coefficients, visualization and forecasting.
Excel skills are indispensable for specialists working in the following fields:
- Financial and economic analytics;
- Accounting;
- Marketing and sociological research;
- Scientific activity;
- Banking sector and work with loans;
- IT sphere, SEO optimization and promotion;
- Working with databases in various fields.
In the above areas, you will need advanced Excel skills, but for managers and other office workers, in most cases, basic skills in using a spreadsheet editor are sufficient. Firstly, this will be a big advantage when finding a job, and secondly, it will really help you cope with your work easier and faster.
Demand for Word and Excel specialists
Despite the fact that you can now learn to work in Excel from scratch in almost any training center In computer technology, there are not enough specialists who know these programs at the proper level. Most people taking ms courses office excel, and those who think that they can more or less work in these programs, in fact do not reach the very initial level. But having a correct understanding of our skills allows us not only to choose the right training course, but also to be able to apply for a certain job. The demand for Word and Excel specialists is one side of the coin, the other side is their professionalism and skill. Therefore, Excel for Dummies training is necessary for everyone, at least in order to understand what level of proficiency in Word and Excel programs we are at, and whether we are doing the right thing by learning Excel from scratch or whether we need ms excel training at a higher level. And even if you have an initial level of proficiency in Excel and Word, but studied on your own, then in the courses you will be able to systematize your knowledge and find a lot of new things in seemingly clear things. Well, if you are trained in more complex levels of office software, then it is better to immediately resort to the services of specialized centers - you will save not only time and money, but also your nerves.
You will need knowledge of the following MS Excel tools:
- Data storage - creating tables, databases, lists, sheets and books;
- Data processing methods - searching, filtering, formatting and grouping by parameters;
- Methods of calculations, analysis and forecasting based on available data;
- Visualization of data in graphs and charts;
- Logical, text, mathematical and statistical functions;
- Formulas for fast computational operations with large data sets;
- Macros, pivot tables and other tools.
Where to start learning, with Word or Excel
Traditionally, learning begins with Word; the program allows you to fundamentally master the keyboard and basic skills in working with text and information of various types. After mastering the Word program, Excel program is easier to master, if only because you have confident typing skills on the keyboard. Working in Excel, training for dummies, implies computer proficiency not only at a basic level, but also at the level of confident use. If Word is a program that almost everyone needs as a tool for creating, editing, sending and receiving any document, then Excel is specialized program, which may not be necessary for everyone, but mastery of this tool, even at a basic level, will open up a lot of opportunities for you. Therefore, in addition to Word, it is highly recommended to take Excel for Dummies training. This combination - word and excel, is very popular as a popular skill for any specialist.
How to quickly master Word and Excel
For experienced computer users, using the main components of the software package at a superficial level is not difficult. Opening a file, reading or typing text, saving a document are actions that absolutely every person who works with a computer faces. Once you master any application included in Microsoft Office, you will be able to understand the logic of the interface and menus, and basic operations will become intuitive in the future.
The situation is completely different if you are a novice PC user or you need Office tools for professional purposes. In the first case, the lack of skills in using office applications, in particular the Word text editor, is a serious obstacle to the further development of all possibilities personal computer. Therefore, learning Office for beginners should be carried out on a systematic basis with a detailed mastery of basic functions, menus and toolbars.
Mastering MS Office for professional use is even more difficult - most ordinary users do not know about 95% of the capabilities of the Word text editor and Excel spreadsheet editor, unless their work requires it.
Self-study requires a lot of time, self-discipline and the ability to concentrate, so the optimal solution would be to take specialized courses dedicated to learning Word and Excel from scratch. They will help you with this Computer literacy courses (Windows, Word, Excel) And Excel courses (Excel) - basic level, which take place at the State Center for Postgraduate Education. If you want to become a professional in using a spreadsheet editor, here is your service:
Word is perhaps the most popular program in the Microsoft Office suite. Everyone uses it, but the secrets of quick and easy work are in this text editor not known to everyone. All Online Courses have collected tips that will help you have more free time for other important things, a break with a cup of hot coffee or a call to a loved one.
In the material - useful features, keyboard shortcuts that will significantly speed up your work in this popular office program.
Typing anywhere
To type text not from the beginning of the line, but somewhere in the middle of the sheet, you do not need to press enter or space bar many times. Such issues will be resolved by double-clicking in the right place, absolutely in any area of the sheet - the cursor will move there itself. The software will automatically insert new lines, tabs and serifs. You can check by showing hidden formatting marks.
Translation of text into another language
Often, many users, in order to write text in an unfamiliar foreign language, are torn between an office program and some translation site on the Internet, copying and pasting sentences back and forth. In fact, Microsoft has its own proprietary translator, Bing, and with its help Word can translate text itself. The program contains several dozen languages and 3 translation methods. They are in the tab "Review", group "Language"- button "Translation".
Video insertion
A text editor can insert a video file from Bing search, YouTube, or codes from other sites into the document. In this case, not the video itself will be saved, but a link to it, so you don’t need to worry about the final “weight” of the document, but you should take care of the Internet. Enabling the option is simple: tab "Insert" and button "Video from the Internet", and then the program will offer to choose a convenient option for inserting video.
Hidden text
Some part of the text in the document will not be visible; its presence can only be revealed by the file size: for example, 3 or 5 sheets of text weigh a hundred megabytes. This function is convenient if you need to temporarily hide some information, leave additions or notes that do not interfere with the main text, but are available in the display mode of all characters. To hide part of the text, you need to select it, click ctrl+d, in the window that appears "Font" put a check mark next to the function "Hidden" in the group "Modification". The hidden text will be underlined against the rest of the text with a line of black dots, so it won't get lost.
Editing PDF format
Word 2013 opens and allows you to edit the document pdf format. If you previously had to use various online services or special programs to work with such files, now Word is quite suitable for this - you can work directly in it. The program converts text, tables and other contents of a pdf document into a docx document, preserving the original formatting.
Table templates
Useful for those who often work in a text editor with various tables. The program contains about a dozen templates, perhaps they will be quite useful. Finding them is easy: tab "Insert" - "Table"- paragraph "Express tables". Perhaps the option will be useful and convenient “Save the selected fragment to the collection”. You can save any tables as a template, you can also create them yourself and then use them, rather than drawing a table from scratch each time.
Quickly insert columns and rows into a table
Word 2013 has a handy feature when working with a table. If you need to quickly insert new line between existing, filled lines - instead of the standard “Insert lines from below\top”, you can use the new option. When you hover your cursor over the area between the rows, a plus sign will appear near the table border. If you click on it, a line will be inserted. Everything works exactly the same with columns.
Calculator
Word is also a good mathematician, so you can do calculations directly in the document without opening a calculator specifically for this purpose. This function opens by clicking on the button "Other teams" in the quick access menu, then to "All teams" and add the option "Calculate" to the quick access panel - a circle-shaped icon will appear next to other buttons (open, cancel, save, etc.). As soon as the mathematical expression is selected, the calculator will work, calculate everything and display the result in the lower left corner.
Simpler, but still useful functions. If previously they were carried out in several stages, now they can be completed faster.
Insert date or time
Instantly insert the current date: Shift+Alt+D; current time - Shift+Alt+T.
Switching case
A situation that has probably happened to every user: giant text is typed while the CAPS LOCK key is pressed. In order not to delete or go through it again, you need to select the necessary part and press the combination Shift+F3– the letters will become small. In the same way, the register can be switched in the reverse order.
Repeat last command
Button F4 will repeat any last command executed. This is a very convenient function if, for example, it took a lot of time to format one piece of text, and you still need to format the second one in the same way.
Quick cursor
The cursor will move not through the letter, but through the word, if hold ctrl key . In the same way, you can quickly move through paragraphs: you need to place the cursor at the beginning of the paragraph and press the up or down button, holding ctrl. In the same way, you can quickly select sections of text or entire paragraphs - you also need to hold shift key.
Accent
If there is numeric keypad, which is located with right side. The sequence of commands for placing an accent is as follows: place the cursor after the desired letter, press alt+769. If there is only the top numeric pad, place the cursor after the desired letter, type 0301 and press alt+x.
Wrap text to another line without breaking
The program itself wraps words on a new line. It happens that a surname fits into the current line, but the initials are orphaned and moved to the next one. To avoid a gap, you need to place the cursor between the last name and initials while simultaneously pressing the keys ctrl+shift+space.
Protect the document
No one will be able to copy the text if you put a watermark on it, for this Word came up with a function "Substrate". This magic button is located in the group "Design", there you can choose any one you like from 4 standard templates.
Hyphenation
The program will hyphenate itself and the document will look beautiful if you enable the button "Hyphenation" in the tab "Page Layout".