For a novice user, the Photoshop program will seem like a magical tool that, with mysterious ease, can change any photo beyond recognition. But how!? Tell! How does he do it? What is the mechanism? What happens inside the photograph that it changes in any way, as if it were a chameleon? Nothing complicated, you just need to know what digital photography consists of and what rules apply to it, then everything will fall into place.
Namely, this is the type of graphics that Photoshop works with; it consists of tiny elements - pixels, like any object made of the smallest particles - atoms.
Pixels- these are tiny square-shaped elements that contain information about color, brightness and transparency. The term comes from crossing two English words - picture (image) And element.
File digital image consists of vertical and horizontal rows of pixels that fill its height and width, respectively. The more pixels an image contains, the more detail it can display. They are elusive to the human eye because they are negligible. You'll have to zoom in a lot to see them:
Please note. The visible part of the image is marked with a red frame. I zoomed in to 1200% on the area where the panda's nose and mouth are. As you can see, the image consists of a set of colored squares. When enlarged, it looks like a patchwork of square pieces.
By looking closely, you can understand the basic principles of image construction:
1. Pixels are square in shape and are arranged in the image in the form of a grid (remember a checkered notebook sheet).
2. Squares are always strictly one specific color; they cannot even be a gradient. Even if it seems to you that some square is shimmering in color, then this is nothing more than an optical illusion. Enlarge this area even more and you will see this.
3. A smooth transition between colors occurs due to gradually changing tones of adjacent pixels. Even the line of contact of contrasting colors can contain more than a dozen tones.
Image Resolution
The concept of image resolution is inextricably linked with pixels.
The resolution of a digital photograph is written as follows: 1920×1280. This notation means that the image is 1920 pixels wide and 1280 pixels high, that is, these numbers are nothing more than the number of those very small squares in one row and column.
By the way, if you multiply these two numbers - 1920x1280 (in my example it turns out 2,457,600 pixels), then we get the total number "shreds", of which a specific image is composed. This number can be reduced and written as 2.5 megapixels (MP). You came across such abbreviations when you got acquainted with the characteristics of a digital camera or, for example, the camera in a smartphone. Equipment manufacturers indicate the maximum value that their product is capable of. This means that the higher the MP number, the higher the resolution of future images can be.
So, the higher the resolution, the smaller the pixels, which means the quality and detail of the image increases. But a photo with a higher resolution will also weigh more - such is the price of quality. Since each pixel stores certain information, as their number increases, more computer memory is required, which means their weight increases. For example, the photo with bears at the top of the article with a resolution of 655x510 weighs 58 KB, and a photo with a resolution of 5184x3456 will take up 6 MB.
Pixel sizes and printing
It is important to differentiate situations when we talk about pixel sizes and their impact on the quality of the photo.
Looking at images on a monitor screen, we see that the pixel sizes are always the same. The computer resolution size is considered 72 dpi.
Note
Please note that when you create a new document in Photoshop, the program offers you exactly this value by default:

When viewing large photographs on a computer, for example, 5184x3456, you can feel how detailed it is, there is no grain and no defects, it is bright and clear. But believe me, such a photo is again 72 dots per inch. Just for fun, let’s open the image properties:

A large photo will look great on a computer due to its scale. What is your screen resolution? Obviously not 5184x3456, but smaller. This means that the computer must reduce such a photograph so that it fits entirely on the computer screen. The pixels are compressed and their sizes are reduced, which means great image quality. If you were to view such a photo at its original size, you could easily see blur and fade in the image, as well as hard edges of contrasting details.
Pixel sizes are something that people mostly think about when it comes to printing a photo. Here 72 points may not be enough.
For example, I created a document measuring 655x400 pixels with a resolution of 72 pixels. Look at the column print size:

Photoshop has calculated that an image of 655x400 with a resolution of 72 pixels can be printed on paper measuring 9.097x5.556 inches (in centimeters this is 23.11x14.11)
655 pixels wide divided by 72 pixels per inch = 9.097 inches wide
400 pixels divided by 72 pixels per inch = 5.556 inches height
It would seem, “Wow! What a big sheet of paper you can print on!” But in fact the photo will look something like this:

Blurred photo, no sharpness or clarity.
Printers are considered high-resolution devices, so in order for photos to be printed beautifully, you either need to print the photos initially large size, as I have 5184x3456, or change the number of dots per inch in the range from 200 to 300.
I’ll take the same 655x400 image again, but change the number of pixels to 200, this is what Photoshop writes:

The print size has decreased by almost three times. Our image now prints 200 pixels onto 1 inch of paper.
What happens is that the image will be small, hardly fit into a standard 10 by 15 photograph, but it will be of high quality, clear and detailed.

It turns out that there is a certain minimum resolution for printing photographs. If the picture is initially small in size, as mine was, then there’s nothing to even think about good print quality.
What size should an image be in order to print it beautifully?
Let's say you came back from a vacation from Crimea, or took 100,500 photographs of a child and, of course, want to print something in a photo album (example 1), and make one of the most remarkable ones in the form of a painting on the wall (example 2). Let's figure out what size such photographs should be and whether modern cameras can achieve this.
Example 1
So, as a rule, a photo album contains photos of the size 10×15 cm(in inches this is 3.937×5.906). Now we’ll find out what the minimum photo size should be for everything to print beautifully. For calculations we take a resolution of 200 dpi.
200 pixels per inch x 3.937 inches wide = 787 pixels;
200 pixels per inch x 5.906 inches high = 1181 pixels.
That is, a photograph 10×15 cm = 787×1181 pixels, minimum (!)
And having learned the total number of pixels in this resolution (787 × 1181 = 929447 pixels), rounded to the nearest million, we get 1MP (megapixel). I already wrote that the number of megapixels is this most important characteristic modern cameras. The average number of MP in cameras and smartphones reaches approximately 8 MP.
This means that current technology will easily make it possible to take photographs that are immediately suitable for printing images in 10×15 cm.
Example 2
Now let’s look at the case when you have chosen a photo and want to hang it on the wall in a frame measuring, say, 30x40 cm (I took the frame size from the IKEA store catalog), I’ll immediately convert it to inches: 11.811x15.748. For this size of photo, I would take the maximum resolution size: 300 dpi, this is already considered professional and the highest quality print (just what you need for a large picture in a frame). And now the calculations:
300 pixels per inch x 11.811 inches wide = 3543 pixels;
300 pixels per inch x 15.748 inches high = 4724 pixels.
Therefore, your photo must be at least 3543x4724 pixels. We multiply the values and get 16,737,132 pixels or 17 MP!
Thus, to print a photo into a frame, you will need a powerful camera. In this range are already being considered. And this is an expensive and serious type of technology.
In general, you should now be able to understand at least a little how the Photoshop program works and how all these photo editing shenanigans are achieved. Having learned about pixels, their properties and capabilities, this process should no longer seem like magic.
If you notice an error in the text, select it and press Ctrl + Enter. Thank you!
Services
- Seals according to GOST (with the Coat of Arms of the Russian Federation), stamps, facsimiles
- Signs, banners
- Business cards, badges, numbers
- Souvenir products
- Printing drawings (A0, A1, A2, A3)
- T-shirt printing
- Printing A4 photos (posters), text (not typesetting), photo retouching
- Making custom signs
- Calendars, invitations, stickers, collages
- Copying, laminating, binding
- Laser engraving on plastic
- Printing on mugs
- Making magnets
- Printing certificates
- Certificates to order
Studios and printing houses are able to print photographs of different sizes - from miniature rectangles “for a passport” to solid photographs of 30x60 cm and non-standard options. It is not always clear which format to choose so as not to see digital “noise” on paper and get the same clarity as on a monitor. What are the photo formats for printing? How to navigate them taking into account a specific goal? This is discussed in our article.
Table of typical formats
International standards for the size of printed photographs have been set by photo paper manufacturers. The proportions in these standards do not correspond to the proportions in the matrices of digital cameras, which adds complexity to customers (who are accustomed to the A6...A0 marking for plain paper and are confused in other designations and tables) and printing workers (who have to adjust and manually crop images).
| Print Format | Exact format size in mm | Photo resolution for printing 300dpi |
| 9×13 | 89×127 | 1051×1500 |
| 10×15 | 102×152 | 1205×1795 |
| 13x18 | 127×178 | 1500×2102 |
| 15×20 | 152×203 | 1795×2398 |
| 15×21 | 152×216 | 1795×2551 |
| 20×30 | 203×305 | 2398×3602 |
| 30×40 | 305×406 | 3602×4795 |
| 30×45 | 305×457 | 3602×5398 |
| 30×90 | 305×914 | 3602×10795 |
Photo paper 10x15 cm approximately corresponds to a sheet of ordinary paper A6, 15x21 cm - A5, 30x30 - A4, 30x40 and 30x45 - A3, 30x60 - A2.
If the table of formats and sizes of photographs for printing has not brought clarity, and you can’t get the markings A6, A5, A4, A3... A0 out of your head, you should prudently order a larger photo and ask the printing house employees to crop it to the usual format.
For example: you want to get a full-color A6 size image with a resolution of 300 dpi. In this case, order a printout on 15x21 cm paper and cut off the excess, because... 10x15 format, close to A6, will be 2 mm smaller on one side than A6.
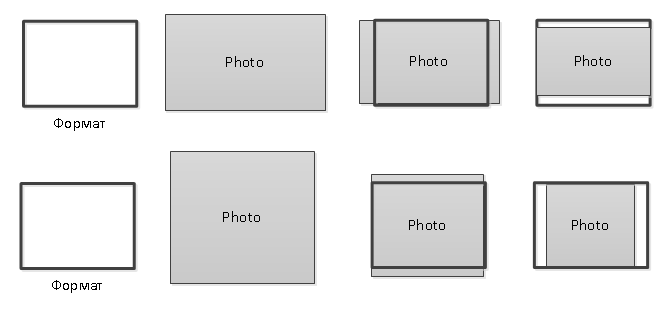
Visually, photo paper formats will look like this:

Purposes for printing a photo and standard photo sizes for printing in cm
- Eternal classic - 10x15 cm. Such a picture will fit in any family album and frame; people with average vision can easily see it; in a small room, a 10x15 cm image will look good on the wall, either alone or next to others.
- A4 (translated onto photo paper - 20x30 cm) should be ordered for wall decoration. Both in a commercial interior and in a spacious room, the photo will look representative and bright.
- 30×40 and 40×50 cm are large images that should preferably be viewed from a distance. Typically, these sizes are chosen for interior design with an emphasis on decor. A resolution of 300 dpi, typical for small photographs, is not enough in this case: a large picture is visible to everyone at once, so it must be clear and free of “noise,” so it’s worth taking care of shooting with a modern digital camera.
- Printing portraits for documents involves using photo sizes for printing in cm. So, for a passport you will need a portrait of 3.7x4.7 cm, for issuing an ID - 3x4 cm, for obtaining a visa - 3.5x4.5 cm, for a standard pass - 6×9 cm.
Choose the paper correctly so you don’t have to worry about fitting a photo with wide white margins and don’t have to worry about how to get back that part of the image that didn’t fit. All printing houses, photo shops and websites usually provide format tables. You can also ask an employee for help through feedback on the website, by phone, or by contacting him personally upon arrival at the studio.
I propose to consider what kind of animals these are - JPG and RAW photo formats, what they affect and when you should pay attention to them. What is photo size and file weight, how are they measured and what do they depend on.
Almost all photo cameras can save photos in JPG format (even phone and tablet cameras). In all SLR and non-SLR cameras, as well as in advanced compacts, in addition to JPG, there is at least RAW and RAW+, and sometimes TIFF.
To understand the formats, you first need to agree on what is meant by the concepts of “size” of a photograph and “weight” of a file (photo). I propose to consider these concepts on more tangible objects... for example, on goodies.
1 | What is a pixel:
 The size of objects is measured in meters, the size of photographs is measured in pixels (px).
 If you measure the size of this bowl of berries, it will be about 10 centimeters in height and about 13 centimeters in width... approximately. That is, we are used to measuring objects in centimeters (meters, kilometers, and so on). If we talk about the photo of the same vase, then the original size of the photo is 7360 pixels (px) wide by 4912 pixels (px) high. This is the maximum photo size that my Nikon camera is capable of. To post this photo on the website, the photo size was reduced to 1200px by 798px (I’ll tell you why a little later).
What is a pixel? Taken with digital cameras or digitized on a scanner, photographs are a combination of tiny colored squares - pixels. If you zoom in on any photo, you will see these pixels. The more such pixels in a photo, the more detailed the picture.
 A fragment of a photo enlarged a thousand times - squares of pixels are visible.
 2 | Is it possible to convert pixels to centimeters:
This is exactly what happens when you need to print photos on paper. Here you will need one more indicator - the pixel density (resolution) that the printer (or other machine for printing photos) can print. The printing standard for photographs is 300 dpi (dots per inch). For example, for printing in beautiful glossy magazines, photos with a resolution of 300 dpi are used.
So that you don’t rack your brains over dividing the photo size by the resolution and converting inches into centimeters, any program for viewing and editing photos (for example, Photoshop) has a function for viewing the photo image size in centimeters. You will need it to understand the maximum size of a photo in good quality (with a resolution of 300 dpi) you can print on paper or other material media.
For example, this photo with tropical Frangispani flowers can be printed in size 61 cm by 32 cm.
 Photo size in pixels and centimeters in Photoshop
 To find out the photo size in pixels and centimeters in Photoshop, you need to press the key combination Alt+Ctrl+I or go to the Image menu Image size.
Let's return to the reality of digital photos - to pixels and photo sizes in pixels. What happens if you reduce the number of pixels in a photo? The answer is that the quality of the photo will deteriorate. For example, I took a photo of the same bowl of berries at the beginning of the article and reduced the photo size to 150 pixels wide. With this reduction, the program destroys some of the pixels. The photo has become miniature:
Now let’s try to “stretch” the photo across the entire page:
 A stretched picture looks cloudy and fuzzy
 As you can see, the detail is no longer the same, since some of the pixels (and with them the details) are missing.
Of course, if you use this reduced image as a small icon or a small image in a Power Point presentation, it will look quite normal, but it is clearly not suitable for printing in a half-page magazine.
3 | What photo size (how many pixels) is optimal:
If you plan to print photos someday, then save photos in the highest possible resolution, which your camera will only allow (carefully read the instructions for your camera to correctly adjust the photo size).
In some cases, you need to reduce the size of photos. As I wrote above, for the site I reduce the photo size to 1200 pixels on the long side. If you upload a photo in full size, the site pages will take a very long time to load, and many visitors may not like this (not to mention the Google and Yandex search engines).
Photo sizes are measured in pixels (px). The number of pixels determines the size of the photo on monitor screens, and what size the photo can be printed.
4 | File size or "photo weight":
Now let's look at the “weight of the photograph”. Historically, there has been a lot of confusion on this issue and the file size is quite often called the “weight of the photo,” which is more convenient than correct. File sizes are measured in megabytes (MB) or kilobytes (KB). And here it’s worth remembering that, unlike kilograms, where 1 kg = 1000g, 1 megabyte = 1024 kilobytes.
How this looks in practice: imagine the situation that your camera has a memory card that says 64GB (gigabytes). If you look at exactly how many bytes there are (right-click on “properties” on your computer), it turns out that there are 63567953920 bytes on this memory card and this is equal to 59.2 GB. How large the files your camera produces will determine how many photos will fit on that memory card. For example, I can fit 830 photo files in RAW format(read about formats below).
What determines the file size:
- Firstly, on the size of the photo (what is measured in pixels): the file with the first photo of berries (photo size 7360x4912 px) is 5.2 MB, and it, reduced to 150 px, will “weigh” 75.7 KB (in 69 times less).
- Secondly, on the format (JPG, TIFF, RAW), which you can read about below.
- Thirdly, the file size (or “photo weight”) depends on the number of details: the more there are, the “heavier” the photo (which is most relevant for the JPG format).
 Many details - more weight of the photo
 For example, in this photograph with monkeys from Sri Lanka there are many small, clear (in the language of photographers, “sharp”) details and the file size of this photograph is 19.7MB, which is significantly larger than berries in a vase on a white background (5.2MB).
If you ask what size photo can I print from a photo that weighs 2MB. No one can answer you until they know the number of pixels. And it’s better, of course, to also look at the photo, since some craftsmen like to get a photo from the depths of the Internet, increase the number of pixels programmatically, and then want to print it on the cover of a magazine. It turns out as in the example above with a stretched photo of a vase 150 px wide.
File size (often called "photo weight") is measured in megabytes (MB) or kilobytes (KB) and depends on the format, pixel size, and detail of the photo.
5 | Photo formats:
And finally, we come to the issue of image formats and type of file compression, which also determine the size of the photo file.
Almost all photo cameras can save photos to JPG format(even cameras on phones and tablets). This is the most common image format and is “understood” by all computers and image viewing programs. Photos in JPG format can be uploaded to social networks, post on blog, add to Word files, Power Point and so on. JPG can be processed in Photoshop, Lightroom and other image editing programs.
From my practice: if I want to take a photo for a social network and quickly upload it, then I either take a photo with my phone or set the file format to jpg in my camera.
Something to remember about the jpg format is that it is a compressed format and has compression levels. The higher the compression ratio, the smaller the file size due to the reduction in detail and quality of the photo. Therefore, it is not recommended to repeatedly edit and resave (re-compress) the same photos in jpg format.
 When saving a file in jpg format, the compression level is selected (example from Photoshop).
 In all SLR and non-SLR cameras, as well as in advanced compacts, in addition to JPG, there is at least RAW, and often also TIFF.
A little theory:
- TIFF(English Tagged Image File Format) - a format for storing raster graphic images (including photographs). TIFF has become a popular format for storing images with high color depth. It is used in printing and is widely supported by graphics applications.
- RAW(English raw - raw, unprocessed) - a digital photography format containing raw data obtained from a photo matrix (that thing that is in digital cameras replaced the film).
Personally, I never shoot in TIFF format. I can’t even think of why I need this if there is RAW. I can use TIFF without compression to save photos that I still plan to modify in Photoshop.
6 | Advantages and disadvantages of the RAW format:
My camera is almost always in RAW format, since I plan to process (edit) photos in Lightroom or Photoshop. RAW has a number of significant disadvantages:
- There is no way to view files without first converting them. That is, to view photos in RAW format you need special program, which supports this image format.
- Larger file size than when saving in JPEG (with my Nikon D800 camera, the file size with a photo in RAW format is 74-77 MB). This means that fewer photos will fit on the flash drive.
- RAW cannot be uploaded to social networks, blogs, and sometimes even sent by mail. First, RAW needs to be converted to a RAW converter (for example, Adobe Camera Raw) that supports the file type from your camera model.
Why do professional photographers often prefer RAW over JPG? Because RAW:
 Save this article as a keepsake on Pinterest
 - provides more options for image correction: white balance, contrast, saturation, brightness and noise level,
- allow you to further correct images without the appearance of defects,
- allows fine correction of lens imperfections (vignetting, chromatic aberration).
So, if you plan to carefully process your photos in Photoshop or Lightroom, sensitively feeling “artifacts” and halftones, “overexposures” and “dips” in the shadows, then shoot in RAW. Just remember that to get a good result, you will need to understand the settings and operation RAW converters. Think about whether you need this headache? Maybe you should shoot in JPG and spend more time relaxing and not on the computer?
The calculators in this article are devoted to the topic of printing digital photographs.
The first calculator helps you select a photo format for printing an image of known dimensions. Let's formulate the problem.
Given: We have a digital image of sizes known to us, for example, 3264 by 2448 pixels, and a set of standard formats offered by photo printing services. The format determines the linear dimensions of the photograph, for example, a 10x15 photograph has dimensions of 102 by 152 millimeters.
Required: Select from a set of formats the largest possible on which you can still print the image without losing quality.
To set photo formats, I created a separate reference book Photo formats, which can be expanded if necessary.
The only special knowledge that you need to have to find the answer is the knowledge that high-quality printing of a digital image requires a resolution of at least 300 dots (pixels) per inch (300 dpi), and more or less acceptable printing is possible with a resolution of at least 150 dots per inch. inch (150 dpi). Everything else is simple mathematical operations.
Graphically, the task is shown in the figure below.
The logic of finding an answer is simple - the linear dimensions of each format are converted into inches and then into pixels, based on the fact that there are 300 (150) pixels in one inch. Next, the resulting number is compared with the size of the image (there are certain nuances related to the ratio of height and width, but more on that in the second part). If the format size in pixels is larger than the size of our image (in the picture - the format to the right of the photo), then it will no longer work, because the photo will have to be stretched, and we will get a resolution worse than 300 (150) dpi. If the format size is smaller than the size of our image (in the picture - the format to the right of the photo), then it will fit - the photo will have to be compressed, and we will get a resolution better than 300 (150) dpi.
Of all the suitable formats, the calculator selects the maximum size format (there are no problems with printing smaller images - as far as I understand, you can print with a resolution of 1200 dpi).
Format size in pixels for 300 dpi resolution
Format size in pixels for 150 dpi resolution
The second calculator uses the dimensions of the already printed photograph and the dimensions of the original image to help determine the resulting resolution of the photograph and the part cropped out when scaling. Let's formulate the problem.
Given: An image of known dimensions is printed on a photograph of known dimensions. Since the value of the ratio of the height and width of the image and the value of the ratio of the height and width of the digital image, as a rule, do not coincide, when printing the image is scaled, obviously while maintaining the proportions. This is shown graphically in the figure below.
When scaling, as you can see, two options are possible:
the first is scaling with loss of part of the image,
the second is scaling, preserving the entire image, but leaving empty space in the image.
As an esthete, I chose the first option for calculations.
Thus, the first thing is required: to find the resulting resolution of the image and the part of the image that was not included in the image. Second, accordingly, this will be the difference between the used width (height) and the original width (height) of the image.
Width of the printed image, cm
Height of the printed image, cm
Let's get acquainted with some terms that are used in the world of digital photography.
Linear photo size is the width and height of the printed photograph in millimeters. The linear size of a photograph can be obtained by measuring it with a regular ruler. For example, the linear size of a 9x13 photograph is 89x127 mm.
Pixels- these are the points that make up the image. Just as a mosaic is made up of pieces, a digital photograph is made up of pixels. The more pixels, the finer details can be seen in the image.
Size in pixels is the width and height in pixels of a digital image. For example, digital cameras take pictures of standard sizes 640x480, 1600x1200, etc., and the number of pixels displayed on a computer monitor is 800x600, 1024x768, 1280x1024.
Permission is a number that relates the size of the image in pixels and the linear dimensions of the print. It is measured in the number of pixels (dots) per inch (1 inch = 25.4 mm) - dpi (dots per inch). The recommended resolution for printing high-quality photographs is 300 dpi. Practice shows that the minimum acceptable resolution for printing photographs is 150 dpi.
In most cases, you print photos of standard format 9x13, 10x15, 13x18, 15x20, etc. Each format corresponds to strictly defined linear dimensions. For each format, you can calculate the recommended dimensions of the source image in pixels so that the resulting print has a resolution of 300 dpi or more.
For example, the linear dimensions of the 9x13 format are 89x127 mm. Multiply the height of the photo (87 mm) by the resolution (300 dpi) and divide by the number of millimeters in one inch (25.4 mm), the result will be the number of pixels of the original image in height
89*300/25.4=1027 pixels.
Same for width
127*300/25.4=1500 pixels.
Thus, for any image whose size is larger than 1027x1500 pixels, when printed on a 9x13 format, the resolution will be greater than 300 dpi. In practice, it often happens that a photograph with a resolution of 150 dpi looks no worse than the exact same one, but with a resolution of 300 dpi, it depends on what is shown in the photograph and from what distance it will be viewed.
When placing an order online, the system automatically determines which formats are recommended for printing the uploaded photo. If you have chosen a format other than the recommended one, then a corresponding message is issued, and The administration is not responsible for the low quality of the printed photograph.
Table of standard formats and corresponding linear dimensions.
|
Photo format |
Linear dimensions For digital printing |
Photo size in pixels (for printing 300 dpi) |