Make a website from the template is a sufficient easy task, but one thing to edit the template manually using a notebook type text editor, and it's a different thing to take into your hands such a program as Microsoft FrontPage. I will explain the items for those who have never come across such tasks to Microsoft FrontPage simply a need, not a caprication, since only with him you can solve such a task without in-depth knowledge of HTML, CSS and such things ...
Why, it is, yes, because this program is nowhere to have nowhere, even a child can cope with her and at the same time get the necessary result. I would like to explain that of course this program and easy to use and all that, but it is still not suitable for creating professional sites. But since our goal is neither this, we will not dwell on it ...
Download Microsoft FrontPage 2003 You can follow this link: http://depositfiles.com/files/81cgnrowa
So the general view of the program is as follows:
Very similar to the usual text editor Word ...
To start work, unpack the archive with the template in that folder in which your future site will be. Now open the main page of the template as a rule it is called index.htm or index.html it does not matter, for this, in the program, go to the file tab -\u003e Open or the Ctrl + O key combination and find a folder with a unpacked template.
In this program, you can use 3 modes of working with the site:
The constructor is the mode when you just draw the tables, score the text and insert the graphics, no code you see and do not fit into the details ...
With division - this option is most acceptable because you are in the constructor mode and at the same time you see all the changes in the HTML page code, as well as you can correct the text if it is incorrectly entered through the constructor mode, I would also like to mark one obvious plus, this mode It will be especially useful for beginners, because they are not just stupidly inserting the schedule and write text, and at the same time they see how the code changes, which is added and the HTML is added accordingly.
The code is, respectively, the mode in which you see only HTML code and nothing more ... This mode is naturally more suitable for experienced users.
View - And here you will see how your site, your page will look on the Internet ...
Now it's time to go to the editing of your template and turn it into a full-fledged site.
So, we'll start with editing the text, here everything is simple in the Designer window we find the text of the template that you would like to replace and simply select it and write your text, he will add your new text in HTML code. To edit the text, we will need a standard panel. There is a small panel in which all major functions, just like in Word:
We go on, now we need to learn to insert images, here again everything is simple, press the image that you want to replace, in the menu that appears, click Cut, and now in the place of the image you deleted, insert a new one, for this we click Bookmark Insert-\u003e Figure-\u003e From the file and in the window that appears, find the image that you need to insert ...
Now we need to learn to make links, this is one of the most important points, since the link built on the hypertext link.
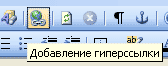
And the following window will appear in front of you:

In the top of the line there is a link text itself, on the left version of the reference execution, i.e. You can make a link to email or any fragment of text in a document or a new document. In the list of files, you can specify what specifically the file will go your link or in the address line, specify which site on the Internet will be this link ...
The next important moment that you need to learn how to make other pages for your site ... Here, as it says, everything is said simply, you just need to remove an extra text that will not be present on other styles, and go to the file tab-\u003e Save as .. and use As a template for new pages and every time you need a new page on the site you open it and save under a different name that you need, for example news.html, etc.
And the last thing we need to master these tables, for them, the whole tab is assigned a whole tab that is called the table, go there and choose the second point:

And you will have a small table of creating and editing tables:

Here I would like to mark several basic and interesting moments, a very convenient and interesting button "Show layout parameters", you can find out the length of the length and height of the table in pixels, very convenient if you use the site template and do not know what table parameters were laid Initially ... Next, the basic tools for creating and editing tables is to "draw a table" and "eraser" here everything is simple as in the usual text editor Word, I think it makes no sense to rush it ... Well, the last main element that you may need to "combine and split cells "... the rest of the functions I think will be clear without explanation, well, if you always help you, the great method" Tyka ":)
Publication date: 2009-05-08
FrontPage is one of the most popular Web Design Visual Tools.
Microsoft FrontPage 2003 includes funds for professional design, development, data and publications required to create dynamic websites.
FrontPage Allows you to develop Web sites in the visual designer mode, without editing the HTML code, and access the corresponding code created during operation.
For FrontPage, there are a large number of paid and free additional modules (Plug - Ins) expanding its capabilities. For example, ULead SmartSaver Pro graphics optimizers and ULead SmartSaver Pro are embedded not only in Photoshop, but also in FrontPage.
In addition, there is a whole industry firms developing and issuing themes for FrontPage. Themes are decoration style, set of backgrounds, navigation buttons, etc., which can be applied to a page or site, thereby significantly accelerating the development process.
FrontPage includes site templates and page templates. The Site Wizard Tool based on the site-selected site template generates a set of pages with references between them. The user remains to fill the pages of the created website template information. The page template allows you to select the required view of the page from the database and fill it with information.
The main feature of FrontPage is that this editor works in WYSIWYG mode - what you see - you will receive), that is, allows you to create HTML pages in visual mode. To create pages, the user uses the same techniques and skills as when working in Microsoft Word .. In this case, the required code in the HTML language is automatically generated.
Web nodes
Web node - a set of related information online resources intended for viewing through computer network With the help of special programs - web browsers. The web site may be a set of documents in electronic form, online service.
Web Browser (Browser, Browser) - a program used to navigate and view various Internet resources. The web browser reads the HTML document and formats it to represent the user. Microsoft Internet Explorer, Netscape Navigator, Mozilla, Opera, received the greatest distribution.
The website consists of separate web pages. The structure of each web page is determined by its internal HTML code. The user can view this code and work with it in the panel code or panel with the division of the page viewing mode, but most of the work is performed in the Designer panel. To work in the FrontPage program, it is not necessary to know how the HTML code is created.
The website is first developed on the local computer, and then published on the Internet. The user will not be able to access many functions until the node is published on the server where the FrontPage Server Extensions package is running.
Types of nodes
Consider the types of nodes that can be prepared using FrontPage 2003.
There are two types of nodes: disk nodes and server nodes. Disk nodes can be run on any computer or even from a flexible disk or CD. Disk nodes support only HTML basic functions. Many web components supported by the FrontPage program do not act on the disk node.
Server nodes are launched on a web server, that is, on a computer that is specifically configured to accommodate (hosting) nodes. With a small scale, the web server can be a local computer or the internal network of the company. With a larger scale, the web servers on which the Internet corporate nodes are usually included in the professional server pools that the Internet Service Provider (ISP) or the Web Hosting Company are managed.
Most nodes are usually developed as disk nodes. This means that they are developed on the local computer. Then they are published on the web server or inside the organization or on external hosting.
Some FrontPage web components are ready-made elements, such as the hyperlink panels and content tables. They apply only when placed on a page, which is part of a node created on the basis of FrontPage.
For some components it is required that the node or web page is on a web server where Microsoft's Windows SharePoint Services is running.
Other common web components are valid only on the server node posted on a web server with a set of FrontPage Server Extensions server extensions.
Some components receive their contents directly from other nodes, so the Internet connection visualization is required for them.
Opportunities for server administration are available only for server nodes posted on web servers, where Windows SharePoint Services or FrontPage Server Extensions is running.
To display database information, the node must be placed on
With development Internet The information exchange protocol appeared, the protocol is called HTTP (HYPERTEXT TRANSFER PROTOCOL - Hypertext transmission protocol). The service appeared with this protocol. WORLD WIDE WEB. (often called Www or simply Web.), which is substituted by an extensive network of servers Http.transmitting files through the Internet.
The main part of these files is Web Pages - Special files written in language HTML (Hypertext Markup Language- Hypertext marking language). Web Pages Published in Internet by placing such files on servers HTTP (Web nodes). Content Web pages may be different and dedicated to completely arbitrary topics, but they all use one and crowd the basis - language HTML..
Most people want to create their own website or page familiar with the language HTML. Just first. Therefore, they may come to the rescue Microsoft Frontpage., one of the most famous site designers.
FrontPage, enters the application package Microsoft Office., became the first widespread product for Internetwhich combines the client and server units and ensures the ability to develop a site as a whole and install it on most popular servers. Frontpage. Can take all the necessary programming work. but Frontpage. It will be a fairly serious assistant and for professional developers who prefer to keep full control over the creative process in their hands.
Window program Frontpage.2003.
Program Frontpage. The company was released Microsoft.and performed in a single style of products included in the package Microsoft Office.therefore the appearance of the program is practically no different from the text processor Word. .
At the top of the window there is a menu string and two toolbars: Standard and formatting. Enable or disable the display panels tool allows view menu.
In the left part is View panelWith which you can switch the document modes.
The main part of the window occupies a work area in which one or more windows containing individual documents can be opened.
At the bottom of the window is located status barContaining reference information. Also at the bottom of the window are three document browsing buttons.
Display toolbars.
To manage tool panels in Frontpage. You can use the same ways as in Microsoft Word.. Namely:
on the menu View need to choose tool panel item, and in the new submenu opened - install flags opposite those tool panels that you need; or click right mouse button for any control panels (or in the area next to it) and in the same way to use the context menu.
Frontpage.like other applications Microsoft Office.Allows you to add, delete, change the menu items and buttons on the toolbars. There is also the ability to create completely your panels.
To do this, it is necessary:
IN tools menu choose setting item…
or
in view menu choose tool panel item, and in the cascade menu that appears - setting item…
As a result of your actions, the dialog box opens Settingwhere you can install the necessary panels.
Creating a new one Web Pages.
If you launched Frontpage., so new Web page You have already created (when starting Frontpage. immediately opens new empty Web pagefinished for the placement of text and any other elements).
Create new Web page In other ways:
Use the button New page on the Standard panel Tools.
menu File Select a submenu Create, and then - Page or Web-knot;
Using combinations Ctrl + N.;
via context menu (Works in all modes except modes Tasks and reports) - for this inside List of foldersthis Web.) You need to right-click and select the item in the context menu that appears. Create Page.
Creating stans with a wizard and templates.
As mentioned above, if you used the menu to create a new page File Create page or Web nodeT. Frontpage. Invite you to use the template for creating a new page.
To do this, it will open a dialog box, the appearance of which is shown below:
On the tab General This dialog box displays a list of templates. Frontpage.available at the moment. Choosing any of the templates, you can see its description in field sample.
Creature Frontpage Web..
Microsoft Frontpage Web. - This is a set Web pages, files with images and other components that can be viewed as a single integer.
If you do a site in Frontpage., it is convenient to use for its storage Frontpage Web..
The most important plus is the ability to rename files included in Frontpage Web..
Imagine that before publishing your site in the Internet You suddenly noticed that the files of the files are called Russian names. - "Now all the files will have to climb and link the handles to change!" Duamue you. Here, then it will help Frontpage Web. - You can rename files late, and Frontpage. will all go through all other files included in Frontpage Web. And rename all links to the file you are fixed.
All other advantages will not describe, but I want to say that to use all opportunities Frontpage.then it is better to use Frontpage Web..
So to create a new Frontpage Web. Click on the arrow located on the left of the new page button on the toolbar and in the drop-down menu that appears from the drop-down menu. Web node ...
Opening Web pages.
Very often when creating the site you have to edit already created Web Pages. To the same page you can return as much as possible to edit it or use it parts for creating new Web pages.
Open existing Web page Can be in any of the existing modes.
From the regime Page Views. There are four ways to open an existing page:
1 way
If you work with Frontpage Web., then simply select the desired file in Folder list And double click on it.
2 way
On the File menu, select item. Latest files. From the cascade menu that appears, select the desired file.
3 way
Using the Open File dialog box: File Open.
Preview.
In order to see how your page looks directly in the browser, you can use the View tab in edit mode. Web Pages. But in this case it may turn out that the browser Frontpage. not quite correctly display some elements of your pages, so best:
Use the button on the toolbar
or in menu File Select item Previewp in the browser.
If you used the first way, the contents of your page appear in the built-in browser Frontpage..
If you took advantage of the second ways, then Frontpage. Displays dialog box View in the browser ...
Here you can:
Select a browser in which you want to view your Web page. As a rule, it is originally displayed here. browserwhich is installed by default on your machine.
Add any other browser for which you want to use the button. Add.
Edit or remove installed browsers.
Install the screen size on which your will be viewed. Web page
Preservation Web pages.
Default Frontpage. Instead of name pagestakes the first string of text with your pages. This is not always what it is necessary. You can change the name of the page using change buttons - Pressing this button opens the name dialog box pagesin which you can change the name pages.
Removal Web pages.
When working S. Web site Sooner or later, it is so that some pages will no longer be needed and you will want to remove them.
There are three ways to remove Web Pages.
1 way
In the panel List of folders Highlight the file you want to delete and click Delete.on keyboard.
2 way
In the panel List of folders Right-click on file (or icon file) to be deleted and in the context menu that appears, select Delete.
3 way
IN panels list Folders select fileyou want to delete and then select item Remove the Edit menu.
Work with text.
At first glance, entering the text in Frontpage. no different from entering text in any text editor (for example, in Microsoft Word.).
In order to type the text, just click the mouse anywhere in the page, and the cursor will be placed in the nearest point in which you can enter text.
A set of uppercase letters, editing text (delete characters, text insert, etc.) produced just like in Microsoft Word.
There is only one small but: when pressing the Enter keys in Frontpage. A coercive cursor transition to a new line is carried out, while before and after the paragraph there are fixed paragraph indents.
If you do not need to create paragraphs, it is best to use the key combination to go to a new line SHIFT + ENTER.
Working with images.
Graphically formats B. Web..
All computer images, all formats for their storage (and, therefore, all programs for processing) are divided into two large classes - vector and raster. Vector Image It consists of objects - geometric shapes made up of direct, arcs, circles and beam curves. Advantages of W. vector graphic Much. From the point of view of the designer, its most importantly, its dignity is that the vector graphics can be "thrust" by anything, not fearing "wipe the hole" in the image or lose some of the information. Another advantage is a small amount of files (in comparison with raster images) and independence from the resolution of the output devices (whether it is a printer or monitor screen). These factors have done vector graphic probable candidate for use in Internet. True, it is worth notify that at the moment, the vector graphics occurs not as often as I would like.
However, among the actually used vector formats, I would like to mention the format SHOCKWAVE FLASH FIRM MACROMEDIA. To view this format in browser You need a plug-in ( plug-in.), distributed by the company Macromedia.. To date, there are both websites and fully created on this technology and sites used Flash format Only partially.
The raster presentation of the graphics is based on the concept of raster. Raster - This is a combination of objects (in this case of pixels) placed in the same rows and columns. Those. raster computer file. It can be considered as a set of small color or gray squares forming a mosaic of the image. Because The size of these squares is obviously small, then when viewing raster graphs, these squares merge with each other, forming a continuous change of colors.
The raster image storage format has both its advantages and disadvantages. One of the big advantages of raster graphics is the ability to work with halftones, i.e. The ability to transmit the image just as it looks in life. But among the shortcomings, the main problem is the file size. Naturally, the more pixels are assigned to formation imagesthe higher the quality of the transmitted imagesBut, thereby more will be the size of the file.
If we now return to browsers, you can say the following that most browsers can easily display graphic files of four formats (* .gif, * .jpg, * .png, * .bmp), To use from which today is best two - * .gif and * .jpg. Yes, and then after pre-optimization.
Inserting images on Web page.
Insert an image to your Web page You can in several ways:
1. Drag the image from Windows Explorer. (that is, directly from the conductor).
2. Drag the image from Internet Explorer..
3. Drag the file with the image from the panel List of foldersstraight to the page.
4. With help clipboard - Copy the image into the clipboard from any other program, and then on the page insert it from the clipboard.
5. With help add button buttons Figure File on Toolbar Standard.
6. Using the menu Box drawing.
Consider these methods in more detail:
Method 1
Windows Explorer. (That is, right from the conductor) it is necessary:
in Frontpage.
open the conductor window;
In the Explorer window, highlight the file with the picture you want to insert on your page;
Left mouse button drag the file image to your Web pagethe picture insert into the place where the insert cursor was on the page.
Method 2
In order to drag the image from Internet Explorer.it is necessary:
in Frontpage. Open the page to which you want to add an image;
in browser Open the image you want to put on your Web page browser The file name should end on jPG, JPEG, GIF);
Left mouse button drag a selected picture to your Web page;
Method 3.
In order to drag file With the image from the panel List Folders, right to the page it is necessary:
in Frontpage. Open page you want to add picture;
Select the desired file with the picture on the panel List of folders;
left mouse button Drag the selected picture on your Web page;
The selected picture insert into the place where the insert cursor was on the page.
Method 4.
In order to insert an image to its Web page Using the clipboard, it is necessary:
In the application from which you want to copy the picture, select the image and using the keys Ctrl + C. copy the drawing to the clipboard;
on their own Web page Insert this image from the clipboard using the keys Ctrl + V.
Method 5.
Web page You decided to use the button Add image From the file on the toolbar StandardT. Frontpage. Open dialog box Picture.
In this dialog box, specify the file with the picture you would like to add to your Web page and click Insert.
Method 6.
If to insert an image to your Web page You decided to use the menu Box FigureT. Frontpage. Offer to make you a further choice:
Pictures... - Selecting that menu item provides you with the opportunity to take advantage of the finished library of pictures.
From file.... - Selecting this menu item provides you with the ability to independently indicate the location of the file with the picture you want to add to your Web page (The use of this item will open the dialog box. PictureWorking with which was described above).
Create photo collection... - With this menu item, you can create a collection of images in a specific style. For this in the window that opens Properties Collections of photos using a button Add On the tab Pictures Select images and on the tab Layout Select format design.
Adding multimedia files.
In addition to simple graphics, like - images in formats * .gif, * .jpg, * .pngetc. Frontpage. allows you to post on your Web pages Multimedia files. These include: video clips, sounds ...
To insert the video clips you need to insert menu Select item Picture, and then Video ...
The dialogue opens video windowThe video clips in the format will be displayed in it * .avi, * .asf, * .ram, * .ra.
Add sound by Web page You can on the General dialog box tab Properties page.
Working with tables.
Table - One of the most powerful tools used when creating sites.
Initially tables Applied only to represent structured data. However, gradually they turned into a powerful universal arrangement for layout Web pages.
Creating Tables
The easiest way creating table - Use the button Add Tablelocated on the toolbar Standard.
Another way - with the help of item menu Table Insert Table.
As well as table You can draw and paste using the clipboard.
Data entry and navigation on the table.
One of the wonderful features of the tables is that the entered text is formatted inside the cell just as we used to format it within the entire document. The text placed in the cell is automatically transferred to a new string if its length exceeds the column width. When pressing a key ENTERAs usual, a new paragraph is inserted. Text or numbers are entered into the table from the keyboard.
Before making data in table, it is necessary to place the text cursor in the desired cell tables. This can be done by clicking on it with the mouse.
However, more convenient to move between the cells to use key combinations:
Keyboard shortcuts: Action:
Tab.anywhere in the table, except for the end of the last line, go to the adjacent cell and select its contents
Tab. At the end of the last line, add a new string to the bottom of the table
Shift + Tab. Go to the previous cell and highlight its contents
ENTER Start a new paragraph
ENTER At the beginning of the first cell, add text before the table at the beginning of the document
Creation and application of forms.
Forms Present text fields, switches, checkboxes, buttons and many other controls. Site visitors just enter any information in a text field, select some data from the proposed list, click on the send button to send data to Web server. For processing (or processed immediately on the page).
Let's get acquainted with you - please fill in the following fields:
Your name:
Your last name:
Your birth date: year month number
Thank you! And now - on the road!
1. Mala, and agile.
Where it happens, there commands it.
In the tent will go -
Bogatyr will turn over.
Who is it?
Fly Flea Capricious Child
2. The release of the eye sits,
In French says
Bleach jumps,
Inheritance floats.
Who are we talking about?
Cat frog parrot
3. What makes the seal breathing, diving under the ice?
4. Why do big turtles cry?
5. What clothes can and the herring be worn?
Shub coat Telnyushki
6. Whom is called a "river horse"?
Exterior hippo crocodile
7. What birds do not climb chicks?
8. What birds do not know how to fly?
If you need to select multiple answers - click and do not let go Ctrland click the left mouse button on the desired answer
But creating Forms on the self Page It is only half of the work. Since it is necessary to exist a program that can process data entered by the user using forms.
Such a program can be located on the server; she can be in your Web site in the form of a separate file, and can be simply spelled out in the code hTML. on yours Web page.
It is she determines - what will happen to the information that the user entered:
information It can be added to the database and various graphics, ratings can be built on it ...;
information can be shipped by email (this is often used to obtain information about the user in the questionnaires of various kinds);
information It can be processed right on the spot and the visitor of your site will immediately receive response information (for example, will receive points for the test, see the information they entered into the guest book ...).
In a relationship form There are several basic rules:
1. EVERY the form occupies a certain area Web Pages. On one Web page One or more forms can be located.
2. Inside each form should be placed at least one of the elements of the forms (although, as a rule, there are several of them).
3. Everyone element forms has a name and value. The name identifies the field input field, and the value is equal to the value selected by the user.
4. One of the elements of the form (it may be a regular button or any drawing) must perform the button function Send.
Creating forms of V. Frontpage..
To add a form on Web page, it is necessary:
Install the cursor to the place where you want to insert form.
IN insert menuchoose clause form, in the menu that opens, select again clause form. The form will be placed on your Web page - There is an area marked with a dotted frame, with two buttons: Send and reset.
Using all the same item insert menu Form consistently insert the items you need formBy choosing them from the drop-down cascade menu (it must be remembered that all the elements of the form are inserted within the shape region marked with a dotted frame).
After the form Created, it remains only to fill it with content - elements form, text, images, tables ... (while sizes forms will change automatically).
Add content form It is possible in the usual way. For example, the text can be typing, and you can insert from the clipboard ... All actions with added objects are similar.
but creating a form - This is only the beginning of work. After its creation, you must configure the properties like the most formsand its elements.
Setting the properties of the form.
For processing or saving data entered by visitors Web page, it is necessary to either take advantage of the capabilities provided by Frontpage Server Extensionsor some other program running on Web server..
But whatever the program you have chosen, you still have to configure the properties of the shape and items in it.
To open the form properties window, you need:
in insert menu choose clause form, and then -
or
Call the context menu to the form and select the item in the context menu Properties of form.
As a result, the dialog box opens Properties of form.
1. B. save field Results must be specified that it will be necessary to do with the data entered in form. You can choose the following options:
O. Sending file name - The data will be placed in the specified file on Web server.. This file may be Web pagewhich will eventually become longer and longer, or data file, which can then be processed in Excel, Access or any other program;
O. Sending mail address - In this case, every time the visitor is pressed Web page Buttons Send to form An email will be generated, which will be sent to the address you specified. This message will contain all the data that was entered by the user on Web page.
O. In the database - In this case, the data forms will be sent to the database. The base must be on Web server. (or be accessible to it).
2. B. property field Forms must specify the form name
Viewing modes in Frontpage..
Frontpage. offers six different modes to view content Web site:
Page,
Folders
Reports
Transitions
Hyperlinks
Tasks.
You can use the desired mode to select presentation panellocated on the left side of the screen, or in the menu View On the toolbar Standard Select the appropriate menu item.
Page
This mode creates and edit Web pages. Here you can create empty Web Pages And pages based on templates, assign the theme pages (a set of page view styles on the screen). In this modes, you can add and format the text, draw up pages Using graphic and video images (supported conversion of a number of graphic formats in formats * .gif, * .jpg and * .png), add to the audio support page, submit information in tables, frames and shapes and finally create hyperlinks. This is not a complete list of possibilities. Frontpage. By editing content Web pages.
Folders
In this mode, you can view the structure Web nodes (files and folders) and manage it similarly to how you do it in WindowsThis mode makes it possible to get more detailed information about files and folders than provided in view mode. Page.
Reports
Provides to your attention more than a dozen reports containing a variety of information about Web-siteoutdoor in Frontpage.
Transitions
Designed to view the site hierarchy. In this mode, you can control the hierarchy, dragging rectangles (each of which represents a certain Web page).
Hyperlinks
Demonstrates a system of hyperlinks that are connected with each other Web nodes(as well as a system of hyperlinks to other nodes), provides an inspection of their integrity and the ability to change.
Tasks
This mode is designed to manage tasks. Web nodes (add, delete, execute, set the priority of execution, as well as tracking the status of tasks).
Free download Frontpage.you can follow the following link:
http://letitbit.net/download/28576.28615a37d4f2a575882748541adf3bf00/microsoft_office_frontpage_2003.rar.html.

Before starting to work in FrontPage, I recommend that you create a folder specifically for your site. It can be called "Site", "My Site", "My Super-Power Website", or, if you prefer English, "My Site", "Site".
On the Internet, files with Russian names, alas, do not work (but it does not mean that they will not work on your computer), so I, on the long-generated habit, will use the default folder site.. You can also start developing this habit in yourself, but it is already only at your request 🙂
You can place the created folder anywhere, on the C drive, in the "my documents", on the desktop ... In principle, it does not matter, the main thing is that you convenient to work with it.
True, I do not advise you to create a folder directly on the desktop. The path to it (it can be viewed in the properties of the folder, or in the folder itself, it is listed in the "Address" line), in which case, it will be very long. For example: "C: Documents and SettingsUsersUn001Rext table". True, it can be short, for example: "C: WindowsRealous Table". It all depends on the settings of your computer.
If the path is still obtained long, then you can create a folder for the site on a C (or d) disk, then its path will be much shorter: "C: SITE". And in order to open the folder, it was possible to quickly and easily, it is necessary to create a label to it and place it at any convenient place for you, for example, on the same desktop.
Why take care of the size of the path to the folder? It will not affect the quality of site creation of the site, but I have made sure that it is not very long, much more convenient to work with folders, the path to which is not very long. The example will be used the following path to the "C: Documents and SettingsSsSSite" folder.
Separate folder for the site - the thing is extremely comfortableSometimes even indispensable. Your materials and the created pages will not be lost anywhere, but will calmly lie in our separate daddy.
FRONTPAGE to create a site not even a very experienced user should not be difficult. For example, you can select the ready-made web site, change the standard data to your own, add something, to delete something and everything, the site can be uploaded to the Internet. Create a new web site, you can choose File (File) | Create (New). The next window will open to the right of the workspace:

By clicking on the link Other web site templatesYou will see that there are still many diverse types of websites from one-page to corporate. For the sake of the experiment, you can try to choose some web site and create a site in this template.
But I actually do not support this way of creating a site, as FrontPage for the finished web site creates many unnecessary folders. And in general, much unnecessary.
Therefore, I offer a slightly different approach. I suggest creating a site from a clean list by selecting the item in the window creating a new page Empty page. And you can choose anything, but simply close the window of creating a new page, since this item is already selected by default.
And here on this empty space we will start creating the first page of the site, or rather, its template.
If you are more or less familiar with the Internet, then probably noticed that many sites consist of tables. Some tables are visible well, some completely invisible. So we will do site consisting of tables.
Now the tables as a means of creating a frame gradually become obsolete, in return to them comes layers. But the tables still remain a simple and effective way to format the page. To begin with, this is just right.
In FrontPage, there are several ways to create a table. Now I will describe in detail each of them so that you can choose the most suitable for yourself. But since you can learn only in practice, I advise you not to just read the text below, but also fulfill all the actions described.
So, first method. In the command menu bar, select the command Table (Table), and in the drop-down menu - item Insert (INSERT) with an arrow. Move the mouse to this arrow and another drop-down menu will open before you. Select Table (Table).
 The first way to create a table in FrontPage- Using the menu Table
After selecting this command, you will open the window where you can specify the various parameters of the created table.

What parameters can be installed? In the first area The size You can choose the required amount row (rows) and speakers (columns).
In the next area Position (Layout) can be configured:
- location of the table on the page - for this in the field Alignment (Aligment) You need to select one of the following values:
- Default (Default) - Then the table will be located at the discretion of the user's browser, most likely at the left edge;
- Left (Left);
- On right (Right);
- CENTER (Center);
- distance between the border of the cell and its contents - for this enter the required value in the field Fields of cells (Cell Padding);
- distance between table cells - To do this, just enter the required value in the field. Interval of cells (Cell Spasing);
- table width - Please note if the checkbox Accurate width (Specify width) is removed, the table size will depend only on its contents. If the flag is worth, then you can designate the width in pixelch (in pixels) or in percents (in percent). I will say right away, the width for the main table (which we now create now), it is better to do in percent, then it will change depending on the size of the user window.
In area Borders (Border) can be configured:
- the width of the borders of the table - for this you just need to enter the required value in the field Border size (Border Size);
- color, Light and Dark Side Table
In area Background (Background) You can set a color for the table background or select a background pattern.
For example, take the settings that I specified earlier. Choose OK And we look at the result.

Excellent! Now let's try to use for comparison second way creating tables in FrontPage. On the toolbar Standard Standard Find the icon Add Table (INSERT TABLE) and click on it. After that, a small table layout will open.
 A quick way to create a table - use the button Add Table (INSERT TABLE)
Hold down the left mouse button highlight the desired number of rows and columns. So, for example, there are two lines and one column on the figure. If you bring a mouse to the right or lower border of the layout, it will expand. After you release the mouse button, the table itself will instantly appear.
This method of creating a table is much easier and faster than the first. One "But" - here you can not first specify the parameters of the table being created. Therefore, if you are gathering to create another table using the second method, it will be possible to change its parameters only after you create it.
About how to do it, I will tell a little later, and now more visual, third way Creating a table. It - drawing a mouse table. We will not use it now, but if you ever need to create complex tables, you will know how to do it.
The first step is exactly the same as in the first case. In the command menu bar you need to select the command Table (Table). But the next step is already completely different. When you select the command Table (Table), you will open the drop-down menu. Consider, he has a double arrow below. Load the mouse to this arrow. Now in front of you the entire list of commands.
 Team menu Table
This time we need item Draw a table (Draw Table). Press. The next small window opens.

Drawing a table consists of several steps: an external rectangular outline of the table is drawn, lines are carried out that divide the table on the strings and columns, the extra lines are erased.
First, make sure that the table drawing tool is enabled (at the same time it should be displayed on a brighter background than the other buttons). Now that the cursor falls into the document area, it will take the form of a pencil.
Now lay the mouse cursor to the top left vertex of the proposed table. Then, by pressing and holding the left mouse button, move it to the lower right corner of the proposed table and release the button. The result will appear the external circuit of the table.
Now, with the help of the same pencil, run lines forming the internal structure of the table.
Remove extra lines using the tool Eraser (Eraser). Take advantage of it easy. On the toolbar Table (Table) Press the button Eraser (Eraser). Then move the mouse cursor to the line you want to erase and spend on it. The washed lines will be painted in red. To disable the eraser mode, click on the button. Eraser (Eraser) again.
With this method, you can also draw a good table, but let's go back to the previous one. We will work with her now.
The first line can be left for the site name, logo, etc. It will be the so-called top of the site. Usually it is left alone for all pages of the site. The following line usually places text, pictures, photos, in one word, information. It is very good to leave the place below for counters that will count the number of visitors. There you can also write the name of the site creator :).
But we have only two lines! Do not have to start all over again? No, what are you! We will simply insert one more string. You can do this in several ways.
For example, if you have another toolbar Table (Table), you can add a new string by clicking on the button Add a string(INSERT ROW). Do not forget to put the cursor over it from one of the rows of the table. The new line will appear in front of the string on which the cursor stood.
The next way to insert the line is also quite simple. For a start, you just need to highlight one of the existing rows, click on the right mouse button and ... But wait, how to highlight the string? There is nothing complicated here too. Just lay the mouse cursor to the string you want to highlight.

Then wait for it when it turns into an arrow and click on it.

The highlighted line looks like this:

And now, without removing the selection, click on the highlighted row with the right mouse button. You will open the attached menu.

Of all these, undoubtedly useful, items, we will now need only one: Add strings (INSERT ROW).
By the way, the string could not be allocated, but simply click the cursor in it. But the skill of the selection of tables, rows and columns you will still need, so get used to 🙂
The next way to insert new rows in the table is much more convenient. And now you will realize why. Place the cursor in the string above (under the) which you are going to add new lines. Then refer to our favorite item Table (Table), which is on the command line. In the drop-down menu choose Insert (INSERT) | Rows or columns (Rows or Columns). The following window opens.

You see, at the bottom of the window, you can select the location of the new line - above the highlighted string (above) or under it (Below). Notice, when using the first two ways, such a choice was not provided to us. We define the number of lines, click on OK and see what we did.

Now we have three lines. For everything there was a place, it remains only to determine where to put the structure of our site. Have you forgotten about it? Now we will consider the easiest way to put the structure on the page - placing it in the second line, next to the "information" middle.
To do this, create another table of two columns in the second line. How to create a new table, we already know. And we know the whole three ways how to do it! What will we use this time?
Let's now use the first, since we need to adjust the table parameters from the very beginning. The path to the creation of the table: Table (Table) | Insert (INSERT) | Table (Table).
In the window that opens, mark one line, two columns and the width of the table boundaries equal to zero. The width of the table is 100% and pressed on approx. The whole table now looks like this:

Small points in the second line are the same "invisible" table. More precisely, now it is clearly visible, but this is just because at the moment we are in editing mode. And when we move to the view mode, there will be no tables.
This "invisible" plate we need only for modeling the appearance of the table, so we made it "invisible." Now in the left column you need to insert another table. The number of rows should be equal to the number of main items of the structure you are. The columns do not need!
Lesson has not lost yet? Then we transfer the names of all major pages (partitions) to our sign. The names of the internal pages (subsections) do not necessarily include. To enter pages names in a table, simply click in the place where the text will be located and type it on the keyboard.

In more detail about entering the text and changing its appearance, I will tell you when we fill the site information.
And now, as promised, I will tell you how to change the parameters of the table after its creation. Remember how we highlight the table row? And now we need to highlight a whole table.
If "manually" to highlight the table fails, you can just pass the way Table (Table) | Highlight (SELECT) | Table (Table). Now, without removing the selection, click on the Table Right-click. You can, by the way, do not allocate the table at all, but I already wrote, it is a very useful skill 🙂
The drop-down menu will pop up. Only this time we need item Table properties (Table Properties). When this item is selected, a window will open, which almost completely repeats the window insertion window of the new table. You can change the existing settings for new ones.
By the way, in the FrontPage program, the table frame can also be done "double" consisting of a plurality of squares, with a shadow, etc. All this is available in the top menu. Format (Format) | Borders and Pouring (Borders and Shading)

In the first bookmark - Framework (Borders) You can change the view of the borders of the table. Look at the possible results after changing the type of table frame.

In the second bookmark - Pouring (Shading) You can set a background pattern for a table as well as select the background color and text. But it is not easy to choose the appropriate color ... Therefore, we will finish today, but let's talk about the colors in the next lesson.
But wait, what to do with our art, i.e. with created signs? Everything is very simple. They need to be saved. To do this in the top menu, select File (File) | Save as (Save AS). Find the daddle on which we agreed to fold the site and save your document under the name in it. index.

Why exactly index? Yes, just because it always indicate the main page of the site. Namely, we were doing now. If you are now, coming out of the FrontPage program, open the document you saved, you will see that it is automatically preserved as index.htm.. HTM - abbreviated from the word HTML, remember what it is?
It is worth remembering that the "HTM" and "HTML" formats are absolutely different things. I advise you to immediately choose something one that the problems did not arise. If you have chosen the "HTML" end, do not forget to add it to each Saved page, otherwise it will be saved by default as "HTM"
Let me remind you that the names of the files for the site can not be written with Russian letters. Then, when you lay out your website on the Internet, these files simply will not open.
And the last about the names. Writing file names, pages for the site with a capital letter - this is, of course, commendable, but extremely inconvenient. I recommend you all, all: pages, drawings, archives - write everything with a small letter. Believe me, in the future it will help to avoid very many inaccuracies.
Opening the saved "index"
Now we will open the "index" document, which we saved in the folder for the site at the end of the previous day. There are several ways to do it. Let's look at each of them so that later you could choose the best for yourself.
So, the first way. File "index" by default is an online file, as it has a format htm. (hTML.). Therefore, if you open it with a double click, you will fall into the browser viewing window.

This method of opening "Index" in FrontPage is to choose a command in the top command line. File (File), and in the drop-down menu - Edit in Microsoft Frontpage (Edit with Microsoft FrontPage).

If in the menu File You have no such item, it means that the FrontPage on the computer is not installed as the editor of the Internet pages. To fix this, you need, firstly, open the FrontPage program itself, and then select the command prompt Service | Parameters. The following window opens:

To work normally with the site, we need to in the area Editors There was FrontPage. If it is not there, then click on the icon in the upper right corner and select there. FrontPage (Open As HTML). Then click on the button Use default.
It was the first way to open the file in FrontPage, through the browser window. But it will be more logical to reduce this way. Therefore, so as not to spend time, you can, without opening the file, click on it with the right mouse button and select the drop-down menu Open with ... (Open WITH) And in the proposed list find the program FrontPage.

And the last, third way. First you need to open the FRONTPAGE program itself, and after that, open the entire site by choosing File (File) | Open Web Knot (Open Web). Or, if you have recently opened index, choose Latest files, and in the desired file drop-down menu.
Of course, it is not so important how exactly you will open the page "index" in FrontPage, the main thing is that you discover it 🙂 Congratulations, another useful skill acquired!
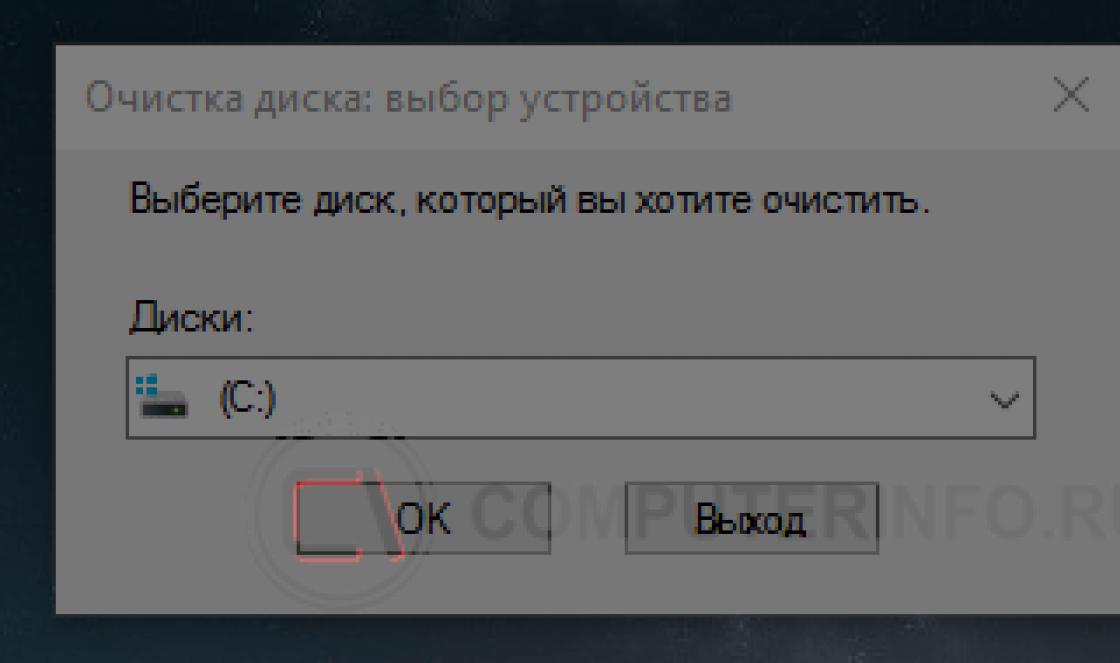
Creating a new web site in FrontPage.
Opening the program, many users do not understand where to start creating your own website. When using the FrontPage program to create a site, you must first create a web site that will be subsequent. The following is described how to do it.
Opening FrontPage The first time we see approximately such a window.
So. Go to B. "File" \\ "Create"

After that, the panel on the right side is selected "Single-page Web Node ..."

In the window that opens, you must select the type of component being created. This is done in the tab "General". You can also enter the location and name of the node. (The name of the node can always be changed!)

You can choose already available site templates. But the task of our lessons is the creation of the site "from scratch", so we choose "Singite Web Node"
After creating a new "single-page Web site", we appear on the screen a list of files and folders that belong to this web site.

Creating and saving pages on a website
So, we created our website and now we will fill it with pages.
List of pages that we will create:
- Main page (created automatically and is called index.htm)
- about the author
- Contacts (on this page there will be a form of sending letters to the creator of the site on his e-mail)
- Gallery (creation of a gallery from images)
- Video (page with on-line video)
- Audio (page with audio on-line)
- Site search
- Further list items you can add themselves if necessary ....
Creating a new page:
Press the button "Creating a new regular page"

Without filling it with its contents, we save it. Press "File" \\ "Save as ..."

In the window that appears, you must make sure that the page is saved to our website. To do this, you need to see the parameter "Folder"

After that click on the button "Change"next to the parameter "Name".In the window that appears, we prescribe the name of the page. (the name can be written with Cyrillic, i.e. Russian letters)

In field "File name"it is necessary to introduce the name of the page, but on the Latin, i.e. eg "OB-Avtore"

After that, you can make sure that the page is created. To do this, let's go to the "Web Node" tab and see that our new page has been created and posted on the node.

In the same way, create all the other pages that we have planned.

To change the name of the main page, you must click on it right-click and select "Properties"

In the window that opens, you need to change the parameter "Name" That you want. For example - "Homepage" or "The main"

Now we have to create a dynamic web template, place visual pages, and fill them with information.
General structure. Attach the template to the pages.
Part 1.
For what you need a dynamic web template. If you speak short, then it is designed to make you, as an administrator, change and complemented one page of your site, and with your actions with this page, changed and all other pages to which this page is attached. It is short. You can find more detail here. (Office.microsoft.com website)
Go to creating a template.
First you need to create a regular page. Click on "Creating a new ordinary page."
Now we turn to the general structure of creating our site - how, and where items will be located, etc.
Selecting the structure, it must be described somewhere. This can be done on the usual sheet of paper. I give you the structure in the video image below.

So, having the structure, we need to translate it into the table than we will do.
Create a table - 1x1

On the new table, press the right mouse button and choose "Table properties."

In the window that appears, enter the parameters, as in Figure:

· Leveling - in the center
· Set width -100 percent
· Fields of cells - 0
· Interval cells - 0
· Border size - 0
Press the button "OK"
This table will be the basis for our page.
In this table we will have to create several more tables.
The first table, which we will create will refer to the header site. Create another table in the new table, but now on 3 cells, because Site cap consists of 3 elements - logo, banner, search.

This table set the same parameters as the previous one. You can set others, such as width - 1024 points, it must be done when the site is written under a certain screen resolution.
In this lesson, we will make a site that will have strict sizes to search and logo, I am a part with a banner will decrease or increase depending on the user screen resolution.
Now it is necessary to set the exact sizes for the cell with the logo and for the Cell with the search.
I have a logo in advance, and it has dimensions - width - 300, height - 186 points. It must be placed in the folder "Images" on your "Web node"

Press the right button on the first cell where the logo should be located and select "Cell Properties"

Set cell parameters:

· Alignment horizontally - "centered"
· Width - 300 points
· Height - 186 points.
Press the "Insert" button \\ "Figure" \\ "from the file ..." and choose the logo:

Select the remaining two table cells and assign them the height equal to the first cell.

"Cell Properties"

"Set the height" -186 at points.
Set the sizes of the width for a cell with a search until we will, we will do when we install a search form.
Add another table below the one that we did for the header. Table size 1x3
That's what should happen:

This table, set the same parameters as the previous one:
Select the first cell and set the width equal to the logo width (this is done at will. You can set any other dimensions.)

Below create another table with the same parameters. This table for the "Niza site", the counters will be located there.
Note!The bottom table does not necessarily do with three cells. Enough and one. For meters, it will still have to do its table.
Highlight all cells of all tables, go to "Cell Properties" And set the parameter "Align vertically:" - "Upon the upper edge"

If the text in the cells are not aligned at the top edge, Set this parameter for each cell into manual.
For cells with search and optional menus it is possible to deliver width - 200 points. This will allow the table to keep the exact dimensions when writing text in cells.
Now we should have the following:

Creating a dynamic web template.