Method 1
1. Start -> Run -> in the Open field write the command control userpasswords2 and click OK
2. Place the cursor on the user name for which you want to configure automatic login to Windows (this will save you from writing the user name in the next window - it will be entered automatically) and uncheck the option Require username and password, then enter your account password (if used) and click OK.
Method 2
1. Start -> Run -> enter the command regedit and click OK.
2. Find the following registry branch:
HKEY_LOCAL_MACHINE\SOFTWARE\Microsoft\WindowsNT\CurrentVersion\Winlogon
HKEY_LOCAL_MACHINE\SOFTWARE\Microsoft\WindowsNT\CurrentVersion\Winlogon |
3. Double click the option DefaultUserName(if there is no such parameter, then create a String parameter with this name), enter your username and click OK.
4. Double click the option DefaultPassword, enter your password in the “Value” field and click OK.
5. Double click the option AutoAdminLogon, enter the number 1 in the Value field and click OK.
Note. If the computer is a member of a domain, the methods listed above will not work, you need to slightly modify the second method by specifying the domain login values:
In the registry in the branch
HKEY_LOCAL_MACHINE\SOFTWARE\Microsoft\Windows NT\CurrentVersion\Winlogon
HKEY_LOCAL_MACHINE\SOFTWARE\Microsoft\Windows NT\CurrentVersion\Winlogon |
- parameter AutoAdminLogon set value 1
- parameter DefaultUserName set the value equal to the username for which you are setting up automatic login
- parameter DefaultDomainName set the value to the login domain name
- parameter DefaultPassword set the value equal to the password of the user for whom you are setting up automatic login
If any parameter does not exist, then it needs to be created, for all parameters the type is String (REG_SZ)
Method 3
If your computer logged in automatically for a while and then stopped, check the following options:
1) The system stops at the welcome screen, waiting for a user to select or enter a password for an existing one:
Autologin occurs when there is ONE PASSWORD-LESS user. Try to bring the system into compliance with this condition.
2) The system displays a dialog box for entering the username and password, although there is no password (pressing Enter continues loading):

You may have disabled the system greeting. Included here:
Control Panel\User Accounts\Change Login Method\Use the Welcome Screen
Advice . To bypass the automatic logon procedure or log on as a different user, hold down the SHIFT key after you log off or restart Windows XP. This only changes the first login procedure. To apply the modified procedure in the future, you must configure the following registry setting.
Good day, dear Internet users, Denis Trishkin is in touch again.
There are many reasons why users want to set up automatic login. This may be a reduction in system boot time, or simply tired of constantly entering some characters. Experts advise resetting this type of protection against unauthorized access only when the equipment is used by one person and only that person. So that the client does not have to constantly enter the code, it is necessary to follow a chain of steps:
That's it. During the next boot, you will no longer need to enter code characters - the desktop will load on its own.
Alternative methods( )
As in many other areas of Windows, there are other options in this one, because suddenly for some reason you cannot perform the above steps.

Alternatively, you can simply remove this function:

It involves creating a special disk to reset the code. How to make a suitable portable device? It's simple:

Now in the future, when the operating system asks you to enter a security code at startup, enter any characters. An error message will appear, as well as the “” option, which is what we need. We insert an already prepared portable device where the code erasure algorithm is stored.


Afterwards a window will open with three fields, two and of which will be new protection and its confirmation, and the third will be a hint. We just leave them empty and that's it. Click next. Now the old protection will be erased, but the new one will not be installed.
If you have forgotten your password and there is no way to recover it, read
At Windows startup 10 or 8, you will be asked to enter a password to be able to log in. This allows you to protect your computer from unauthorized access. But if you're the only person using the computer and you don't want to be prompted for a password every time, you can get rid of this process and log in Windows system automatically without entering a password.
Starting with Windows 10 version 2004, which will be released in spring 2020, also known as "20H1", Microsoft has changed the default behavior for the automatic sign-in feature. Now, if you have any of the options enabled Windows security Hello, you will not be able to log into your account automatically.
Starting with Windows 10 build 19033, if you have set a PIN or other secure Windows feature Hello, Windows 10 hides the option to use this PC in the classic control userpasswords2 style. See the following screenshot:
In this article, we will look at three ways in which you can disable the login screen and automatically login Windows 10 version 2004 (20H1) and previous versions without entering a password.
Method 1.
Automatic login to Windows using the commands - control userpasswords2 and netplwiz.
To turn off the login screen and automatically login Windows 10 version 2004, follow these steps:
Step 1: Open the application "Options" most quick way Press the Win + I keys simultaneously.
Step 2: Go to section “Accounts” → “Login Options”.
Step 3: Turn off the - option.

Step 4: Press the Win + R key combination to open the " Execute", enter one of the two commands below:
netplwiz
Step 5: Press Enter to open the " User Accounts" And With Uncheck the box, click the button Apply" → "OK".

This action opens a window in which you must enter your account password. If account is a local entry and has no password, just leave this field blank.

Step 6: Restart your computer.
Once you do this, you will find that you can log in to Windows 10, 8 automatically without having to enter your password or account information. Microsoft records.
Step 7: All that remains is to disable the password request after sleep; you can read the instructions in our article:
Method 2.
Automatic login to Windows using the Microsoft “AutoLogon” utility.
Microsoft Autologon it's small, free utility offered by Microsoft, which can be used to configure the built-in automatic login mechanism of Windows 10. Similar to the utility netplwiz, you can save credentials for any local or MSA Microsoft account. The most important advantage of Autologon is that it encrypts the password before saving it to the registry.

Step 1: Download the utility AutoLogon, unpack the archive and run the file autologon.exe and accept the license terms.

Step 2: Fill in the required information: login, password and click the " Enable" to enable password bypass for the selected user account. A message will appear on the screen confirming that Autologon has been successfully configured.

You can also use the AutoLogon utility from the command line using the syntax below:
autologon user domain passwordStep 3: Restart your PC.
Method 3.
Automatic login to Windows using Registry Editor.
How to automatically sign in to a user account in Windows 10 version 2004 "20H1" using Registry Editor.
Step 1: Create a system restore point and then click Win+R on the keyboard to launch the " Execute". Enter regedit.exe and press the key Enter to open Registry Editor.
Step 2: Navigate to the following path in the left sidebar of Registry Editor.
HKEY_LOCAL_MACHINE\SOFTWARE\Microsoft\Windows NT\CurrentVersion\WinlogonStep 3: Now, on the right, find the parameter “ AutoAdminLogon" and change its value to 1 .

After this, you need to create some additional string parameters to store the account data values. Just right click on the partition Winlogon and select " Create" → "String parameter" and fill them with the appropriate values depending on the name assigned.

If the String parameter already exists, you just need to change the value accordingly.
Step 4: After all values are filled in, save the settings and close the Registry Editor.
I should note that one of the disadvantages of using Registry Editor to log in automatically is that your password is stored unencrypted. Any user with access to the registry can view it. Therefore, we recommend that you use the Method with netplwiz or Autologon, your password will be securely encrypted and will not be stored in the Registry Editor.
To disable automatic login using this method, remove the DefaultPassword value and set AutoAdminLogon to 0.
I hope this advice is helpful to you.
Judging by search statistics, a large number of people are interested in the answer to this question. Although, to be honest, it’s only about five minutes of work, no more. Soon you will see everything for yourself. So here we go.
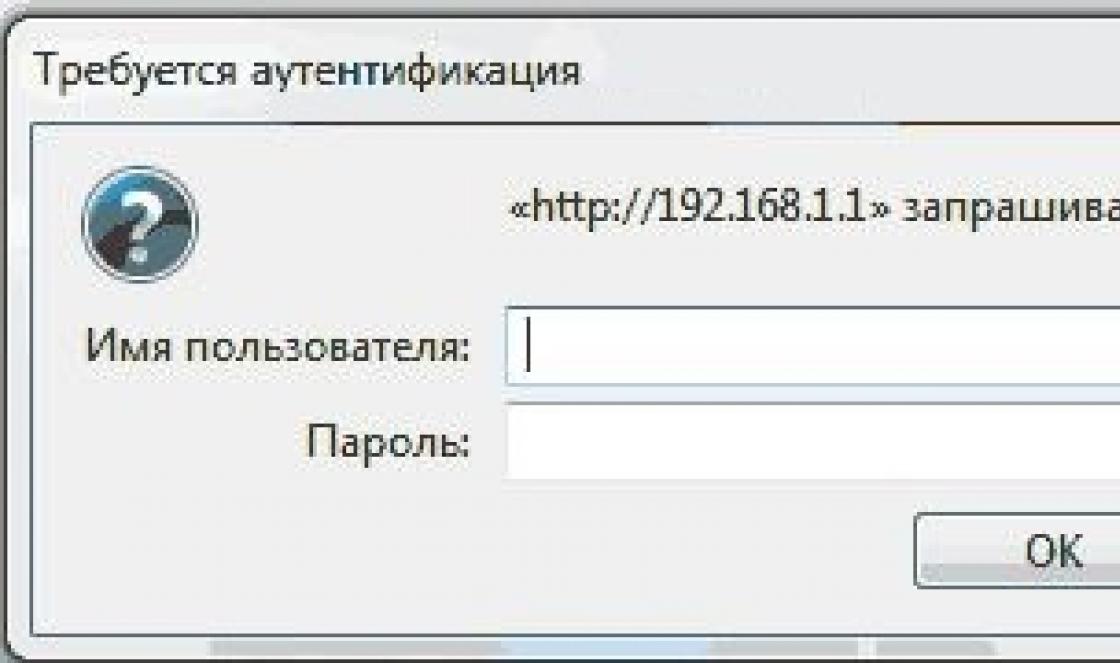
And now, when we turn on the computer and load the great and terrible Windows, we see a dialog box asking us to select the desired user and enter a password. This is how the picture looks like:

But we don’t want that, now we will need to enter data every time. We love it when automatic login occurs, so that nothing is required from us. Okay, let's do everything now as it was, the old way. It's very simple.
It is also worth saying that all the settings in the article will be made using the example of the Windows 10 operating system. But if you configure this matter on versions 7 or 8 of this OS, you will see that everything is absolutely identical.
So, first, click on the "Start" button and select "All applications":

Then you need to find in the general list of programs " Command line" and run it:

In the black window that opens, enter the service command:
After that, press the "Enter" key:

At this step, you will need to uncheck the “Require username and password” checkbox, and then click on the “Apply” button:

Now a dialog box will open in which you will need to specify the user account under which you will be automatically logged in upon boot Windows versions 7, 8, 10:

It is logical that this should be the “account” of the computer administrator. That is, the person who is endowed with maximum rights is the master here. As you can see in the screenshot above, the “User” column already contains the “Admin” value we need, so all you have to do is enter the password and confirm it.
Once again I focus attention on this point so that there is no confusion later. “Admin” in our case is not the name of the account, but its type, which specifies rights. And the record itself can be called differently, so to speak, according to yours.

I hope that this will be more accessible, since it is very important to understand exactly this moment of the settings in order to really understand the essence of these actions. In general, at the end of all our joint movements, click on “OK”:

Well, people, now let's check that the changes made are correct. To do this, you need to restart your computer and see if automatic login works.

So, the operating system begins to start, the nerves are taut like strings:

And... Things seem to be going well. Yes, together with you we coped with this task:

So, dear readers, as you can see for yourself, we have easily and simply set up automatic login to Windows 7, 8, 10. But if suddenly something still doesn’t work out for you, ask questions in the comments to the article.
At this point, allow me to take my leave. After all, as they say, it’s time to know the honor. Thank you all for your attention and understanding. In the meantime, you can take a musical break. And as always, the author is nostalgic. 😉
You may want to consider disabling the password verification prompt when booting into Windows 7 when only one person can use the computer. Of course, it’s not worth removing the password request completely, if only in order to be able to limit outsiders’ access to the computer at any time. And also because it may be necessary for a completely different person to turn on the computer in your absence, but you consider it unnecessary to tell him the login password.
The benefits of automatic login are obvious; loading the Windows 7 operating system is much faster, if only because you do not need to waste time entering a password. And disabling the need to request a user password in the welcome window, frankly speaking, is not the best complex problem. For home computer, or a computer not included in the domain, changing the settings for automatic login without a password in operating system, is easily performed in the graphical interface of Windows 7.
Important! To change settings and organize automatic login to Windows 7, you will need administrator rights. Of course, if the computer is at home, then you are the most important administrator for it.
So, in order to disable the password request option, first of all, by simultaneously pressing the “Win + R” buttons, call the “Run” window,
and in the text field write: “control userpasswords2”. Then, after clicking the “OK” button, the account settings window for all users will open.

In the dialog box, select the desired user and uncheck the setting that requires entering his name and password when logging in. The correctness of the selected option is confirmed by pressing the “OK” key. In the window that appears

the username will already be filled in, you just need to enter the password twice in the special fields of the form, and after filling it out, click “OK” again. That's basically all, now when you start the computer and booting Windows 7, you no longer have to painstakingly enter your secret password.
When there is only one account in the system for which automatic login without a password is provided, then it is the account that performs the automatic login. Naturally, in this case any additional settings no longer required.
In our turbulent times, “life moves on and everything changes,” so if you suddenly need to return to logging into Windows 7 with a password request, then you just need to check the box next to the desired option. The choice is confirmed by one click of the “OK” button, without even needing to enter a password.