It was in the process of restoring a 2104 station wagon. The no longer young radio FORD SOUND 2004 (89FB-18K876-BB) found its place in it. By the way, the password on the radio is three-digit, and is written on its body. The audio device remembers not only cassettes but AM radio. It's not too complicated and easy to change. Has a good amplifier. Therefore, it was decided to remake it for modern formats storage media, namely USB, microsd and AUX for connecting to a smartphone or mp3 player. In general, I think that this kind of radio is not popular. They won't cost much if you buy them for such a modification. Very good and budget option sound for a car, home or garage.
Remaking the radio
The first thing we did was order an MP3 module with built-in all the capabilities we needed so much (ordered here: link). All the rest we needed were various tools, glue, Dremel, Soldering Iron, and so on.
Since the Swallow was under repair, there was no opportunity to look at the pinout. I found several diagrams on the Internet, but to be 100% sure, I’ll check all the contacts myself.
I'm dismantling the radio. You need to remove two metal covers on the top and bottom of the radio; they are not screwed on, but simply latched. You need to remove it by bending it back caps Since there are antennae in the front, you won’t be able to start from the pipe.
To determine where + and - are on this radio, just ring the largest capacitor near the connector. It should ring from one of the legs in the socket. This is a power + contact. The downside is that it’s as easy as shelling pears, it’s always on the case, and we call the case with the legs in the socket and find a contact. The most difficult contact to find is the one responsible for turning on the radio display. This can be found using a resistor of at least 300 ohms, at the end of the + wire, connected in parallel to the power + wire. The resistor serves as protection; it can be used to poke all the incomprehensible connectors where the desired contact is supposed to be located. It is not necessary to poke the next half of the terminal block, where there are 8 contacts. All terminals are there for connecting speakers. By the way, in order for the front panel backlight to work, you also need to connect the positive wire to the corresponding contact on the terminal block. In my case, it is 4 from top to bottom, on the left side, where there are 7 contacts.
The cassette deck is secured with screws. I unscrew the screws that are located under the front panel, as well as the screw inside the radio.
I disconnect the deck connector. All that remains is to unsolder the three-core wire that transmits the signal from the magnetic head to motherboard, in the immediate vicinity of the 70010BB preamplifier (TDA3420), which works with this signal.
We unscrew the connector from the deck and unsolder all the wires on the deck from it. We also solder the long switch. That's it, we no longer need the cassette deck at all. Well, maybe for homemade products.
Near the preamplifier there are two small capacitors, I also solder them. They will be needed for soldering in another place.
Now let's work with the deck connector. We need to solder two wires from the MP3 module there, with a connector, it is red, for 12 V power supply. Our module is 12 volt, but it is not afraid of voltages or more. Thus, when we turn on the TAPE mode, the module will work.
Next you need to solder four wires in place of the long switch, where the tracks on the board are connected. You also need to display the TAPE/RADIO mode switch on the panel. I did this using a P2K type switch from the times of GOST and the USSR. It fits perfectly in size, you don’t have to look for the button with a magnifying glass, and it also has several pairs of contacts that are independent of each other. This is what is required to switch modes. When one pair of contacts opens, the other closes, but there is no common conductor between them. I solder both pairs separately, so that when you press the button, the module turns on and the radio turns off. This is easy to determine.
In order for the lights on the front panel to light up (rewind ◄), you need to short-circuit two of the three wires going to the rewind switch on the deck. In my case it's blue and orange. We don't touch yellow at all.
We take the next wire from the module, four-wire with red wire, this is the antenna. I solder the antenna to the antenna connector inside the radio. I fix it with hot glue. All wires are delicate, so you need to fix everything securely. All the same, our roads are not European yet, and the car shakes well.
I solder the grounding connections, after tinning them as always, to a contact on the board, directly next to the diodes.
I solder the right and left channels to the negative terminal of the capacitors. I solder the capacitors with the positive leg to the output point of the track from the 70010BB preamplifier (TDA3420) to the board. Before the diode. This place has the best sound. From here the signal passes through our capacitors, then through a diode, another capacitor, and goes to the 70011SB (TDA1524) audio processor chip, where the volume is adjusted, modes are switched, and so on.
The next and most important thing. This is, of course, the front side of the radio. Where are all the control buttons and monitor output located. Here we have to install the module itself, having previously adjusted the sizes of the first and second for assimilation. I cut off all the excess. I widen the hole where the cassette deck was. And I completely turn off the space for the mode switch. I'll drill a hole there later. I adjust the panel flush and attach it with super glue. The rest is filled with epoxy resin and soda for a thicker consistency. I decided to experiment with adding black paint to leather jackets, and it turned out great.
I make a hole for a screw to attach the mode switch to the radio body. I immediately look to see if the screw head will shorten anything on the board. I isolate.
After the panel dried, 12 hours passed. It’s not “stone” yet, but it’s easier to remove burrs and decorate and polish everything beautifully.
I make a hole for the mode switch button. First, not with a large drill. Then more and to the desired size.
After processing the panels, I paint them all with the same paint. It turns out very cool. Didn't expect it. One backlight bulb in the front panel burned out. I found a piece of 12 volt LED strip low power (three diodes, very small). I painted it with green nail polish, since the backlight is green. I just soldered it in place of the light bulb and laid the tape. Works normally without heating.
I'm assembling the front panel. Using silicone, I lubricate the mode selection button, as well as the hole where it will work. Everything is in reverse order. I attach all the loose wires with hot glue.
I'm testing the device. Everything is just great. The view is excellent, the panels merged into one whole, as if it had happened all at once. And the sound is generally excellent. This is not PAM8403, low, high, bass. And I'm happy. You can bet on the swallow, she will be happy.
Even today, there are some modern cars that are equipped with radios without a USB connector, not to mention older cars. This state of affairs does not suit many car owners, which prompts them to search possible solutions. One of available options equip the standard car radio with USB - connect the input yourself, this is not difficult to do, but not all car radios accept this solution.
What is a USB input on a car radio?
Many car owners are faced with a situation where the standard radio in the car does not read music from a flash drive. And the whole problem is that the device simply lacks USB input, i.e. it was not originally provided. Moreover, this situation is relevant not only for old cars, but also on modern foreign cars you can often find such a distinctive feature. Almost everyone will agree that you want to listen to music in the car without any restrictions, but you can’t burn a lot on a CD. Yes, and disks in a car today are somehow inconvenient and outdated. What to do, is there a solution to the problem? After all, replacing a radio is not the cheapest pleasure and not everyone can afford it. Below we will try to understand the situation in detail and find the optimal solution.
How to make and connect a USB input to a radio
Today only electronic devices and the devices do not exist and, of course, the problem outlined above did not remain aside. It is not necessary to change the standard radio; it is enough to simply improve the device. There are different options, which we will consider.
USB adapter from mp3 player for standard tape recorder
For this method, we need the simplest mp3 player that is capable of reading music files of the appropriate format from both a memory card and a flash drive. Important feature: the player must have an audio output (jack) for headphones. It is from this that the signal will be taken and sent to the radio. It is worth noting that to perform the procedure, you need at least minimal skills in working with a soldering iron in order to avoid short circuits with solder during the soldering process and damage to the insulation of wires, elements, etc. We implement the player as follows:
- We disassemble the radio and remove the CD drive or tape drive from it (if the radio is a cassette).
- We take power from the standard device to power the player, the board of which is first removed from the case.
- Depending on the player's supply voltage, you will have to implement a voltage converter circuit. For example, the car's on-board network has 12 V, and the player is powered by a 3.6 V Li-ion battery.
- We take the sound signal from the output of the player and feed it to the AUX input of the radio. The connection requires a shielded wire, i.e. the wires must be braided. On the radio board you need to find the audio input contacts. We solder the wire from the player to them.
- We install the player board inside the radio, since after removing the CD drive, space will be freed up. For convenience, the USB connector itself is located in a hole intended for cassettes or disks.
- The wires must be connected carefully to avoid a possible short circuit.
- To control the player, the buttons are connected to unused buttons from the CD drive.
- All that remains is to assemble the radio, install it in place and you can enjoy the music, for which you just need to activate the AUX mode.
Thus we have collected USB adapter on one's own. With this connection method, the volume level on the radio should be lower, which will eliminate the loud signal at a high input signal level.
DIY adapter
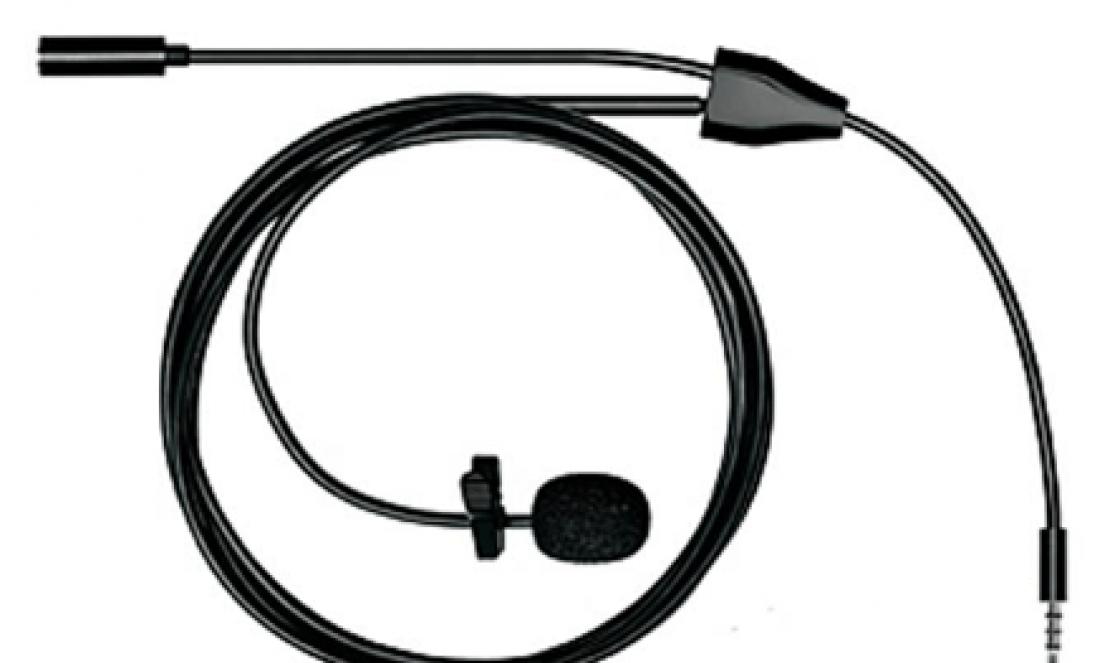
Let's consider another option for connecting a flash drive. In this case, you will need a plug from standard headphones, tulip-type connectors and a 4-core copper braided wire. The adapter will be made from these elements. For the procedure to be successful, the radio must have an AUX input. Before starting work, make sure that the headphone wire is not broken. For this reason it is called a multimeter. The whole process is as follows:
- We remove the insulation from the headphone wire and see red and green conductors that correspond to the right and left channels (we cut off the headphones themselves). These conductors must be stripped and soldered to the middle contacts on the tulip connector.
- The braid of the main wire is connected to the steel base of the “tulip”.
- The finished adapter should have the following wiring: a signal from the right and left channels is supplied to the middle contacts of the “tulips”, and the steel base is the common contact.
- To the external connector sound signal radio, we connect an adapter with which you can connect any device: tablet, smartphone, player, etc.
- All that remains is to activate the AUX mode and you can listen to music.
How to make an AUX jack
From the above, you can understand that the radio must have an AUX input. But what if there is no such connector, how to connect an external signal source in this case? There is a way out of this situation, and you can do everything with your own hands. For this we need:
- audio jack (standard 3-pin stereo jack);
- wire for connections (2 in the screen);
- soldering iron and everything necessary for it (solder and flux);
- multimeter
Once everything is prepared, you can begin dismantling the device. Let's look at the whole process using the standard Toyota Avensis radio as an example. To remove it you need to:
- Pry the decorative strip from the end on the right, pull it along its entire length and remove it.
- Remove the connector from the button responsible for heating the rear window.
- The radio is secured with two bolts. To unscrew them you need to use a screwdriver with a magnet. Otherwise the bolts will fall behind the panel.
- To ensure free access, the handbrake must be raised.
- Move the selector to the central position and press the Shift Lock button, while the ignition should be turned off. In the corner we pry up the selector panel by snapping the pistons.
- Disconnect the connector going to the ashtray and remove the panel.
- More fastening bolts will be visible from below, which we carefully unscrew.
- We take out the radio so that access to the connectors on the rear panel is provided.
- Disconnect all connectors.
- Remove the brackets (left and right).
- Using a flat-head screwdriver, pry up the plastic locks on the front panel, and then remove the panel itself.
- There is a seal under the panel, which we also remove.
- We unscrew the bolts that connect the front panel to the side walls and the player. After which the walls can be removed to the side.
- Remove the back cover of the radio and the top of the player.
- You need to carefully lift the player, after which two cables will be visible and accessible. We take them out of the connectors and remove the player.
This completes the disassembly process of the device. But before you connect the AUX connector, you need to understand the board and find two points (RCH and LCH). These points correspond to two channels (outputs) of the player to the head unit. After the points are found, perform the following actions:
- Take 3 wires of different colors ( best option- shielded pair of cores) of small cross-section and length of about 0.5 m.
- We connect one of the wires by soldering to ground.
- We solder the remaining two wires to the right and left channels. For soldering, use a low-power soldering iron of 25–30 W.
- After the wires are soldered, you should write down which color wire corresponds to which channel.
- The wires are wrapped in a heat-shrinkable tube.
If the question is about introducing an AUX connector into a cassette recorder, then the process is not complicated. On the front panel of the device there is a volume control with 3 pins arranged in a row. We solder wires 25 cm long to the outer terminals. It is advisable that the wire be shielded, which will avoid interference. The wires from the device are routed outside. Alternatively, you can make a small hole in the side wall for them. All that remains is to connect the audio connector and our marking will come in handy so as not to get confused with the channels. When the wires are soldered to the connector, select a convenient place to attach it.
Upon completion of installation, check the functionality of the speakers in radio mode. To supply an external signal (from an mp3 player, smartphone or tablet), use an appropriate audio adapter that connects the audio output of one of listed devices with AUX input of the radio. In this case, you need to turn on the CD on the radio to activate the channels.
Video: How to install AUX using a Kenwood radio as an example
Connecting a flash drive to AUX - is it possible?
Many people ask the question: is it possible to connect a flash drive directly to the AUX input of the radio? The answer is simple - you can't. And all because the flash drive needs power, plus there is simply no sound signal output from this type of media. To play music from a flash drive, you must have a reader. Those who buy an adapter of this type: an audio jack on one side, a USB jack on the other, connected by a piece of wire, will be disappointed. Such an adapter will not work for the same reasons as listed above. In this case, it is necessary to purchase a special adapter, which is not just a piece of wire, but a device assembled in a separate housing.
So we looked at possible ways obtaining a USB connector for connecting a flash drive to a CD or cassette player. In fact, there is nothing complicated about this procedure. The main thing is not to rush during the soldering process, perform the actions carefully and connect the wires to the appropriate points. At the same time, the costs, compared to purchasing a new radio, are minimal.
In order to be able to connect a flash drive to the standard radio, it is not necessary to buy a new expensive device. It is enough to make simple modifications and you can listen to music both from a flash drive and from other signal sources. This will require minimal skills in working with a soldering iron and a step-by-step procedure.
Of course, you can go to the store, spend about $50 or more, buy a new one and not fool yourself. But this is not our method!
So, let's take a Chinese MP3 player that reads flash drives and memory cards. There are a lot of options. The most important thing is that it has a headphone output. From there we will record the audio signal. You can use a car FM transmitter with a separate audio output. Its advantage is that the transmitter comes with a remote control remote control. Let's disassemble the player.
We disassemble the car radio and remove the CD drive or tape drive (which one). Of course, provided that they are not workers.
We solder the positive power wire of the MP3 player through the “Krenka” to the contact of the car radio, on which, after turning it on, voltage appears (+12 or +9 V).
Don't forget about the voltage converter from 12 to 5 V. FM transmitters have a built-in voltage converter. MP3 players may not have it at all. You'll figure it out locally. In any case, it is better to use LM7805 or the domestic analogue KR142EN5A.
After we have sorted out the power supply, we connect the sound. We take a shielded wire (the kind that usually comes from the head of the tape drive) and connect the audio output of the MP3 player to the AUX input of the car radio. WHAT? Is there no such thing? Then it's a little more complicated. We are looking for a pre-amplifier on the board (the same shielded wire from the head goes to it). We look at the brand of the microprocessor to find where its audio signal output is (Google will help you). We solder the isolation electrolytic capacitors and feed the audio signal from the player there.
Now we mount the MP3 player board into the car radio casing. After removing the tape drive (or CD drive), there is plenty of space there. The main thing is to prevent a short circuit.
The USB output is output to the front panel, into the hole where cassettes or disks were inserted.
The player control buttons are connected to unused control buttons for the tape drive or CD drive. There are only three of them - “play/stop”, “next track” and “previous track”. In the case of a cassette deck, we install suitable mini-keys opposite the button rods.


Nowadays, no one can be surprised by a radio in a car; it’s difficult to see a car without it. The latter's screen displays not only sound data. In some versions, it displays speed, data about external light lights and much more. But in our digital age, not every one of them is able to support listening to music from USB. It's good that many car radios can connect this type of input.
Why connect USB
Music in cars appeared back in the 70s of the last century. At first these were simple radio receivers with a small range of received waves, and they were installed only on executive Volgas. For the owner of a medium-sized Zhiguli, such luxury was unavailable for a long time. With the development of industry, they added to the radio receiver cassette recorder, which was later replaced with disk support. Subsequently, even a CD changer appeared. The newest cars have radios with the ability to listen to music via USB.
But what should the owner of a car produced 5-10, or even more years ago?
Buy a new radio?
No - modernize the old one.
But before we talk about such modernization, let's figure it out.
What is a USB input on a radio?
This input on it, like on any other household audio-video equipment, allows you to connect ordinary flash drives according to the 2.0 standard. But this is clearly not enough. The radio must detect the flash drive, understand the format of what is recorded on it, and play it back. No one argues that if the radio has an audio input, you can connect the output from your smartphone and download music to it.
But what happens when you get a call? In most cases, they unplug the cord from the headphones and talk without them. This simple operation requires both hands and distraction for a few seconds. If this happens in a fast moving car... The situation on the road changes quickly, you get distracted... and get into an accident.
There are several solutions to this situation:
- The radio (sometimes the CD player) may have an external input on the back side, plug a special adapter into it;
- you can remove the old player and put an FM modulator in its place;
- solder USB extension cable to the radio board.
Option with adapter
Most factory radios may have a socket on the back. All work comes down to several actions:
The advantages of this solution:
- The radio will “decide” that you just changed the player. Accordingly, if the radio supports MP3 playback from a disc, it will be able to play it from a flash drive.
- Some adapters, in addition to USB support, have memory card support. You can remove the card from the smart card described above and insert it into such an adapter.
But there is also a minus
Control protocols are different for different cars, so when you change cars, you will most likely have to change the adapter. But when buying a new car, this issue is not so important.
Modulator: how to connect and use
An FM modulator is a device that can transmit a signal from a flash drive (as well as a memory card) over a radio channel. In general, it is plugged into the cigarette lighter socket and adjusted to a certain frequency. The same frequency is adjusted on the radio receiver. You (and your neighbor nearby) can listen to music from a flash drive. But for a large city, where the radio range is jam-packed, you can do it differently: install the modulator directly into the tape recorder. How to do this?
To work you will need:
- soldering iron;
- a set of shielded wires (you can take regular ones, but shielded ones will give better quality (a sufficient amount of wire will be in the original radio);
- Modulator (you can use any MP3 player). The advantage of the modulator is the presence of a remote control, as well as a built-in power converter;
- the radio itself;
- voltage converter 12 - 5 V.
Operating procedure
Nutrition
- After disassembling the radio, disconnect the tape drive or disc player.
- Having disassembled the modulator, remove the microcircuit (there is only one there).
- The plus from the modulator power supply is soldered to the general plus of the radio (the contact where 12V will appear when turned on),
- Minus - to the minus of nutrition.
- USB is connected to the front panel using an extension cable.
The power converter in the modulator is different, in the player it depends on its brand.
Audio
A shielded wire connects the audio output of the modulator and the input of the radio.
There is no such input on ancient cassette players. In this case, the signal will have to be applied directly to the input preamp. It's easy to find - it's where the shielded wire from the head goes.
The wiring diagram for the amplifier chip can be found on the Internet.
For example, this is what the circuit of an amplifier based on TDA2005 looks like.
Assembly
Since in the new version only the radio receiver unit remains, the modulator can be located in the housing. If all contacts are connected correctly, then the activation of “AUX” or “Tape” is redirected to the modulator.
Video
How to do USB support and at the same time leave the old (working) player
Connect the USB extension cable directly to the car radio board
There is no need to stop specially at soldering the extension cord. The attached video shows in sufficient detail with the names of all the parts how such a cable is soldered to the radio in Wv.
Video
What to do if you need a cassette
Sometimes the electronics of an old cassette player are configured so that it can only play when the cassette is inserted. In case of modernization there will be nothing to play with. The solution is to find a diagram of your cassette player on the Internet and find out which jumper is clamped by the inserted cassette. Close the jumper, and the radio will be “sure” that the cassette is in place.
An ancient car radio lying on a shelf in a closet will last for many more years. Instead of buying a new one, add USB support to the old one.
Who hasn't thought of building an mp3 player into an old but still beloved boombox or music center? Doing this is a kind of pleasure, because installing a regular player into old audio equipment is oh so difficult. More convenient options for modernization are offered by our Chinese comrades. On many trading platforms You can find built-in audio modules equipped with a combined digital-to-analog converter, and sometimes with a miniature amplifier.
Devices of this kind can have different functionality: from the simplest decoder with a single USB port for a content source to advanced models equipped with their own LCD display, control panel and additional connectors. The most practical, cheapest and at the same time fully functional version of such a module from Aliexpress was considered on mySKU.ru.
The board's specifications claim MP3 playback up to 320 kbps at sampling rates up to 48 kHz, WAV and even five-channel DTS. This option is not equipped with any additional interface, except for analog audio output and a single USB port. It turns out to be a kind of mp3 player that requires a power supply and speakers (also an amplifier, actually). It is they that will be used from the old audio device (a kind of second life, but, alas, the operation of the board and the music center itself can only be coordinated separately).
After receiving the parcel from distant China, you will need to partially disassemble the animated tape recorder to determine where the board can be mounted. Installation must be done in such a way that the control panel and dataport can be used. If you have the appropriate skills, you can unsolder these components and place them on the wires - this way you can place the board in more convenient places. Most often, such modules are placed in cassette compartments, next to the power buttons or in disk drives. You can find more interesting places.
Then we take a coil of wire. It is needed to connect power and audio output. This is the most difficult operation. You will need some knowledge of circuit design and the circuit diagram of the existing device itself, which can be downloaded on the Internet. If you are not strong in circuit design, contact a friend who is more knowledgeable in this topic, who will help you find the power pins where the two wires will be soldered. Be careful! The board consumes 5–12 V DC, no more.

Having stretched the wires to the installation site, we will begin placing the board. You will probably have to make a cut in the housing, which will require a Dremel or similar brand of tool. For the simplest placement, you can use a regular cassette compartment, then the port will be accessible when you open it.
A small detail remains - connect the audio output from the board to the output of a music center or tape recorder. You can use the circuit, find the output stage on it, and solder the wires from the audio output of the USB board to them. You can do it easier and output them to the AUX audio input or similar (if, of course, it is available).
Now you just need to connect power to the board with a USB output, then insert a flash drive with music and carry out the first test of the updated boombox.
Of course, the complete design is very dependent on the functionality of the Chinese device and will not be able to completely replace any modern music center with NFC, Wi-Fi, the ability to work with streaming services and many software features to improve sound. But, on the other hand, is all this necessary?

At the time of writing, the module cost about $5. We accept the amplifier and speakers as free. If the sound suited you initially, it will not change radically for the worse. So it's not a bad way to upgrade your audio system.