Do you want to feel like an administrator? BUT! How to install a script (hype, bux or other)? In this article you will find all the answers.
Hello, dear readers of the blog site.
Do you want to have your own investment game? Do you want to feel like a project administrator? Don’t know how to install the script correctly? Don't worry... In this article I will tell you everything about it in detail.
So, let's go...
First of all, I would like to say where you can download such scripts from. I have identified three projects for myself, which, in my opinion, are the best and without viruses. You can find out about them in my other article. Link .
We downloaded the finished script, which is in the archive. Open it and copy all files to separate folder. Next, we need to buy our own hosting and domain. I use Hostia. High quality, reliable and most importantly, very cheap. In one word, “I recommend.”
I won't dwell on this because not every hosting has the same control panel.
My hosting supports Direct Admin, but be aware that you may have a completely different management system (for example: ISPManager, ZPanel, WHM/CPanel). If you have one of them, then there is nothing to worry about. The entire process of installing the script is no different.
Instructions for installing a script (investment game, HYIP, book)
Step 1. Upload the script itself to the hosting
For this we need one program: FileZilla(I recommend) Total Commander or Notepad++. Download any one to your computer, launch it and create an FTP connection. I forgot to say that hosting control panels also have a “built-in” file uploader. You can use it. I chose FileZilla for myself. The program is stable and completely free.
As for FTP, here we need some data, which you can easily find out from your hoster:
- Login.
- Password.
- IP Address.
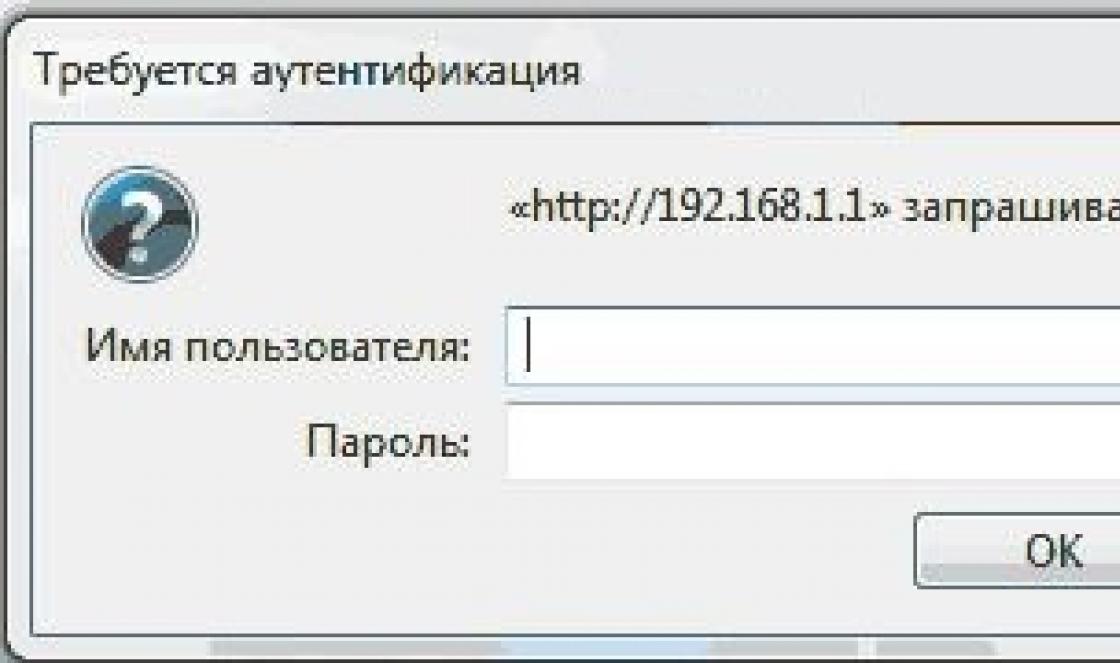
If you have problems logging into the admin area, write in the comments. I'll help!

Waiting for the download to complete...
Step 2. Create a database
Go to the “Databases (MySQL)” section and click “Create new” or “Create database”. We enter a name and password. Fields: Database Name And DB Username can be filled in the same way. Attention! Remember your login and password or write it down somewhere. We will need them when we change the config file. I’ll show you with an example what it looks like in Direct Admin. See:


Step 3. Import SQL into our database
Each script has a file in "SQL" format. It is possible that there may be exceptions and such a file simply does not exist. I don't know, I haven't encountered this before. But! If you are so lucky, then simply skip it (see Step 4).Now we need to find in our personal account « PhpMyAdmin" The utility is used to import or edit MySQL DBMS databases. We go into it, connect (if you don’t have an account, then be sure to go through a simple registration).
We go in and on the left we see a list of databases we have created. Select the one you created in the second step. And then we do everything according to the screenshots:


Step 4. Change the file config
In the script folders we look for a file called config. In HYIPs, look for the file in the “classes” folder. Found it? Great! Let's open it. We see:
public $HostDB = "localhost";
public $UserDB = " Database Username"
;
public $PassDB = " password"
;
public $BaseDB = " Database Name"
;
We replace our data and save. This way we connected the script to our database.
All friends! Congratulations! The script is completely installed!
And now a small addition...
Free scripts from the Internet often have holes. Be careful! Check files for viruses. Also remove any additional references in the script files. They often look like this:

But still, if you are unable to install the script, we can do all the work for you. For example, install a script of any complexity, connect additional payment systems, make the script unique, etc.
Thank you very much for reading the article to the end. . There will be many more different treats ahead!
Welcome to the site site!
Today I’ll write an article about how to set up a script using an example Joomla engine AndCpanel control panels.
Often on the Internet you can find various scripts that are sold for money, orfixed for free. Usually these scripts look like a .zip or .rar archive in whichthere are folders and files, as well as a .sql file databases.
We will talk about scripts that have already worked on some other hosting and domain andyou just downloaded it from the Internet.
This article will also be useful for those who want to transfer their website or blog to a new domainor hosting. Including resources made on Joomla.
In order to install the script on your hosting, you need an FTP client program (I recommend the free FileZilla), connection data that the hoster sent you after your registration, as well as access to phpMyAdmin of the hosting on which the script will work.
You can also use the tools provided by the control panelCpanel, IspManager or another, rather than using the program for FTP access. In CPanelsuch a tool is called a “file manager”.
Well, let's get started!
First you need to register a domain if you don’t have one, or create a subdomain onyour work site. When creating it, you must come up with a password and specify a nameregistered domain or subdomain. You also need to create a databaseuser to it and set the user password. Don't forget to save all data
created domain and database to yourself, somewhere in a safe place. If on your hostingThis is your first website, so there is no need to invent and register anything when registeringOn hosting you are given a domain and all the other data necessary for work. If
this is true, just “upload” the script to the public_html folder on your server.
If, after registering with hosting, you still registered a second domainsecond level, you need to wait until it is activated - this usually happens inwithin one or two days. If you created a subdomain on a running domain, itIt activates immediately, and you don’t have to wait two days.
Next, open the FTP client, enter the data to connect to the server, connectand upload it to the public_html folder or to the folder of your domain that you created yourselfscript, that is, all folders and files as they are.
Files can be uploaded in two modes, either binary or text. This is veryimportant, because if you upload a binary file in text mode, then the file encodingwill be violated, and subsequently the information on the site will be displayed incorrectly. And whatNo matter how much trouble you have, set auto-detection in the FTP program settings. Then that's itfiles will be downloaded in the formats they need. If you are uploading files through the panelcontrol, you don’t have to worry, the system itself will understand which file is in which formatneed to download.
Once the download is complete, open the configuration.php file for editing, andWe indicate the database name, username, user password and localhost.
It looks something like this:
public $host = "localhost";
public $user = "username";
public $password = "user password";
public $db = "database name";
Also replace, if necessary, the database prefix with a new one.
It looks something like this:
public $dbprefix = "A5ht42S_";
Also replace the path to the logs and temporary folder of the script:
public $log_path = "/home/your nickname /public_html/your site.ru /logs";
public $tmp_path = "/home/your nickname /public_html/your site.ru /tmp";
Now take the database file and open it with notepad, or even better with a programnotepad++. We find the line where someone else’s or old address of the site is indicated, where previouslythe database worked, and replace this line with the site address that you registered.To do this, right-click on the .sql file and select from the context menunotepad++, if of course you have it installed, or just a notepad, everyone has it Windows versions.
Next, click on “search” - “find ...” - “replace” and in the “find:” field enter thatthe address of the site on which the script previously worked, i.e. what needs to be replaced. And in the field“replace with:” you need to enter the address of the site on which you are installing the script and towhich needs to be replaced. Next, click the “replace all” button and the program will run in a secondreplaces old data with new ones. You will also need to replace the name in the databaseuser and database name, as well as the path to the site folder, if necessary. AfterSave this and close the file. Don't forget to rename the .sql file to the database name,which you created. In this case, the file extension must remain .sql.After that, go to phpMyAdmin, select the one we need on our computer
edited database and click “import”.
It is also necessary to make changes to the .htaccess file, for example, if it containsredirecting the site address from www to without www, that is, you need to insert a new one in the fileyour website address instead of the old one.
After this, we open our website in the browser at the new address and enjoy its work already on your domain.
PS: In general, the whole point comes down to the fact that you need to replace the old ones everywhere, in all filesdata for new ones. Typically these are two files - a configuration file and a database file.
If you have any questions or want to add anything to the article, write everything to
The initial steps for installing almost any script on any normal hosting are the same: you need to create a database, upload script files to the server, and link the domain. This post will provide detailed instructions for installing an online store script (or any other CMS) on BeGet hosting. This hosting will come in handy: 30 days of free trial access will allow you to practice to your heart's content.
These instructions are suitable for almost any hosting. Since the control panels of all hosting sites are similar. There may be differences in menu item names and dialogs. But I think you’ll understand: all hosting services perform the same function and changing the names does not change the overall meaning.
So, you registered on the hosting, you downloaded the distribution kit with the script. Let's think about what we will do next. A script is a set of folders and files. These files contain instructions for managing the site. What is a website? It’s a collection of data: text, pictures, products, manufacturers. The script will use a database to store this data. Most often MySQL. This means that before installing the script, we need to create a database on the hosting and provide the script with access parameters to this database. This is done once during installation. The site must also have a unique name: domain name. This name is associated with the folder with the script.
It turns out that the site is physically a folder with a script that has access to the database to store all the information. You can link any domain name to this folder. From here the chronology of our actions will be like this:
- register for hosting by choosing any tariff (during the test period the tariff is not important, but then you can change)
- download the script from the official website or from ours.
- create a database on hosting
- create a website (directory for the script) and link the domain name
- upload script files to hosting
- start installation
I think it won’t be difficult to register for hosting: we select the Start tariff (in principle, it doesn’t matter which one, if it gets crowded, you can change the tariff at any time), enter your name and E-mail in the form and wait for a letter in which the passwords for access will be indicated for hosting. After registration, you have 30 days to try, if you don’t want to use hosting, then after 30 days your account and sites will simply be deleted.
After registering and logging into hosting, we see the hosting Control Panel (CP):

We create a database on the hosting
In order to create a database on hosting, you need to click on the MySQL icon in the PU. This will open the database control panel:

Here we specify the database name and password. Click the Create button. The database has been created. All we have to do is remember the entered data. We will transfer them to the script during installation. Please note that there is a prefix before the database name and the name of the database will be considered the name that is obtained as a result of gluing this prefix and the name that you entered. Later, when installing the script, you will need to enter: database name, user name, password. The username on this hosting is not entered - it matches the database name.
Create a website (directory for the website) and link the domain name
In order to upload script files to the hosting, we need to create a separate folder for the site: after all, several sites can be located on the hosting - the files of each should be located in a separate directory. When you create an account on your hosting, one folder is automatically created: public_html. We will upload the script into it. If in the future you need to create a second site, then use the Sites item in the user interface:

In order to create a site (directory), specify the name and click the create button.
Nothing complicated. In the future, we will see the created directory in the file manager when uploading script files to the hosting. Also in this control panel item you can link (attach) one of the existing domain names to the site directory. In our case, a free third-level domain name of the form AccountName.bget.ru should be linked to the public_html directory. We receive it when creating an account. In the future, you can link a normal second-level domain name to the already created site.
Uploading script files to hosting
There are two ways to upload a script to your hosting: via file manager hosting control panel or via FTP.
I’ll tell you how to upload (upload) a website to hosting. Moreover, I will post two instructions:
- BRIEF REFERENCE - for those who fumble, they just need a hint;
- DETAILED INSTRUCTIONS - for those who are in the tank and don’t understand anything at all. We were all like that - it's normal. I posted everything, including links and pictures. Enjoy it for your health!

Brief information on how to upload a website to hosting
Quick and to the point:1) Buy hosting (). There is trial period(I think 5 days), by the way - just to practice uploading sites and pages. With the purchase you receive three parameters: Host, login and password. They are used to connect and download.
2) Download the FTP client (program). The most popular and convenient is FileZilla. You launch it. And yes, if FileZilla does not install (this happens on ancient computers and netbooks), then try Total Commander. The principle of operation is the same, but the interface is DOS. And so everything is the same.
3) Enter in the top field: Host (or Server), Username (or Login) and Password. They are sent by the hoster when purchasing hosting. See email.
4) THE LEFT PART shows the explorer and the contents of folders on the computer. The RIGHT PART shows the explorer and the contents of the folders on the hosting. A message will indicate that you have connected, and a folder with the name of the site (domain) will appear in the window on the right.
5) On the left, open the folder from where you will upload files to your hosting. On the right, go to the folder with the name of the site on the hosting side, for example, "mysite.com". Then the "www" folder.
6) On the left, select the file to upload, right-click on it and click “Upload to server”. Congratulations, you have uploaded a page to the Internet! Now you can check how it is displayed in the browser.
PLEASE NOTE:
IMPORTANT #1: The root folder of the site is "www". It should contain the MAIN PAGE OF THE SITE, that is, the file index.html or index.php. As well as other files and folders, respectively, if they exist.
IMPORTANT No. 2: during subsequent uploads, pay attention to which folder you are uploading the file to! if, for example, you want to upload a picture to the images folder, make sure that it is open on the hosting side!
That's actually everything about how to add a website to the Internet. If the short instructions didn’t work out or something is unclear, read complete guide below.
DETAILED INSTRUCTIONS on how to upload a website to hosting
For those who didn’t understand anything, with all the details, pictures, explanations and screenshots!
So to speak, instructions for girls (blondes, brunettes and redheads, since ladies with dreadlocks and blue hair already know how to do this).
My dears, I didn’t want to offend anyone, but the first sentence with notes weeded out all the men: R. What's important!
IN lately several times I was faced with the fact that those who graduated online courses by design, they don’t know how to upload sites to hosting.
For me, once upon a time, uploading a site to the Internet was also a sealed secret... But once you try, the situation becomes clearer.
A website is actually a folder with files that can be laid out in HTML and sometimes plus PHP* and scripts (the software part in the form of code).
By default we take the situation:
- You ALREADY HAVE A READY website, it’s just on your home computer, and not on the Internet.
- You bought a domain for it, and possibly hosting. ( - but you can choose any office. The principle of placing websites on the Internet is the same everywhere).
Let's stop here for a moment to explain.
The site might look like this:
1. index.html (or index.php) – home page site (the name index is given to the main page of the site and any default folder on all sites on the Internet)
2. index.css – file where the page style is specified (background color, window size, font)
3. images folder – pictures for page design
4. page1.html (or page1.php) – any page of the site, but not the main one
5. page2.html (or page2.php) – any page of the site, but not the main one
6. page3.html (or page3.php) – any page of the site, but not the main one
Let's say something like this: 
REMEMBER! YOU UPLOAD THE FOLDERS THAT THE PROGRAMMER GAVE YOU! We take this set just as an example.
So, you have already purchased domain and hosting. Usually they are sold by the same comrades on the Internet (hosters). But you can buy from different ones. I personally like the company Ukraine.com.ua - they have inexpensive domain names + good technical support, which is important when questions arise about the operation of the hosting.
A domain is the name of a website on the Internet, for example: mysite.com, http://freetravel.com.ua, ukr.net.
Hosting is the “ hard drive» on the Internet, where your folder with the file will be located and will be available to all Internet users around the clock.
So, you buy yourself a domain name. It will be assigned to you within two days. Then you buy hosting on the website Ukraine.com.ua. By the way, they have 5 days free use hosting - for testing, just a little.
If you have already purchased hosting, you will be sent a letter with the server name, login and password for using hosting:
To access via FTP*** use the following details:
Server: mysite.ftp.ukraine.com.ua
Login: mysite_ftp
Password: A0a0A0A
These passwords are not used on the hosting site, but for FTP clients (programs that allow you to upload a site to the hosting, and essentially to the Internet).
There are two main ones:
FileZilla – I RECOMMEND!
Total Commander - use if your computer is rubbish and FileZilla is not installed on it.
Download the FileZilla program, enter your passwords and connect.
Step by step on how to upload a website to hosting.
Uploading files to hosting via FileZilla: 
The fact that you are connected is indicated by the appearance of your domain folder in the field on the right: 
A folder with your domain appears on the right. Go into it, and then into the www folder! 
The index file (the main page of the site) should be located in the www(!!!) folder. To upload it, you need to open the www folder on the right! Then right-click on the desired file and select “Upload to server.” 
It is important that the folders on both sides clearly match. If you want, for example, to add a new picture to the images folder, then in FileZilla the images folder should be open on both sides. 
After you have uploaded the file through FileZilla, you can check everything on the Internet by simply entering the address into the browser. Everything should work. If something is not displayed, it means you haven’t uploaded it! Be sure to check the uploaded files online.
Solving problems loading a website onto a server.
If the connection does not occur, the issue may be a dynamic IP. Relevant for those who use mobile or other people's Internet.
The fact is that Ukraine hosting provides its users with additional IP protection for your Internet. If it changes, then it also needs to be changed on the Ukraine.com.ua website in your personal account in the SECURITY section. Actually, this is another reason why I like hosting, because in order to access the site, you need to go through identification via an SMS code. This means that no one will get to my site))).
How to change the registered IP!
Log in. Go to your personal control panel on your hosting:

Go to the Security section 
On the left on a white background are the IPs that can make changes, and on the right is your current IP: 
If they do not match, add it to the white field: 
It should appear: 
Now you can upload your website to your hosting using FileZilla (or Total Commander). The sequence is shown above.
By the way, Total Commander is used in the same way as Filezilla, but it has a slightly different interface (DOS, almost). But in principle, the site owner “doesn’t need checkers, but to go,” that is, to upload the page to the Internet!
________________________________________ ____
Reference:
*HTML or PHP formats. The files have the corresponding extensions: index.html or index.php If you can open the index page with a browser, this is HTML :) PHP files can only be opened on a server (Internet hosting or local server, which is installed on a work computer - but if you are not a developer, you don’t need it).
** Content management systems are used by those users who cannot (or do not want) to write codes for the page themselves. Essentially it's just using a user-friendly interface.
*** FTP (File Transfer Protocol). Uploading a website to hosting is the same as uploading it to someone else’s computer. Who would allow this to anyone? For this they use FTP - it allows you to upload certain files to a certain location and that’s it.
For a long time, it took me a long time to transfer a site to another hosting if the script worked with the MySQL database, It was quite a tedious and difficult task.
Even if I did this and in the end everything worked, it was like dancing with a tambourine.
Short:
- Install the script on the new hosting. During installation, we create a database.
- We dump the database on the old hosting
- On the new hosting, we delete the newly created database and create it again.
- Import the data from the dump into the newly created database
- Voila! Everything works.
And now in more detail, for those who do not understand.
If it seemed to you that what is written above is “dancing with a tambourine,” I will describe in detail, with pictures, what needs to be done.

I think you already know how to install the script on your hosting. If not, then read more about installing the script here.
During the installation process, the script will ask you to indicate which MySQL database you want to install it into (database name), the database user name (MySQL login) and its password (MySQL password). Those. you need to create a database in your hosting control panel, create a user, and link this user to the created database.
You can read more about creating a database here.
As soon as you create a database and enter all its data in the appropriate script dialog box, the script will install and write its initial data to the database.
2. On the old hosting we dump the database.
Let's do it very simply. - Log in to your hosting cPanel. - We look for the phpMyAdmin menu and click it.

We see this window.

___________________________
Don't forget TUNKILK here
___________________________
In the left column, find and click on the name of the database that you want to save (make a database dump).
We see this window.

IN top menu search and click the Export button.
We see this window.

Click OK.
That's it, the file download begins. The file will look like this: host_info5.sql
This is a dump (archive) of your database.
Why delete and then create again, you might think?
And this is very important! Without doing this before, I could not upload my dump to the new hosting, an error popped up.
So why are we doing this? During installation, the script created its own database with its initial data. But we don’t need them, we want to upload our database. But it is not downloaded over an existing database, or is downloaded with errors.
This is why we first delete the database created by the script, and then import our database (our database dump).
If you don’t know how to delete a database, you can read here.
To upload your dump, you need to create the database again, we just deleted it. It's simple, but those who are not in the know can read this post.
We will now import our dump into the newly created database (under the same name!!!).
Log in to phpMyAdmin again. In the right menu, select (click) our database. (see pictures above for an analogy) And now click the Import button on top.