Hello, Habra residents!
I've been keeping a calendar on Google Calendar for quite some time. It seemed practical to me, because you can work with it using a phone, a web interface and many applications.
But recently, in addition to the personal calendar, the need arose to simultaneously maintain a working calendar of meetings, which was maintained locally using Thunderbird/Lightning. This blatant injustice upset me, so I decided to combine the management of all calendars in the way that is familiar to me - using any device connected to the Internet.
So, what is the input:
- Personal calendar in Google Apps
- Work Calendar in Lightning
Details and necessary crutches are under the cut.
Create and merge calendars in Google Apps
First, we need to register for a “work” address email a new Google account (not Gmail). The easiest way to do this is from the Google Calendar page. This is done, by and large, so that the people you invite to meetings receive notifications from their “work” address.After this, you need to provide access to this calendar from account Google Apps. This is done as follows:
Then you should enter your email address Google mail Apps, and give yourself full access.

After adding this calendar to your Google Apps account, we will be able to manage two calendars at once from one account.

Adding Calendars to Lightning
To add calendars to Lightning, you can take two routes. The first way (also easy) is to install the Thunderbird add-on. The calendar address is taken from the same page where access to the calendar was opened.The second way is even simpler. Use CalDAV. To do this, when creating new calendars, you should specify a path to them like: www.google.com/calendar/dav/%Your Google ID%/events. Access is carried out using the https protocol.
Once you add calendars, Lightning will display them.

And, most importantly, we synchronize everything with Windows Phone 7
To do this, you need to connect your Google account on your phone. This is done in the “Settings → Mail + accounts” item.Now, actually, the most important crutch. From your phone, or from any browser that allows you to replace the User-Agent with a “phone” one, go to http://m.google.com/sync/.
Google may throw an error saying: Google Sync is not working on your device. This can be treated by clicking on the “Change language” link and selecting English.
Settings must be changed for the Windows Phone device.
Here, with a checkbox, we select the calendars that need to be displayed on the device. Obviously, you can select not only our “working” calendar, but any one to which you are subscribed.

After which on Windows device Phone should be deleted and a Google account created again. After synchronization, all calendars selected in Sync will be displayed in the calendar settings.

05/25/2012 Romchik
Good day! In this article I want to tell you about the settings mail client Thunderbird. Or more precisely, how to add a calendar to Thunderbird and synchronize it with Google calendar. What is this for? Many people use Google Calendar to plan their events, meetings, events and tasks. And me too. And who doesn’t use it - try planning it saves a lot of time and effort. But the WEB interface is not very convenient, for one thing, you don’t always have access to the Internet at hand. That's why I started looking for an offline calendar with the ability to synchronize with Google. And how glad I was that such a thing was found and found as an addition to my favorite email client Thunderbird. Now I have both an email client and a calendar in one program. Well, enough words, let's get started setting up Thunderbird
The first thing we need to do is install Thunderbird, for those who have not done so yet. You can download it from the official website. Thunderbird is available for Windows, Linux, Mac OS, and FreeBSD.
Now let's install the Thunderbird add-on - calendar.
Installing a calendar in Thunderbird
Go to Tools->Add-ons

In the “Get add-on” tab, look for “lightning” in the search bar and select Lightning 1.4 (this is latest version at the time of writing this article):

After installation you need to restart thunderbird.
Now let's see what we got. Go to the Events and tasks menu -> Calendar or press Ctrl+Shift+C:

And we will see the default calendar.

Creating a calendar that syncs with Google calendar
In order to organize synchronization of the calendar in Thunderbird with the calendar in Google. You need to install one more add-on - Provider for Google Calendar. Let's install this add-on by analogy with installing Lightning. Only now we look for Provider for Google Calendar and select Provider for Google Calendar 0.13 (this is the latest version at the time of writing this article)

Restart Thunderbird. Now we are all ready to create a calendar that will sync with Google Calendar.
To do this, go to the mail tab and go to any mailbox or to “ Local folders” and click “Create a new calendar”:

In the “Create a new calendar” window, select “Online” and click “Next”.

Now we need to go to the Google calendar WEB interface, go to settings and select calendars:

Select the calendar with which synchronization will occur or create a new one:
In the next window, look for “Private address” and click on “xml”:

Now we copy the address.
It was explained how to synchronize contacts, incl. using Yandex services. But in addition to working with contacts, it can be very useful to synchronize your calendar. Thanks to this, you can have your up-to-date schedule on all your devices and thanks to this you will not miss an important event or meeting. Now we will tell you how to synchronize Yandex calendar in such a way that you can work not only with calendar events, but also with your to-do list while on the go. On the Yandex website, this to-do list is available for editing in mailbox, while the calendar is located on a separate page. However, both of these resources are stored in the same account and can be used on mobile devices when synchronized.
Technical tools for synchronizing your calendar and to-do list
Calendar entries and tasks are synchronized in the same way that contacts are synchronized. Newer data is stored on devices at the time of synchronization, and thus up-to-date information is maintained everywhere. If the CardDAV server is usually used for contacts, then for the calendar and to-do list there is its brother - the CalDAV server. As you might guess, the three letters Cal are short for the word Calendar. And such a server is publicly available on Yandex websites. And of course, if you want to use local synchronization, avoiding public servers, then the Baikal server mentioned in the last article allows you to create CalDAV accounts and synchronize them over the network.
Calendar entries do not contain a wide variety of fields. Therefore, with them there is usually no such problem as with contacts - the problem of partial incompatibility on different systems. The only stumbling block is Android smartphones - they do not have tools for working with tasks as standard, and there is also no means for synchronization via DAV servers. Therefore, for Android you will need to install additional software.
Having an account on Yandex, you can use the online calendar and tasks using the following software:
IN Windows system you can work in the emClient application, given that it synchronizes, among other things. and contacts. If you don’t need contact synchronization, then you can use a completely free one, which, thanks to the Lightning extension, allows you to work with a common calendar and tasks.
iOS devices by default can work with the CalDAV server, so they do not need to implement special calendar programs.
For smartphones and Android tablets no completely free solutions. Existing demon paid application CalDAV-Sync Free does not sync the task list. For such synchronization, you will need to purchase an inexpensive paid version of this program and use it in conjunction with the free OpenTasks application from the same author. The second option is to use another paid app, DAVdroid, which syncs both your calendar with your to-do list and your contacts. But you will still have to work with the list of tasks in the OpenTasks program, since the standard Android calendar does not display a list of tasks. All of the above programs are available in the Play Market.
In any modern browser you can work with Yandex calendar directly through the web interface. Unlike the contact editor, the web version of the Yandex calendar has full functionality and is quite convenient to use.
Connecting a Yandex account on a computer
If you are using mail application emClient, then the procedure for setting up Yandex synchronization for this program is described in the previous article (link at the beginning of the article). If you want to use the Mozilla Thunderbird program, then to use the calendar synchronization feature you will need to select the main menu item “File / New / Calendar”.
The next step is to select the “Online” option.

We indicate the CalDAV server type and its URL – https://caldav.yandex.ru/

At the final stage you will need to specify a name.

As a result, the account will be ready for online update.

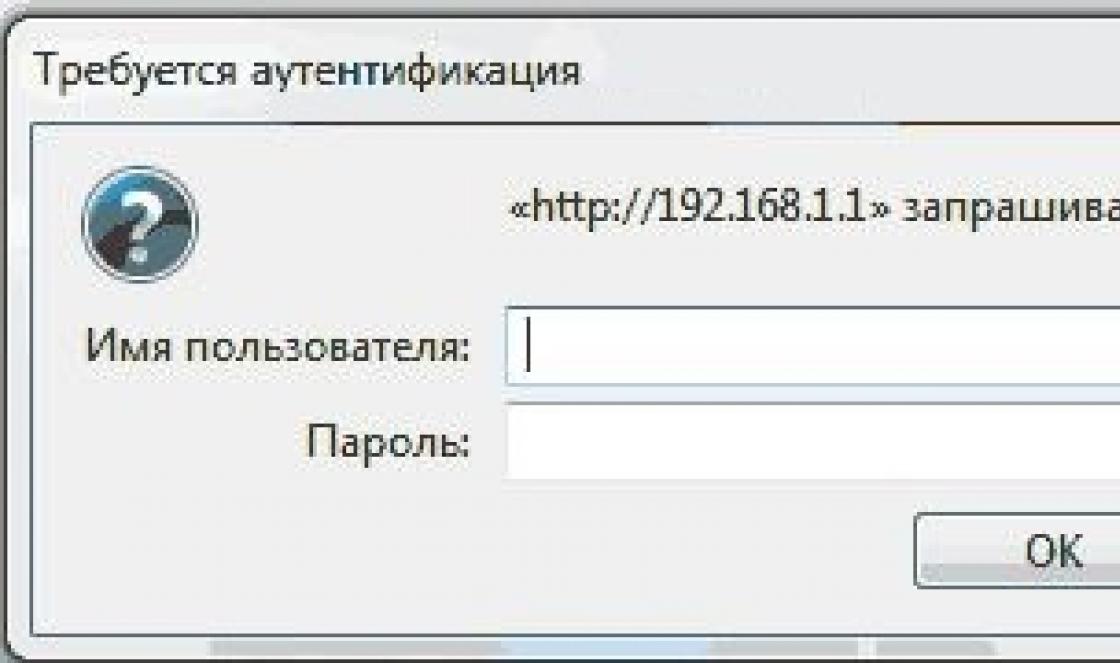
During the first communication session with the server, you will be asked for a login and password to log in.

As a result, all information received from the server will be displayed in the local calendar and task list. You can open them through the “Events and tasks” menu.

Setting up synchronization on smartphones and tablets
On iPhones and iPads, connecting a calendar account is similar to adding an account for contacts. This is done in the “Settings” / “Calendar” section. In the window that appears, select the option “Accounts” / “Add account” / “Other” / “CalDAV Account” /. You will need to provide your server login information.

On the Android system you need to use additional applications. If you synchronized Yandex contacts using the DAVdroid program, then through the same program you can synchronize your calendar and to-do list. It is enough to check both items in the CalDAV window in the account settings: “My events” and “Don’t forget”. After updating the data via the network, all events from the Yandex calendar will appear in the standard Android calendar.
But to access the to-do list, you will need to install it from the Play Store free application OpenTasks. This application was created by the author to work in conjunction with the inexpensive CalDAV Sync application. But it also works well in conjunction with the DAVdroid application.
Conclusions
Using free public Yandex servers, you can synchronize your calendar between your PC and other devices - smartphones, tablets, and other computers. You can also work with this information through the web interface - all changes made will be saved on devices by synchronizing your Yandex account. Thanks to this, you can significantly increase your level of personal organization. After all, now you don’t have to be at the computer to work with your tasks and schedule. And vice versa - it is not necessary to edit information on the small screen of a smartphone. It’s much easier and faster to do this on a computer – and it will update automatically on your smartphone.
For a long time I wanted to have a calendar planner in such a way that the events were the same on the computer, on laptops and on the phone. Today I will tell you how to use Yandex calendar using the Lightning add-on for the Mozilla Thunderbird email client. Mozilla Thunderbird will be synchronized with Yandex, accordingly, new events added to the calendar in Mozilla Thunderbird will automatically fly to Yandex and arrive on other devices on which Mozilla Thunderbird with the same add-on is installed, as well as on the iPhone. I’ll tell you how to set up synchronization of Yandex calendar with iPhone in a couple of days. And now we will install the Lightning add-on to synchronize the Mozilla Thunderbird calendar
To get started, here is a link to the Lightning add-on. As always, I have a version of Mozilla Thunderbird for Linux, the add-on, respectively, and the description of installation and configuration are all for Linux. In the Windows version, the differences are not significant.


For those who can't see
How to install in Thunderbird
Download and save the file to your hard drive.
In Mozilla Thunderbird, open the Tools menu and select Add-ons.
From the settings button menu located next to the add-on search field, select "Install add-on from file..." and find the downloaded add-on.
Specify the path to the downloaded Lightning add-on

We give approval for installation

After installing the Lightning add-on, Mozilla Thunderbird will ask you to restart - allow it
The Lightning add-on has been installed, now you need to set up synchronization with the Yandex calendar. Open the calendar that appears

We delete the existing standard calendars so as not to get confused. Right-click on an empty space and add a new calendar. Selecting a storage location for the new calendar Online


And enter the address

https://caldav.yandex.ru/calendars/(your login)@yandex.ru/events-default
After this, you will need to enter your username and password for your Yandex account in the pop-up window

On the next page we write down the name of the new calendar, for example Ya.Calendar and specify the email for notifications that the calendar will send as reminders of events
I have a suspicion that in the depths of Microsoft there is a special team of developers who specifically makes sure that everything related to the team Windows string, there were rakes, pitfalls and problems.
Examples:
- %comspec% (cmd.exe) requires that all parameters after /C or /K be in quotes. For example, you cannot do
cmd.exe /C "%ProgramFiles%\notepad2\notepad2.exe" "%USERPROFILE%\Documents\test.txt"
, necessary
cmd.exe /C ""%ProgramFiles%\notepad2\notepad2.exe" "%USERPROFILE%\Documents\test.txt""
What’s even worse is that cmd.exe disguises this jamb, and where it “notices” its call, it itself inserts outer quotes (and it doesn’t always guess). But other programs don’t know about this! For example, this is very disruptive when using the Windows Scheduler. - START "notepad.exe" - does not work. Works
START "" "notepad.exe" - "%windir%\System32\find.exe" /n "4" "test.txt" separately - works.
FOR /F "usebackq tokens=*" %%A IN (`"%windir%\System32\find.exe" /n "4" "test.txt"`) DO ECHO %%A – does not work. Works
FOR /F "usebackq tokens=*" %%A IN (`%windir%\System32\find.exe /n "4" "test.txt"`) DO ECHO %%A - ECHO 123>test.txt – does not work.
ECHO "123">test.txt – writes "123" with quotes.
ECHO 123 >test.txt – with a space.
To make it work without a space, you need to write
ECHO 12^3>test.txt
or
(ECHO 123)>test.txt - ECHO - outputs ECHO is on. or a localized phrase (in Russian - four long words). To output an empty line, you need to write
ECHO.
(with a dot together; ECHO\, ECHO], etc. also works) - If inside the block (...) there will be a comment with parentheses, for example, rem (check) , the command line interpreter will read the closing brace as the end of the block.
- FOR %%A in ("C:\test.file") DO ECHO%%A outputs C:\test.file regardless of whether test.file is there.
- Some commands do not change the ERRORLEVEL error code when called with invalid command line parameters. The most annoying examples:
- NET SHARE (at the same time NET USER – changes)
- defrag.exe (on Win8 and higher it should be launched with the /O key; on 7 this key is not supported)
- To Windows Vista There was no preset environment variable that specified the location %USERPROFILE%\Local Settings\Application Data . Vista added %LOCALAPPDATA% , but also added a folder %USERPROFILE%\AppData\LocalLow , the location of which is again not specified in any environment variable.
- Finding out the hostname is a non-trivial task. There is a variable %COMPUTERNAME% , but therealways in uppercase and trimmed if forNetBIOS it is "too long". However, it can be read from the registry, only...
- When reading keys using reg.exe, problems begin if there are spaces in the key name, since reg.exe never displays only the value - it is always displayed after the key name and value type. So, in order, for example, to read hostname, you need to write
FOR /F "usebackq tokens= 2 *" %%I IN (`REG QUERY "HKEY_LOCAL_MACHINE\SYSTEM\CurrentControlSet\Services\Tcpip\Parameters" /v "Hostname"`) DO SET "Hostname=%%~J"
FOR /F "usebackq tokens= 3 *" %%I IN (`REG QUERY "HKEY_LOCAL_MACHINE\SYSTEM\CurrentControlSet\Services\Tcpip\Parameters" /v "NV Hostname"`) DO SET "NVHostname=%%~J"
I wonder what reg.exe was already in XP (in NT4 and 2000 it was in the Resource Kit). But the XP command in the REG QUERY output separates the fields with a tab (character with code 8). Since there are no tabs in the names of the keys, such output is much easier to parse (however, you still can’t get rid of the header). Something like this:FOR /F "usebackq tokens= 2 *delims=
indicated in bold italics
must be in the text of the batch file as a single character with code 8, and not in the form of triangular brackets and letters. In this case, the number after tokens= does not depend on the number of spaces in the key name.
By the way, if you are reading the path from the registry, pray that there are no international characters there. Find them in command line- unrealistic, and they are issued by reg in ANSI encoding (I remind you that cmd.exe works in OEM), so if there are non-ASCII characters, when you try to chdir (or anything else) batch file There will be a bummer waiting. - Copying folders is an epic example of a fail (or the win command from the first paragraph?). A typical command for copying a folder in Windows:
xcopy s:\WindowsImageBackup r:\WindowsImageBackup /E /I /Q /G /H /R /K /O /Y /B /J
were you able to count the number of keys the first time? Well, ok, probably not all of them are required. Here's the minimum required so that xcopy doesn't stop somewhere in the middle and ask a stupid question, waiting for an interactive answer:/E /I /G /H /R /Y . Oh, by the way, did you use copy ? The bummer will be waiting for you unnoticed :) The copy keys are indicated before the arguments from where and where, xcopy - after the arguments. - %comspec% /U /C "ECHO 123>test.txt" writes the file to UNICODE.
%comspec% /U /C "FOR /F %A IN (test.txt) DO ECHO %A" can't read it!