D-Link DIR-320 is a router that allows you to organize wireless network to connect to the Internet. The built-in firewall protects users of the entire WiFi network. The router is equipped with additional security features (MAC filter) and encryption (WEP and WPS), which minimizes unauthorized access to the access point.
Any wireless network needs protection from connection by unauthorized persons. There are several ways to restrict access to the router. The simplest of them is to set a password for WiFi. To do this, you need to connect the router to your computer, configure it, and then proceed to set a password. As an example, let's try to set a password on the WiFi D-Link DIR-320.
Quick navigation through the article
Setting a password
A password allows you to protect your wireless network from unwanted connections. To set a password, you need to connect the router to your computer (via a special cable that comes with the kit), configure it and perform the following steps:
- Log in to the IP address “http://192.168.0.1” (you can use the standard Internet browser Explorer, in this case, depending on the router firmware, the IP for connecting to the control panel may be different - http://192.168.1.1);
- In the “Username” field enter “admin”;
- In the “Password” line, write “admin” or leave it blank (depending on the router firmware version);
- Click the “Login” button;
- In the window that appears on the left side, select the “WiFi” section -> “ General settings»;
- Check the box “Enable wireless connection”;
- Go to the “WiFi” -> “Security Settings” section;
- In the “Encryption Key” field, create and enter a new password (it is best to set the WPA2 encryption mode);
- Click the “Change” button;
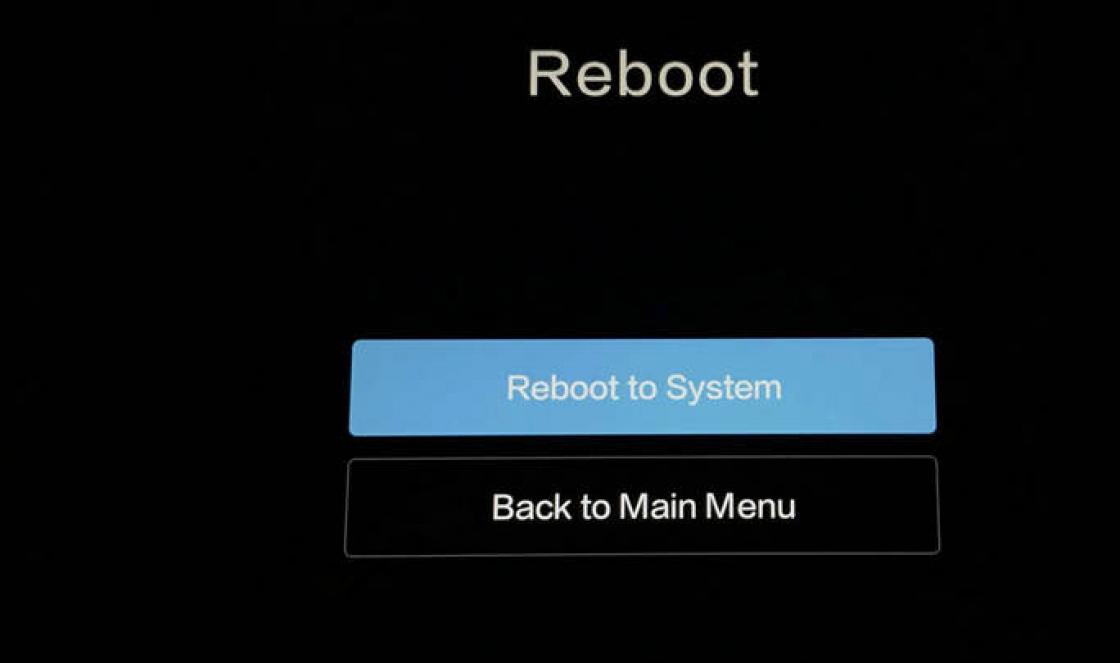
- In the upper right corner of the page, select “System” -> “Save and Reboot”.
In order for a password to become reliable protection, you must adhere to the basic rules for choosing it:
- The password must consist of at least 8 characters (letters of different sizes, numbers, symbols);
- You cannot use first names, surnames, or animal names that may be known to unauthorized persons;
- It is not recommended to use dates of births, weddings, etc.;
- Better not to use simple words and sets of numbers;
- It is advisable to change your password periodically.
The Dir-320 router - the brainchild of the popular company "D-link" - is a wireless router with a data transfer rate of 54 Mbit/s and support for “USB 2.0”.
Unfortunately, currently this model is no longer practically relevant, since the technical characteristics of the router - according to current demands - leave much to be desired.
Therefore, relatively recently - in 2011, the company "D-link" released the updated "Dir-320 NRU" with support for "WiMAX", "3G GSM", "CDMA" and a data transfer rate of up to 150 Mbit/s - for 2011 this is enough good performance.
Brief overview of the dir 320 router
Detailed list technical characteristics The router is shown in the following illustrations:


The router body is made in black with one external antenna and right side router.
The indicator panel consists of 8 elements:
- “Power” - power on/off;
- “Internet” - if the indicator is blinking, traffic is being transmitted, if it is just “on”, the connection is established;
- “Wireless network” - blinking – data is being transferred, “lit” - the network is active;
- “Local network 1-4” - blinking – traffic is being transmitted over the corresponding port, “lit” - the network device is connected;
- “USB” - “lit” - an external USB device is connected, flashing - the connection is established.
Rear panel of router dir 320:

- “LAN 1-4” - ports for connecting network devices;
- “Internet” - port for connecting to an “Ethernet line” or DSL modem;
- “USB” - port for connecting USB modems;
- “5V-2A” - connector for connecting a power adapter;
- “Reset” is a button used to reset to factory settings.
How to set up an Internet connection on a d link dir 320 router?
Prepare an agreement with your service provider in advance, as it will contain the authorization data necessary to set up an Internet connection.
To enter the router settings, you need to connect the router d link dir 320 To and enter the address 192.168.0.1 in the browser address bar. When prompted for a login and password, enter “admin/admin”.

If your router has been in use before, then before making settings you need to reset its configuration to the factory one using the Reset button. Otherwise, authorization errors may occur (for example, an incorrect login and password will be specified) and problems with setting up the device.
Below is appearance router interface d link dir 320 from software version “1-2-94”, which is stock by default.
After logging into the web interface for the first time, you need to change the administrator password (in order to secure the network from possible unauthorized entry), and then click the “Save” button.

To create a new Internet connection, open the “Network” section, then “Connection”, click the “Add” button and do the following:

- “Name” - leave unchanged;
- “Connection type” - this parameter depends on the authorization data from the agreement with the provider.
Choose one of the options:
PPPoE

- in the “PPP Settings” block, enter “Username” and “Password” (twice);
- tick the following options: “Keep Alive” - connection support, “NAT” and “Firewall”;
- If desired, you can enable “PPP Debugging” - entering debugging entries over the connection and “PPPoE Forwarding”.

IPoE

- check the boxes “Obtain an IP address automatically” and “Obtain DNS server address automatically”;
- “Vendor ID” - if required by the provider.

PPTP or L2TP

- if you need the connection to be carried out automatically, select “Connect automatically”;
- “Service name” - enter the ip or url address of the authentication server;
- indicate “Username” and “Password”;
- in the “Encryption” line, select one of the options: “Off”, “MPPE 40/128 bit”, “MPPE 40 bit” or “MPPE 128 bit”.

3G

- in the “Mode” line, select “Auto”;
- authorization data is filled in by analogy with the above;
- “APN” - access point name;
- “Dial-up number” is the number for connecting to the operator’s authorization server.

Setting up wifi on a router d link dir 320
To set up your wireless network, select General Settings and click Enable Wireless Connection.


- indicate in the “SSID” line the name of the network being created;
- “Country” and “Wireless mode” - no changes;
- in the “Channel” line - select either “Auto” or from 1 to 13;
- if you plan to limit the number of connections to the network, indicate the desired number in the “Maximum number of clients” line.
Then open “Security Settings”.

Select one of the following options in the “Network Authentication” line:

A). "Open", "Shared" or "WEPAUTO"

b). "Open-IEEE8021X"

c) “WPA-PSK”, “WPA2-PSK” or “WPA-PSK/WPA2-PSK mixed”

Depending on your selection, enter the security key that will be required for subsequent wifi connections devices to the wireless network.

Setting up IPTV
Please note that the “IPTV” section is present only in software versions “1_3_3” and “1_4_0”.
Settings are made in the “IPTV Setup Wizard” menu

Here you only need to select the port number to which the set-top box is connected.

- click "Add";
- “Type” - for “IPTV” select “Transparent”;
- Specify “VLAN ID” if required by the provider;
- in the “Port” line, select the port number to which the set-top box is connected.

To complete the settings for the d link dir 320 router, click “Save changes”.
In version “1-2-94” there is no “IPTV Setup Wizard” section. In the Advanced menu, check if "IGMP" is enabled:

Additional features of the d link dir 320 router
As additional settings It’s worth paying attention to “WMM” (Wi-Fi Multimedia). In short, it is a protocol for prioritizing voice traffic (AC_VO), video traffic (AC_V), traffic from devices without a QoS mechanism (AC_BE), and traffic without latency and performance requirements (AC_BK) over normal traffic passing through wireless network.

- “Aifsn” (variable interframe interval coefficient): the lower the value, the higher the priority;
- “CWMin/CWMax” (minimum and maximum size of the concurrent access window);
- "Txop" (data transfer capability);
- "ACM" (Access Control Mandatory);
- "Ack" (reception confirmation).
There is a big difference in the external component " web interface"There is no difference between versions "1_2_94" and "1_3_3".
However, starting with version “1_4_0”, the router interface is more similar to: the main elements can be found in the following illustrations:


On many devices, setup is quite easy if you know all its nuances. To make a connection, you need to outline a plan for the sequence of operations to configure the main equipment to work in the global network together with the device and implement the setup D-Link router Dir 320.
Work order
The instructions we will follow are as follows:- Setup network card, in relation to different operating systems using the example of Windows XP and “Seven”.
- Troubleshooting problems when turning on and operating the modem.
- Replacing an old microcircuit or flashing a new one for proper operation Wi-Fi router D-Link Dir.
- Basic network settings for different operators.
- Setting up a Wi-Fi network.
Setting up a network card
Before installing the router, it is necessary for the computer to recognize the network card, then you need to set the IP address to the “automatic” position. This is necessary to synchronize the settings of your PC with the D-Link device, which has this specified in the factory settings.We proceed according to the following scheme:
- Click on “Start” and enter it.
- Click on “Control Panel”.
- We find a drawing with the inscription “ Network connections" and we enter.
- In the window that appears, select the picture next to which there is the inscription “Connect via local network».
- Then right-click on it and find the “Properties” item.
- Having entered it, put a tick on the inscription “Protocol (TCP/IP)” and click on “Properties”.
- At the end, put the dots on “Automatic” and click “OK”.
The scheme is as follows:
- Click on “Start”.
- In the search engine (the line right above the “Start” button) enter the word “Network”.
- In the window that appears, look for the inscription about the local network and click 2 times.
- Then, by clicking on “Properties”, look for “Protocol version 4” and double-click.
- Select “Automatic” and click on “OK”.

How to set up a D-Link Dir 320 NRU router without problems
After setting up the card on your PC, you need to make sure the IP address is correct.Return to the item labeled “Local Area” and in the window that opens after double-clicking, select:
- "More details" on Win XP.
- "Information on Win
The IP address will be something like 192. 168. 0. XXX
If the address is not received, then the number will be 169.ХХХ. XXX. XXX.
XXX – any number (for example, 101, 204, 3) not more than 255.
To insert the correct addresses you will need to return:
- in Protocol (TCP/IP) for Win XP.
- Protocol 4 (TCP/IP v4) for Win

At the end, click “OK”.
Replacing an old microcircuit or flashing a new one
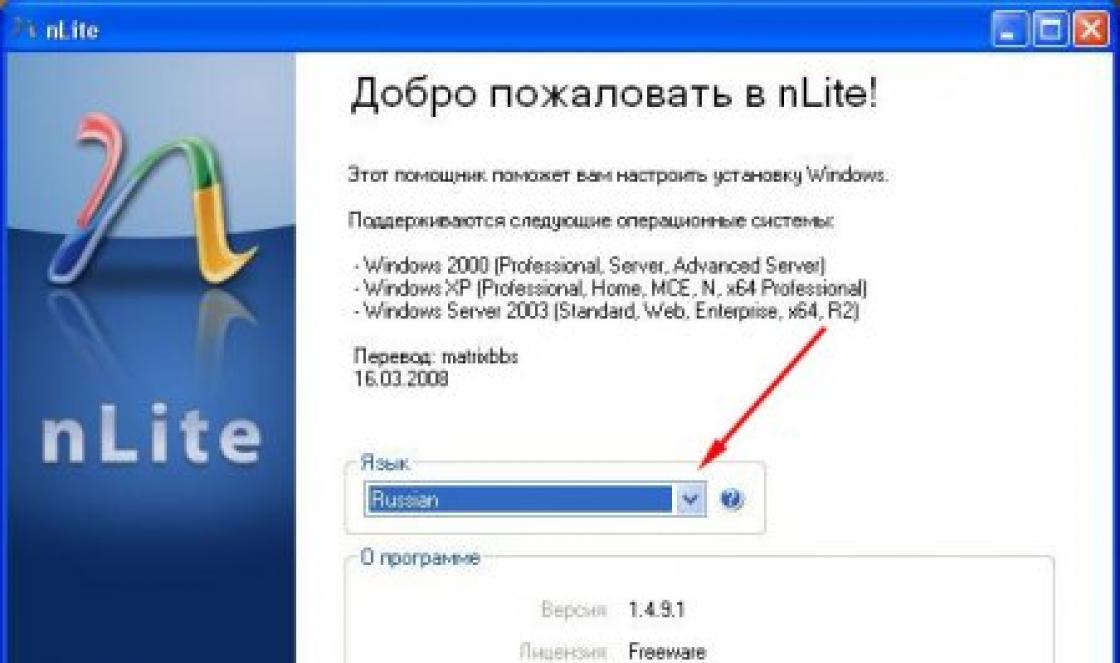
We will explain step by step how to flash the router firmware using a PC, in other words, how to reset the original parameters.First download the current version of your device from the pages indicated in the figure:

To perform a reset and create the necessary settings for some models, you need to disconnect the Internet cable from the PC. So, check both options.
How to login - Link 320:
- Connect your router to your PC and log into your browser.
- You must enter the following in the address line: 192. 160. 1 – then press Enter and log in.
- Enter the word admin in the “Login” field, and then Next or OK.
- Enter the word admin in the “Login” cell and in the “Password” column.
- In older D-Link devices, the firmware version looks like this:

To flash:
- go to “Maintenance”;
- then on the left in the “firmware update” menu;
- then click on “Browse”;
- find a new firmware version;
- At the end, click “apply” and wait for the result.

First option.
We look for the word “System” in the left menu and click on the button. Next, in “Software Update”, turn on the “Browse” scanner and select the required file.
Second option
“Configure manually” – “System”, go to the “Software update” item and select the file.
Third option
“Advanced settings” – “System”, then click forward and click on “Software update”.
- After all the switching, you need to click on the apply button (“Update”).
- Next you will need to wait about 7 minutes. This is necessary to complete the operation completely.
- As soon as the installation occurs again, you must enter 192. 168. 0. 1 into the browser address bar and log in.
Connecting to providers and Wi-Fi
Beeline CommunicationsFirst, go to “Advanced settings” - “Network” - “WAN” - “Add”.
- In the connection columns “Type” and “Name” – click L2TP + Dean. IP. in the first and any inscription in the second.
- In the “User” (Name) section and in the “Password” column, enter the information received from the technicians who connected the equipment.
- In the “MZT Address” field, enter – tp.internet.beeline.ru, then “Save” in one window and “Save” in another.


The setup of the D-link Dir 320 Beeline router is complete.
Communication Rostelecom
The primary actions are the same as in connection with Beeline. Next:
- In the “Type” column, click PPPoE.
- In the “PPP” field – in the “User” (Name) item and in the “Password” column – enter information from Rostelecom employees.
- Click “Save”.

Setting up a Wi-Fi network
It also starts with “Advanced settings”, but then click “Wi Fi” - “General” - “SSID”, enter any inscription - the name of your personal network and click on “Change”.

Next, go to “Security” – “Network Authentication:” – “WPA-PSK2”, enter 8 or more characters in the “Encryption Key” and click “Change”.

Congratulations. You did everything right.
Visual instructions for setting up Dir 320 (video)
Useful video with router settings:You can configure the router yourself. By doing this, you will save money, learn how to set up a device, and, perhaps, start your own business connecting users to the Beeline and Rostelecom networks.
In order to connect your computer to the Internet, the user needs to configure his router and himself. Only after this will it be possible to easily open various electronic pages of websites and download the necessary information.
Connecting a router
Setting up and connecting the D-LINK DIR-320 router begins with checking the functioning of important network nodes on the router itself and the computer.
To get started, you need to do the following:

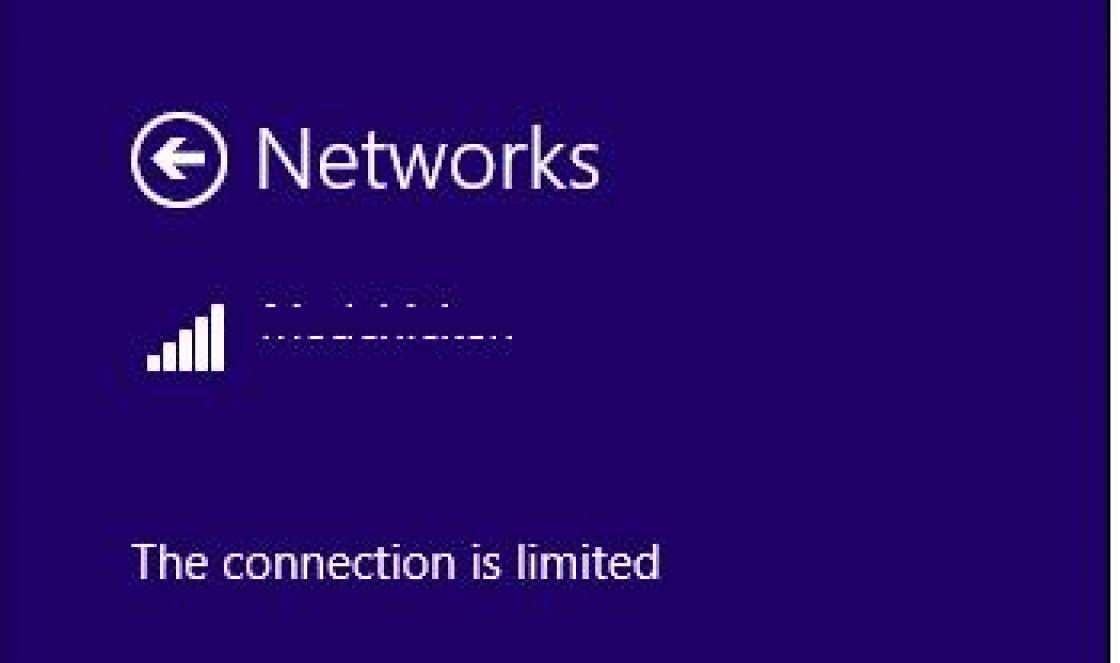
Photo: Network designation on the taskbar
If everything is done correctly, then you can start setting up the router itself and the connection.
Login to settings via web management
Before you start setting up D LINK DIR 320, you need to check the operation of network devices.
To do this, you need to perform the following procedure:

These actions are necessary to prepare automatic wifi settings d-ink dir 320 router and local network.
After setting up a local connection, you need to launch the disk included with the router. It is necessary to create local connection to the Internet and settings of the router itself. This is done according to the prompts that pop up in the installation window.
Particular attention should be paid when choosing the connection technology parameter - pppoe or l2tp. You should choose a connection format in accordance with the parameters specified in the Internet connection agreement.
The next step is configuration via the web interface. To do this, you need to type the IP address 192.168.0.1 in your Internet browser.

The login and password are in the instructions, which the system will prompt you to change after logging in.

After changing the login and password, an interface will appear on the screen in which all connection parameters will be indicated, including all possible settings parameters based on the provider’s technology.

Photo: Interface with connection parameters
The standard router kit includes a disk with software necessary for the correct operation of the network device, but this does not guarantee the uninterrupted and correct functioning of the D-LINK DIR-320.
How do I configure and install the latest version of the required drivers?
Update software for the D-LINK DIR-320 router only passes through home internet pages – 192.168.0.1. This procedure should be carried out immediately after installing the basic software from the disk by following the link “ftp://dlink.ru/pub/Router/DIR-320_NRU/Firmware/”. Download and save the file to your desktop.

Photo: Firmware updates for DIR-320

Thus, the path to the file is set, on the basis of which the router software will be updated. When carrying out this operation, you cannot turn off and restart the computer before it is completed, otherwise a failure may occur and you will have to start installation and configuration from the very beginning.

Photo: Software update progress
Once the update is complete, the DIR-320 will reboot.
Setting up the D-LINK DIR-320 router from providers
The providers themselves often take advantage of the information weakness of users, most of whom are simply afraid to get into the hardware and figure it out on their own. In this regard, it is always possible to call an appropriate specialist to your home to carry out the appropriate work on setting up the Internet.
For example, you can order setup of the D-LINK DIR-320 router from Rostelecom by dialing the technical support number. The operator will listen to all your problems and offer a convenient time to call a company specialist at your home.
In fact, all these steps are simple, and you can do them yourself without additional expenses.
To do this, you must adhere to the following sequence:


This sequence of setting up an Internet connection is applicable to the operating room. windows system 7 and 8.
Setting up for Rostelecom
To configure the D-Link DIR-320 router on the Rostelecom provider network, the user must go to home page router (192.168.0.1) and perform the following steps:

Setting up for Beeline
Setting up the D-LINK DIR-320 router for the Beeline provider differs from Rostelecom, because they use the connection type "l2tp".
So the user's actions should look like this:

If everything is done correctly, the user will be able to freely use the Internet.
Setting up for MTS
Connection to the Internet from the MTS provider uses “pppoe” technology.
Therefore, setting up the router D-Link dir 320 will be held as follows:
- checking the operation of the network device;
- go to the router’s home page in the Internet browser 192.168.0.1;
- install drivers;
- update drivers;
- go to the “network” tab and select the “connections” line;
- in the window that opens, select the “add” option;
- connection type is set to “pppoe”;
- check the “allow” box;
- in the line “physical interface” set the parameter “port5”;
- in the user name and password lines we enter the corresponding data from the agreement with the provider;
- in the “NAT” and “firewall” lines, check the boxes;
- save the parameters and configuration.
Video: Setting up a D-Link dir router
Setting up Megafon
Internet from Megafon is mainly provided using 3G technology. Therefore, all settings are set manually:
- go to the router page 192.18.0.1;
- select the “Internet installation” column;
- in the updated window at the bottom, select the option “set up an Internet connection manually”;
- in the window that opens, select the connection type “3 GUSB adapter”;
- in the fields of login, password and dial number in accordance with the parameters issued by the provider under the contract;
- save the parameters.
Wireless connection
Network operation via the wi-fi module of the DIR-320 router is very simple and convenient. To set up a wireless connection, just follow the prompts during the initial installation of the driver on the router. If a corresponding message appears during the installation process, you should set the recommended parameters according to the prompts.

Photo: Wi-Fi item in the main window of the web interface
The main attention should be paid to the settings of the network card on the computer to support a wi-fi connection. In this case, you need to go to the control panel, and in it select the network control center and shared access. Next, enter the option to change adapter properties and check the operating status of the wi-fi module. If everything works, then the connection to the Internet will occur immediately and without delay.
Wi-Fi connection settings in Windows 7
If the connection to the Internet does not occur automatically, and this only happens when using older versions of D-LINK DIR-320(b1) or operating system windowsxp, then you will need manual setting. To do this, you need to go into the settings of the wireless connection adapter and manually set the IP and DNS address. In this case, the IP address will correspond to the router address, and the submask (dns) will be 255.255.255.0.
Next, the user must create a new connection without changing the parameters. You only enter your login and password information to connect to the Internet, and a shortcut is created on the desktop, when opened, a direct connection occurs.
So to carry out full customization your D-LINK DIR-320 router, you need to:
- carefully read the instructions for the router;
- check the operation of the network card and local network settings on the computer;
- install drivers and configure the connection according to the prompts during the installation process;
- update drivers to latest version.
Experienced users can easily cope with such a task, but for beginners it will be difficult. But if they configure their router strictly in accordance with the indicated order, then the result will not be long in coming.
Connecting to the Internet is a technically complex operation. In turn, the client must also understand what type of connection he will use, what speeds he wants to receive and what he expects from the new connection.
D-Link router model Dir-320 – has established itself as a reliable budget device with good functionality and a range of additional features, missing from most cheap routers. If a user is looking for a router for distributing the Internet in an apartment or house, this will be the most the right choice in terms of price and quality ratio.
First of all, routers differ in the type of connection. D-Link version Dir uses fiber optic cable and FTTx technology for connection; the maximum transfer speed with this type of connection reaches 90 MB/s. This is enough to download an HD movie within one minute. But do not forget that the traffic speed is controlled by the operator and depends on the package ordered by the user.
There are several varieties of Dir-320 routers, the differences lie in the color of the case. The functionality is the same, they are configured according to the same scheme.
As already mentioned, this is a budget model, so functions such as setting up a repeater (repeater) or setting up a torrent client on the router are not provided. But using third-party firmware, some additional features are added that are not related to hardware, for example, connecting a D-link router model Dir-320 in torrent client mode.
Appearance
The router is a rectangular “box” measuring 14x3x11 cm. Made of rigid plastic with a glossy surface.

At the front of Dir is a panel that displays the status of connections. If we look at it from left to right, the first icon is responsible for connecting the Dir router to the power grid. Next comes the globe icon. It becomes active if the network cable is connected, that is, access to the Internet is obtained. This is followed by the Wi-Fi indicator, displaying the network distribution from Dir. The next four computer icons display the number of connected users via the Lan cable. The maximum possible number of clients is therefore four. And the last icon is responsible for the presence of a connection between the USB device and the router. Through the USB connector it is possible, for example, to directly connect the printer to Dir-320.
WITH reverse side The router has built-in connectors and a button Reset, as well as a power output, where the wire from the unit with a voltage of only 5V is connected. The Dir router is assigned the third - last - level of security and does not pose any harm to humans and pets.
Now directly about the Dir connectors. Let's start the review from right to left. The first input is Internet: the main cable with the Internet is connected to it, an RJ-45 connector. Next come similar inputs, but for connecting users to a PC. A local network is configured between them and the Dir modem.
You can connect your computer to any free outlet, after which the DHCP server will assign it an IP address. Information about the address can be found in the Dir modem settings menu. The last connector is intended for connecting other devices that operate via USB (printer, 3G router) to the Dir router. This additional function. If you configure Dir, it is capable of transmitting traffic not through a cable.

You can also see the antenna in the picture; there is only one in this configuration. But the power is enough to distribute Wi-Fi over an area of 50-60 square meters, taking into account concrete walls, the presence of electrical wiring and other sources of channel pollution. If necessary, the antenna can be easily dismantled and replaced with a more powerful one.
Connection and preparation for work
After the user has unpacked the router, it is necessary to assemble it. It comes with: antenna, power supply and stand. The block is connected to the back of the Dir router, the connector is designated “5V 2A”, that is, it operates at a voltage of five volts. According to the instructions, first the parts are connected to the equipment, and only then the power is connected to Dir.
Connecting to the Internet occurs in two ways: using a regular network cable, coming from the general network, or using wireless USB 3/4 G-router, connected to the USB connector near the antenna.

Now that the power is supplied and there is access to the network, you need to launch and configure the D-link Dir-320 router for the first time. For initial setup, the Dir router must be connected to a laptop or PC via a regular Lan cable, built into one of the four ports on the Dir router. Now let's move directly to managing parameters.
Settings
After the circuit is assembled and everything is connected, the Dir router is turned on. Default, some settings D-link router Dir-320 are carried out automatically. For example, he takes the IP address 192.168.0.1, through which he can later connect to him and make changes to the configuration. Here are some examples of automatic configuration.
Automatic setup
For the convenience of users, as well as the speed of connecting devices, an “Automatic Configuration Wizard” has been added to the router menu: Wi-Fi, Internet (all protocols PPPoE, PPTP, connection via static, dynamic IP using 3G) and IPTV.
The wizard works in such a way that when adding any connection, the user does not have to fill out the configuration form at all. By saving the configurations set automatically, it will create a working network. A slight exception is the PPPoE network, since for its operation you will need to enter data provided by the provider. Otherwise, the network will be created, but without Internet access.
Also, the Setup Wizard does not generate passwords, so a Wi-Fi network created with its help will be open to public access. The user is allowed to make changes to the configurations set by the Wizard, thus creating a convenient and flexible interaction system, thanks to which time is saved, and there is no need to search for information on items that are unclear to the user.

Connecting to the Internet manually using the example of some providers
Some providers provide direct access to the Internet only if the client has a login and password. For this they use various types PPPoE, L2TP connections. In this case, you will need to fill in the necessary data and manually configure the D-link router model Dir-320.
For most providers, the connection methods will be different, but entering the router settings directly from a PC is always the same. If the Dir router is connected, as indicated in the previous section, you need to open any browser and enter the line: 192.168.0.1. The main window will open:
By default, the username and password are the same - admin. After authorization, you can change it if you wish. If the password and login have not been changed, but access cannot be obtained, you need to reset the current settings. This is done by using the Reset button. When Dir is working, you should hold down the button until the lights on the panel simultaneously go out and light up again. After which the standard authentication data will definitely do.
Now directly about setting up the Dir router for certain providers.
Dom.ru
This provider provides services along with equipment. The company installs its own firmware on the router, so when purchasing named devices there are no connection problems, and the procedure takes place in automatic mode. But there is one drawback: the Dir router cannot be used when switching to another provider. Therefore, it would be more correct to purchase a factory Dir and configure it manually.

First you need to go to the “Network” tab and view the presence of working WAN connections, if they work, select and delete. Then create a new one. The main thing is to select the connection type during the connection process: for Dom.ru it is PPPoE. The PPP prefix means that access will require entering data provided by the provider. When signing the contract, the subscriber is given a “Username” and “Password” entered in the “PPP Settings” section.
The remaining fields remain unchanged. “Service name” can be any name here. Add the created network and be sure to save the configuration so that it does not disappear after a reboot or power loss.
Rostelecom

The Rostelecom company also offers its users a Wi-Fi router "D-Link" Dir with its own firmware. But the connection algorithm is no different. The user will also need to delete working connections in the “Networks, WAN” tab.
Then add a new PPPoE type, enter authentication data and save it.
"Beeline"
Many are accustomed to the fact that Beeline only deals mobile communications And wireless internet. But in lately There are often areas where it is possible to order the service wired internet and IPTV from Beeline. It is enough to have the official firmware version on any compatible router for everything to work stably and without failures
 .
.
You can try to establish a connection without the latest firmware version Dir. The main thing is to open the advanced settings, find the “Network, WLAN” field, and delete all existing connections. Next, add a new one. “L2TP with dynamic IP” is selected as the network type.

To connect to the NetByNet network, it is advisable to update the device firmware. Next, go to the networks menu and if there are ready-made ones in it, delete everything completely. Then create a new one with the network type PPTP.
First of all, in the menu that appears, you need to select a dynamic IP type. In the Ip/Name Vpn Server field you must enter the provider's server. This information provided to the client by the connection company. For example, for Moscow the address is ppp.lan. You will also need to enter the username and password provided by the provider. The last point is to select the type of mod to be connected; it is set to the Always position. At the end, the configurations are saved.
The provider also provides connection services using the PPPoE protocol. The algorithm is identical to Dom.ru.
Backup connection via 3G, 4G
The technical characteristics of the D-Link router allow for a backup connection. This means that not only the Lan cable is used as a traffic source, but also 3/4G wireless modems.

It’s worth noting right away that this function is available in the device, but not on all types of firmware. Before trying to connect, you should update the software version. As a rule, the version information states whether it supports connecting third-party mobile devices or only works with a Lan cable.
Next, proceed to the connection and configuration procedure wireless router. First you need to connect it to the Dir Dlink router and apply voltage to it. Now go to the familiar address: 192.168.0.1. The user will be interested in the WAN network section. Create a new connection here. Select 3G or 4G as the network type depending on the modem type.
In the “Provider” section, you need to change the manual type to the country/region from which you are connecting. For example, Russia. This is where the provider is selected. After this, all items are filled in automatically. All the user needs to do is save the changes and wait a few minutes for the Dir router to reconnect to the new network.
Wireless network
To set up a wireless network, the Wi-Fi router must be turned on and have access to the Internet. By default, the network is open and has a standard name - Dir. But this needs to be changed so that only the user has access. To do this, you need to set a password for Dir. First, find the router settings and open the Wi-Fi section. Pay attention to whether there is a checkmark next to “ Wireless connection" She must be present. Then you will need to fill in the fields:

SSID: here you need to enter the name of the future Wi-Fi, as the user would like to see it among the available connections, for example, HomeWiFi.
Channel: the data transfer speed will depend on this parameter. By default, they all work at the same speed, but if there are many users on one channel (they are not necessarily connected to a personal network, they can also be connected to a neighbor’s), then problems with speed begin. To determine which channel is free, you should use special applications on mobile device. If this option is not available, it makes sense to choose among 5-8. They are usually the least busy.
Mode: Limits the maximum possible transmission speed. 802.11 B/G/N is considered the modern standard, and should be chosen.
Encryption type: this is exactly the answer to the question: how to set a password on wi-fi Dir-320. It is at this point that you choose how the subscriber’s data will be protected. The most secure encryption on at the moment is WPA2. Well, the user himself comes up with the password. It must consist of at least eight characters: letters and numbers.
IPTV

To get started IPTV setup, first you need to connect the set-top box to the Dir router via one of the Lan outputs. The numbering of the port for connecting IPTV is not important, but the fourth one is most often used. Then you should go to the Dir settings and find the IP television section. Here indicate which port was selected and save changes. Most providers use a simple connection scheme. To do this, you need to go to advanced settings, find all ports in the Vlan group and delete them. Next, go to the WAN section, the “Port” field, indicate the TV set-top box you are using. In the “Tag” column, enter the value untagged. Now all that remains is to save the changes for the scheme to work.
Dynamic DNS
The Dir router has a dynamic DNS feature. In order to activate it, you need to go to the DNS settings or, when creating a network, specify what type of server will be used: static or dynamic.
You can also set an alternative address that the user enters independently, and in case of problems with the main one, the transition will be carried out through an additional one.
DNS allows you to work with another convenient server remote access to the router Dir – DDNS. To use it, you will need to register your own domain name. For these purposes, it is recommended to use the official website dlinkddns.com. After registering and linking your domain name to the IP on the site, the user will have the necessary data to create remote access.

Next, return to the advanced settings of the router Dir, find the DDNS section in the “Advanced” tab. Once you open the settings, you will need to create a new connection. In the “Hostname” field, add the domain name received during registration. The “Username” section must contain the login used during registration. The password for the network is created by the subscriber himself. The last item is “Update period”. Here the value is set to 60. After everything, you should return to the advanced settings and save the changes.

To control access to resources, Dir has a function parental controls. The user enters into the list the addresses of sites to which access will be prohibited. It also configures the time and days of the week during which access to them will be open or, conversely, limited.
Security settings (antivirus, firewall)
To enhance PC security, use the firewall settings in the Dir router to filter outgoing IP addresses. To do this, you will need to go to the advanced menu and find the “Firewall” tab, where first you need to add a rule in the Port Forwarding section. Next, the packet direction is set in the Firewall tab. The penultimate stage: you will need to enter a rule that controls the receipt of packets from IP addresses and specify the end port. The last step there will be an indication of the exclusion rule for receiving packets.
This is the basic plan for working with the Firewall of the Dir router. All addresses and ports are selected individually. This allows you to block access from sites that do not comply with the requirements and could harm your PC.
Setting up the printer
Printers with USB connectors are directly connected to the Dir router. This allows users of the same group connected via a Lan network to use it together.
The DLNA server allows you to watch free IPTV on several smart TVs, and for free. In this case, there is a chance to use one, as well as different channels. To do this, the Dir router must have the appropriate firmware - DD-WRT.

First you need to download it from any known resource. Then you will need to check the network settings on Windows. First of all, in the Start menu, find “Control Panel”. Here select “Network and Internet,” then “Network and Sharing Center,” then “Change adapter settings.”
Then you need to right-click on the “Local Area Connection” icon and select “Properties”. Here find the “Internet Protocol Version 4” section, select properties, check that both submenu items are in automatic mode. If necessary, change and save them.
Next, go to the router settings Dir, change its version using DD-WRT firmware, as indicated in the “Firmware update” paragraph. The reconfiguration procedure takes about 3-4 minutes. Then return to Windows settings, the item where the IP address was determined automatically, change to the second one, enter the following IP: 192.168.1.2.
To get into the router configuration, you need to use the address 192.168.1.1 in the browser. When you first log in, you need to register, to do this, create a username and password. Remember them, as they will be required for further use of the Dir router. Next, go to the “DHCP Server” settings and check the configuration: the status should be automatic. Now that IP addresses are distributed in automatic mode, go to the network card settings and change the “Obtaining an IP address” item to automatic.
After the completed operations, you can safely connect the set-top box via a Lan cable and enjoy watching your favorite TV shows.
Setting up a VPN server

Network equipment does not support creating a separate VPN server, but it is possible to use third-party options. When you create a PPTP connection, you will be able to connect to a VPN server. It ensures the confidentiality of user data. That is, the provider will not be able to view which sites have been visited. To set up such a connection, you need to fill in all the fields in the IP section that opens when creating a PPTP network. Passwords, IP address and the VPN server itself are provided by the provider; the data is usually included in the contract.
Possible malfunctions, ways to eliminate them
Often, when it comes to a Dir router malfunction, the problem comes down to incorrect settings. If Dir fails, the device stops working in most cases.
If there are connection interruptions, first of all you should check whether the configurations are set correctly.
Most often this happens with Wi-Fi. If the user does not see his connection in the available ones, or it appears and disappears, then the channel needs to be changed; most likely, it is overloaded. If the network is found, but the IP address is constantly being authenticated, it means that the DHCP settings on the Link Dir have gone wrong and it has switched from automatic to manual mode.
When the Internet disappears directly on the PC via a Lan connection, this may be due to the automatic settings described above in the section of the same name. Or you need to update the firmware of your network device. A section on how to carry out this action is given below in the article.
Firmware update
Updating the firmware to the latest version, or installing a third-party assembly, will expand the number of functions performed by the router. But first you need to find out which version is currently installed so as not to use an outdated one. A description of the router, its characteristics, as well as the firmware version are written on the bottom side of the device. Installation new version Firmware for this model is provided only through the web interface. Knowing the necessary information, you should begin the update process itself.

Via web interface
It is required to download the firmware version the user is interested in from the official website or other resource. Today there are quite a lot of them and they offer very interesting assemblies. Now that the file is on your computer, you need to go to the router settings and find the “Software Update” item. Here you will find the “Browse” button, clicking on which will open a menu with a file selection. You must select the directory downloaded earlier and then start the update procedure.
Important! Under no circumstances should you interrupt the firmware installation process; this will lead to failure of the router itself.
The whole procedure takes about three minutes, after completion the Dir router will reboot.
Resetting the router to factory settings
There are two ways to perform a factory reset. In the first case, you will need a thin long object, for example a pin, to press the reset button for 10-15 seconds. After this, the equipment will reset all configurations.

For the second method, you will need to use the interface; to do this, go to the router settings and select the “System” menu, where there is the “Restore default settings” option. Select it and carry out the reset procedure.
After the above steps, passwords and logins will be reset to standard ones. To enter the settings you will need to enter admin/admin, wi-fi network will be renamed to Dir and will become open.
Conclusion
The Dir router that was reviewed is worth the money. This is a budget router, but with a good set of features that are not found in all expensive models. In addition, the router is equipped with a USB connector, through which you can connect a printer, as well as configure other Powerline products USB devices. This includes portable 3/4 G-routers, so it’s almost impossible to stay with it without the Internet. It is also worth noting that the Dir device is powered by only five volts, which saves energy consumption, and in emergency situations it will be possible to power it from a battery.
Pros of Link Dir
Users cite the following advantages of the Dir router:
- Price.
- Ability to connect a large number of users via Lan and Wi-Fi.
- Availability of a secure VPN connection.
- 3G backup function.
- Availability of a large number of firmware for Dir, ease of installation.
- Possibility of expanding functionality using firmware.
- Automatic network creation upon first connection.
- Manage settings from mobile devices.
- Availability of IPTV function for several devices connected to Dir.
- Creating parental controls to manage visited resources.
Cons of Link Dir
The following parameters received a negative rating:
- Inability to work in multiple ranges.
- Does not support: IPSec, IEE802.1q, IPv6.
- Maximum Wi-Fi speed is 54 Mb/s.
- No repeater mode.
- There are no dynamic routing protocols.
- There is no console port and SNMP.
The Dir router also has other disadvantages related to its functionality, but the number of additional features, as well as the low cost, outweigh the disadvantages.