Electronic mailbox today it is almost an obligatory attribute of a modern city dweller. This is very handy tool both business life and leisure. On email you can send or receive documents, photos, audio and video clips of small sizes. Without it, it will not be possible to register on social networks classmates, Vkontakte, Facebook or another site, or receive services on government portals or services. Registering an e-mail usually does not raise any special questions, but nevertheless, there are still users for whom this is a difficulty. As a rule, these are pensioners and the elderly. Especially for them, I will tell you in detail how to create an email on mail.ru, Yandex Rambler or Google.
So, the e-mail registration procedure itself consists of the following steps:
1. enter personal data
This means entering a last name, first name. Age and gender. Also, I would strongly recommend that you specify your contact number mobile phone. This will allow you to quickly restore access if attackers somehow steal your credentials.
2. come up with a name for the email
The full email address consists of two parts:
Everything up to the dog sign is the name of the box that you come up with. Everything after is the name of the mail service where your e-mail is registered.
The mailbox name must be unique within one mail service (read server). If the name that you came up with is already taken, the system will offer you other available options.
3. come up with a password
Many users do not pay due attention to this item. But in vain. It is a simple password that is the cause of email hacking in 90% of cases. The password for the email must be an arbitrary set of characters not shorter than 8 (or better than 10) characters and consist of numbers and letters of the Latin alphabet. In this case, it is better to use both lowercase and uppercase letters. By the way, never store your email password in text files on the desktop.
After the registration of the mailbox is completed, the browser will automatically redirect you to it. Now you can safely use the created email for personal or business correspondence.
4. confirm your details
From a dozen years ago, in order to create an email for yourself, it was enough just to fill in the required fields with a first and last name. And not necessarily your own, you can also invented. Now gradually everything is changing towards mandatory personalization. Today, in most cases, confirmation is already required using an SMS code that will be sent to the phone you specified. On the other hand, it is a handy tool for recovering access to email if you accidentally forgot your password or it was hacked. If you are a law-abiding citizen, then there is nothing to be afraid of.
Let's take a step-by-step look at how to make a mail using the example of the three most popular mail services in Russia.
Google mail registration
We go to the world's most popular email service from Google - Gmail.com (gmail or jimail).
Click on the "Create an account" button. A window for entering registration data will open:
Here you need to enter your first and last name.
Below you will need to come up with a "Username" (email address) and a password, which will be used in the future in order to access Google mail.
Next, you will need to specify the date of birth, gender, mobile phone number and alternate email address (if any). The last two points are needed in order to help restore access to the box if it is hacked or you forget the password.
It remains only to enter the verification text from the picture and agree to the terms.
Click on the "Go to Gmail service" button to open the service interface.
That's all, the Google mailbox has been successfully created and you can work with it - send and receive letters.
By the way, the created email, or rather the name of the mailbox, will be used as a single login on all Google services - YouTube, Google Drive, Maps, Blogger, Play market.
Creating an email account Mail.ru
This is perhaps the oldest e-mail service in Russia. To get the email address of Mail.ru, go to the site of the same name and click on the "Register" button in the left corner of the screen:
Then this page will open:
Enter information about yourself - First name, Last name, date of birth, place of residence and gender.
Then, you will need to come up with a name for the mailbox and a password for it. By the way, the service allows you to select one of the server domains - in addition to @mail.ru, @list.r u, @bk.ru and @inbox.ru are also available.
For the opportunity quick recovery access to Mail.ru mail, it is advisable to indicate your mobile phone number.
Click on the "Register" button.
After that, you will receive an SMS with a confirmation code on your phone, which you must enter in the window that appears:
Enter the number from the SMS and click on the "Done" button. If the code is correct, you will be transferred to a successfully created mail.ru mailbox
From here you can send and receive emails. Here you will also have access to the IM-client [email protected].
Email Yandex
The largest Russian search engine Yandex.ru also has an excellent mail service. To register your email box on Yandex mail, you need to on the main page search engine, in the upper right corner, click on the link "Start mail".
The registration form will open:
Here everything is the same as in the previous services - we write down the First Name and Last Name, come up with the name of the Yandex mailbox and indicate the mobile phone number.
Click on the "Get code" button. An SMS will be sent to your phone, the code from which you will need to enter in the field below, after which a check mark will appear that the phone has been successfully verified.
Click on the "Register" button. As in the case of Google, the created account will be the same for other search engine services - Maps, Market, Pictures, Video, Music, etc.
Using a smartphone without e-mail is by no means complete. Moreover, the full functionality of most sites on the Internet is not available without mail client, because to register an account you need email address Email.
Let's try to figure out how to set up email on Android from the most popular providers. We note right away that the main emphasis will be placed on the function of collecting letters from other accounts, and other individual settings, such as the location of elements and the appearance of the client, are solely at your discretion.
What mail to choose?
Before setting up mail on Android (Mail-Android), you should know that there are many sites on the Internet that will provide you with an email box with great enthusiasm. But beauty and convenience are not the most important thing in this business, because not all clients are equally reliable: some are suspected of reading personal information from letters, someone is malfunctioning, etc.

Most users of the Internet community recommend paying attention to the following email clients:
- Gmail from the Google search engine;
- "Yandex.Mail" from a domestic search engine;
- Mail.ru from a large Internet company.
In order to register a box, just go to home page any of the above resources and select the "Mail" section. As for a smartphone, before setting up mail for Android, you must have a proprietary application from a particular client. You can download the official utility from the same Playmarket.
gmail
Before setting up mail on Android, it’s not superfluous to look at the list installed applications. There, in 95% of cases, there will be an email client from the eminent Google search engine, that is, you won’t have to download and install anything.

Naturally, the box is primarily designed to interact with its own service. If you have previously worked with operating system"Android", then for sure you already have an account from the Google mail, and if not, then registration will not take much time. All you need is your full name, age and place of residence, and the rest of the profile lines can be filled in later.
The search engine provides its customers with 15 GB for use cloud space. For clips, audio and other documents enough in full. In addition, the mail has excellent spam protection and various filters for competent sorting of incoming correspondence, so no letter will be lost.
Assembly of letters
GMail email client is reliable, pleasant and functional. appearance, as well as intelligent filters for working with letters, so it can be called the best choice for the owner of the gadget on the Android platform.
To collect emails from other accounts, follow these steps:
- launch Gmail and log in to the system;
- we put forward the "curtain" from the left edge and go to the "Settings" section;
- find the menu item "Add account";
- in the section for selecting mail clients, select the desired one from the list: Yandex, Mail.Ru, etc.;
- enter your username (email address) and password;
- now mail from another account will appear in your GMail inbox.
Before setting up mail for Android in the Gmail service, it will not be superfluous to know that the client does not delete letters from other accounts, but only duplicates them, but this point can be changed in the settings.
"Yandex. Mail"
Another handy box for the Android platform. The client comes installed by default on most budget gadgets shipped to Russia from China. The application has distinguished itself by stable operation, intelligently delivered Push notifications and quite a nice appearance.

In addition, the client is ideal for users who work with a huge amount of correspondence. Even if the mailbox contains more than 1000 letters, smart search will find exactly what you need. So keep this in mind before you set up mail on Android.
The service from "Yandex" competently highlights each letter or group with a distinctive label, which allows you to distinguish them from the crowd. There is a classification according to topics and importance of postal correspondence. Moreover, the client has good spam protection, albeit slightly inferior in effectiveness to GMail.
Correspondence collection
Setting up Yandex mail on Android for collecting letters is quite simple. Click on the drop-down menu icon in the upper right corner and select "Settings". Then tap on the inscription "Add account" and mark "Email" in the list.
Next, enter the login of a third-party client (mailbox) and password. Then you need to decide on the type of account to connect: POP3 or IMAP. Almost all Internet gurus recommend stopping at the IMAP type. Because this option allows you to work with correspondence in real time, that is, all changes that will be made to the letter will be immediately reflected on all accounts. Roughly speaking, the POP3 connection is intended only for downloading new messages, while the IMAP protocol allows you to work with correspondence without breaking the connection on another server.
As for the specific ports and security type of each individual third-party client, the service should configure everything automatically, so there will be no problems here. The only thing you can add is to choose the frequency of checking other mailboxes: every 15 minutes, 30 minutes, etc.
Mail.Ru
A fairly well-known domestic client, distinguished by aggressive marketing. Before setting up Mail.ru mail on Android, you should know that many people call this service viral due to the abundance of annoying ads and installation of applications without the user's knowledge. Nevertheless, the client is used and even considered one of the best in our market.

The mailbox interface is quite simple and intuitive. The rest is also up to the mark: a good spam filter, email tags, etc.
Assembly of letters
To manage the collection of correspondence, you need to open the settings in the special agent "Mail.Ru" (downloaded from the "Playmarket"), where in the menu click on the line "Add account". Then you need to enter the data of a third-party mailbox (login and password) and the type of connection (POP3 or IMAP). Everything else will be done automatically by the agent. You just have to choose the frequency of checking other accounts and choose a name separate folder for correspondence that came from a particular client.
Now e-mail is often required to register accounts on different sites, subscribe or exchange messages with other users. Not all users have permanent access to a PC in order to create an account through the official website of the mail service. Therefore, we offer you instructions on how to perform this process on a smartphone or tablet with an Android operating system on board.
First, we recommend choosing a service that suits you, where you will register your mailbox. Each service has an official application, its own features, additional tools and privileges for users. Below we will look at the guides for creating an account in the four most popular services. You can choose one of them and immediately proceed to the implementation of manipulations.
gmail
Gmail mailbox is created immediately after registration account Google. In addition, you have access to all the resources of this company, such as spreadsheets, Google Photos, Drive or YouTube. At the link below you will find another article from our author, which describes the process of creating a Google account in detail. Follow all the points, and you will definitely be able to solve the problem.

Yandex Mail
The postal service from Yandex is considered one of the most popular in the CIS. Especially for users of mobile devices, an application was released that makes interaction with the service even more comfortable. Registration is carried out just through this program. You need to do the following:
- Go to the Google Play Market and through the search find Yandex.Mail, then tap on "Install".
- Wait for the installation to finish and launch the application.
- You can immediately connect mailboxes of different services, however, to create a new one, click on "Get Yandex.Mail".
- Enter the basic registration data and proceed further.
- If you have entered a phone number, wait for the message with the code. In some cases, it will be entered into the line automatically. After that select "Ready".
- Familiarize yourself with the main features of the application.
- You will now be moved to the section "Inbox". Your account has been created and you can get started.


Rambler mail
Gradually, email from Rambler is losing its relevance, more and more users are switching to other services, which is associated with frequent malfunctions and limited capabilities. However, if you want to register in Rambler / Mail, you will need to perform the following steps:

Mail.ru
The Mail.ru company is engaged in the production of many services, supports the work social networks, and also has its own postal service. Registration in it is available not only through the official website. This can be done through a special mobile application:

If you are the owner of several email accounts from different services, we advise you to take a closer look at special email clients for the Android operating system. They unite all accounts and allow you to more comfortably interact with all of them. Description of popular applications can be found in our other material at the link below.
This article will show you how to create an email on your phone using both built-in applications and downloaded from various sources.
Step-by-step instruction
- The Gmail mail client shortcut is a standard application for any Android device. First you need to go to the program and enter your personal data in the appropriate fields, click the "Next" button.

- The system will then prompt you to select an email address.
- Then you need to come up with a password that must contain at least 8 characters.

Advice! A good password is one that contains numbers and letters of the Latin alphabet in different case. Since it is this password that is the most difficult to crack.
- In the next step, enter your mobile number phone in international format.
You can skip this step, but it is not recommended to do this, because if you lose access to your account, the phone number is the easiest, fastest and most reliable way to restore it.

- Then you need to accept the terms of use and the privacy policy of working with the application by clicking the "Accept" button.

- After that, the user will see his data on the screen and all the services that are available to him to enter through this email address.

- Wait for the end of the check by clicking the "Next" button.

- After the verification is completed, the system will prompt the user to subscribe to news from Google by clicking the "Next" button.

After registration, the user automatically gets to the main page of his mailbox.

Setting up a mailbox through the Mail app
To create mail on another server on devices with the Android operating system, there is a special standard Mail application.
In the market, you can download other programs, the settings of which follow the same principle as the standard one.
If the box already exists and you need to install it on an Android phone, then you need to follow the following instructions.
- Sign in to the Mail app

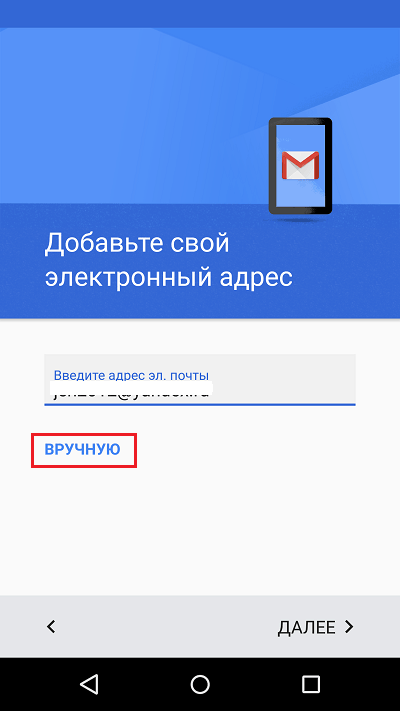
- First you need to enter your email address and click the "Manual Setup" button
- In the second stage, the system will prompt you to select the type of account. He chooses depending on the domain on which the box is registered.
In the case of working with mail.ru, you need to select "Personal (IMaP)" when there are no accounts in the system or Personal (POP3) for those smartphones on which accounts were previously created.

- Then enter password

- After that, you need to configure the mail server and enter or replace the following data for "Personal (IMaP)"
- IMAP server- imap.mail.ru;
- Type of protection- SSL/TLS;
- Port - 993
"Private(POP3)"
- POP3 server- pop.mail.ru;
- Type of protection- SSL/TLS;
- Port - 995

Our man will not go into his pocket for a word, but for the mail - completely. No, this is not about an envelope with a letter taken out of a drawer and stuffed into a pocket, but about a smartphone, which is our personal “postman” in a modern version.
Many people think that Android phones allow, which is tied to Google account, and iPhones only work with a box that is associated with an Apple ID. And that other mail accounts need additional programs. In fact, the possibilities of gadgets are enough for everything. Let's talk about how to set up email on your phone to receive letters from all your accounts in one mailbox - built into the system.
Setting up mail in the Gmail app on Android
Adding and setting up a new account
Mail client " gmail”, pre-installed on Android phones, can be used to assemble letters from various mail services, except for those that do not support third-party applications, such as heavily protected ProtonMail and Tutanota. By default, it collects emails only addressed to the Google account associated with the device.
To connect a different email account to your Gmail client, do the following:
- Launch the application. If anyone does not know, his label is a white envelope with a red letter "M".
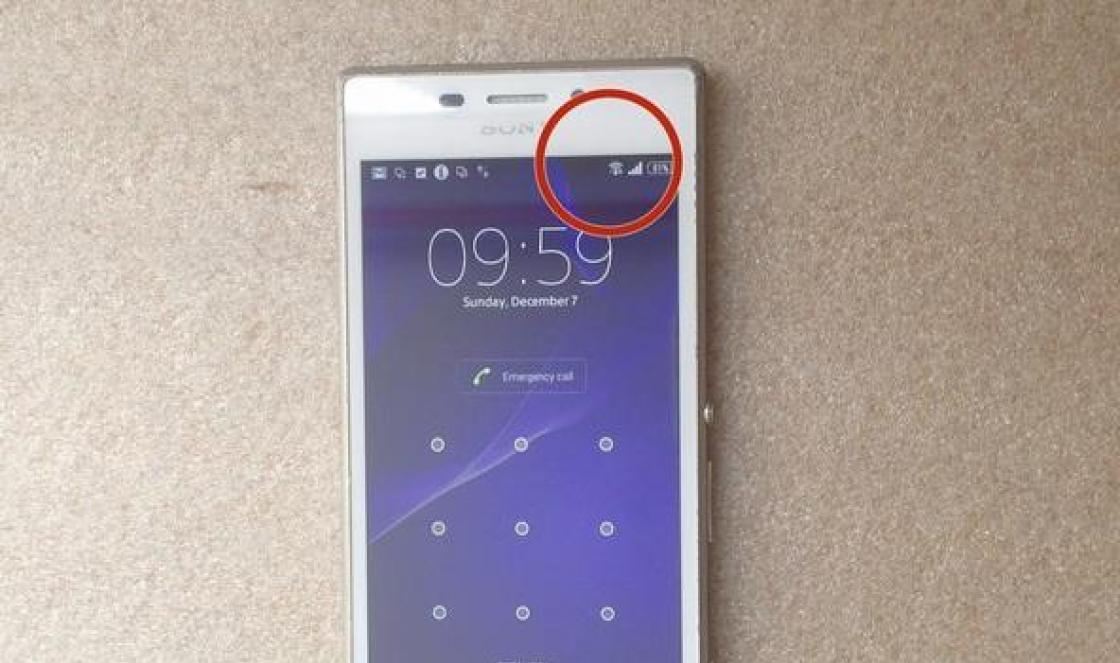
- Touch the hamburger button and open the side menu. To access the account management section, tap the triangle circled in the screenshot.

- Select " + Add account».

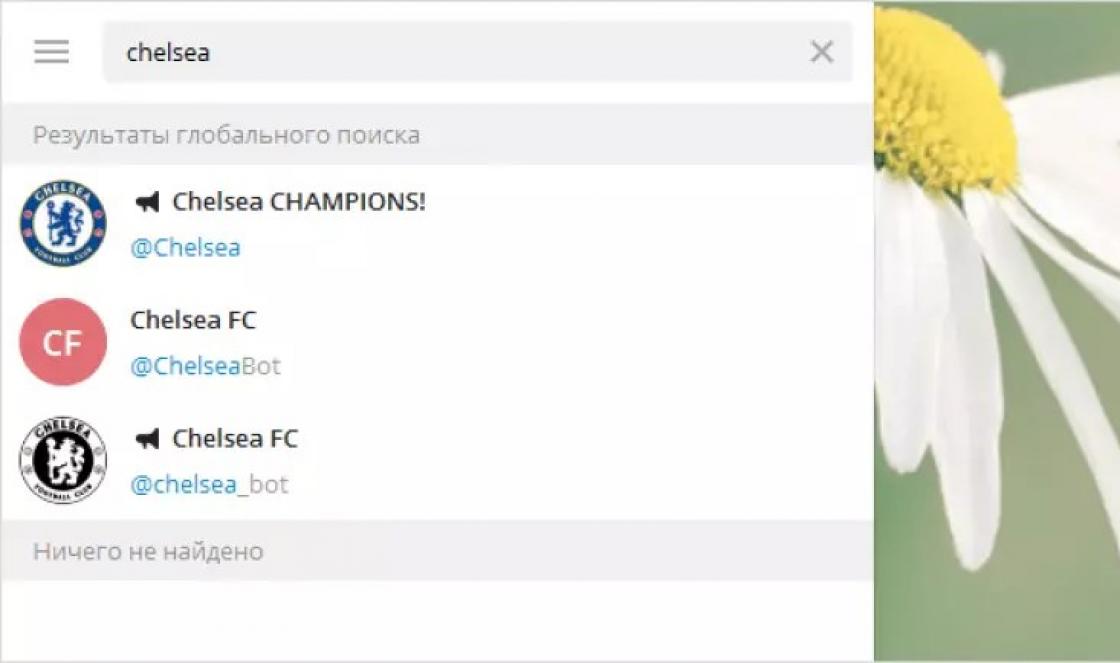
- Select the mail service you want to connect. For example, if Domain name the server where your mailbox is located, yandex.ru or ya.ru, choose Yandex; if gmail.com, choose Google, etc. If the desired service is not listed, your choice is " Another". We will analyze further actions using the example of the last option.

- Enter an email address. To set its default settings, click " Further". If you want to specify your settings, tap the " Manually».
- When choosing manual settings, the program will ask you to specify one of three options for the type of account. For personal mail, these are POP3 or IMAP protocols (you can find out what to choose from the instructions for users of your mail service). For mail on a corporate server - Exchange, unless otherwise used.

- Once again, enter the login or full address of the mailbox and password to enter it.

- In the next step, specify the incoming server. If the program did not determine it itself, you will have to refer to the manual of your mail service again.

- Next, write down the address of the outgoing message server and, if desired, enable automatic login into the system. Then you will not have to enter a password every time you access the mailbox.

- The basic setup is almost done. The point is small - to allow or prohibit the synchronization of the program with mail server. If allowed, set the synchronization frequency (default 15 minutes), as well as enable or disable notification of new letters and auto-download of attachments when the phone is connected to a Wi-Fi network.

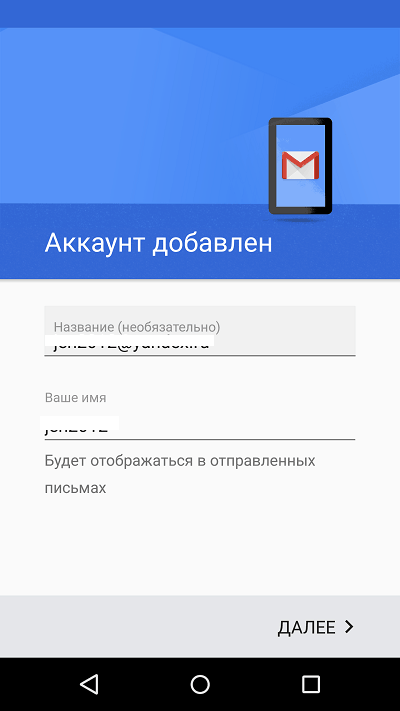
- Account added. At the final step, you can change your name, which will be displayed in sent letters. By default, instead of the name, the account login is specified.
We can finish here, but if you want to customize the new box more finely, open the side menu in the application again, scroll down and tap the " Settings».

Select the account you want to edit.
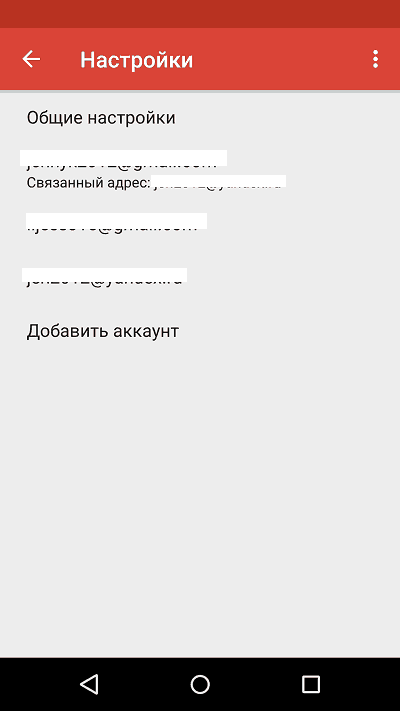
The following options are available for editing:
- Account name (email address).
- Your name (the default is your account name).
- Signature in the letter.
- Associating an address with another Gmail account.
- Request to display images in emails (if the Internet connection is slow or is charged according to the amount of traffic, it is better to enable it).
- Synchronization with the mail server and its frequency (high frequency of synchronization increases the volume of traffic and accelerates the discharge of the phone's battery).
- Automatic download of attachments to emails when connected to Wi-Fi.
- New mail notifications.
- Sorting incoming mail by categories (unsorted letters, social networks, forums, promotions and notifications). Not supported by all mail services.
- Automatic reply to incoming emails. Not supported by all mail services.
- Auto-suggest quick replies. Not supported by all mail services.
- Select a ringtone to alert you to an incoming message.
- Adding labels.
- Vibrosingal to notify you of the receipt of a letter.
- Incoming and outgoing mail servers (username, address, port and encryption type) and more.

In exactly the same way, accounts of other mail services are added to Gmail. There are no restrictions on the number. Use manual settings, as described above, is usually not needed, except for connecting corporate or some exotic mail accounts. In other cases, the application chooses the optimal default settings.
How to Change or Delete Your Gmail Account
By default, Gmail displays correspondence from only one account - the one that is currently active. To check the mail of another, you need to make it active.
All connected accounts are displayed in the top field of the main application menu (hidden behind the hamburger button). To switch between them, just touch the desired tab. And to download messages from all your mails at the same time, select " All boxes».

To remove an account from the Gmail app, click on the triangle button in the main menu and open " Account Management».

Next, select the mail service and account you want to delete. On the next screen, highlight the desired address again and go to the menu hidden behind the "three dots" button (top right). Touch " Delete account».

Set up mail on iPhone and iPad
Connecting and setting up an account
Adding and configuring an email account mobile devices Apple is no more time consuming than Android, but less intuitive in my opinion. And they are performed not in the mail section, but in " Accounts and passwords».
To use a different email account on your iPhone or iPad besides the one linked to your Apple ID, do the following:
- Tap in the list " Accounts» item « Add».

- Select the mail service where your mailbox is registered. If it is not in the suggested list, click " Other».

- Then select the section " Mail" and " New account».

- Enter your account information: username (by default, the login of the mail account is substituted), email address, password and description (the latter, by default, matches the mailbox address). Touch the " Further».

- In the next window - IMAP, check " Mail". Paragraph " Notes» is not required. Save the setting.
- Next, if you think the settings are sufficient, click " Ready". The new account will be added. If you want to edit parameters that are not displayed in this window, click " Additionally».

In chapter " Additionally» contains the following options:
- Box behavior. Allows you to assign or change the roles of some folders - drafts, sent, archive and deleted messages.
- The place to move unwanted letters is to the trash or archive box.
- The frequency of emptying the trash (complete destruction of deleted messages). The default is one week.
- Options for receiving incoming mail: use SSL encryption, select an authentication method, IMAP server port number, and IMAP path prefix.
- Whether to use S/MIME encryption. Disabled by default, supported by most but not all email services.

After closing the settings window, you will be taken to the section of the newly created account. By the way, here is the delete button.

Now the mail program built into the system will receive letters, including from this mailbox.
Setting up the mail application
The parameters of the built-in mail program are configured, as you probably already guessed, through the section " Mail».
The following is collected here:
- Application integration with Siri and search engine.
- Ways to notify about incoming correspondence (ringtone and sticker). You can assign individual notification settings to each mailbox.
- Message list display: number of lines to display when viewing, labels, swipe options (right, left, with flag added, etc.), style and color of flags.
- Actions when reading a message (requesting confirmation of deleting a letter, downloading pictures).
- Sorting and processing correspondence: grouping by topic, collapsing read messages, location of the last message (top or bottom), ending topics (showing a thread of letters that make up the same topic, even if they have been moved to other folders).
- The parameters of the message being created: sending a copy of the letter to yourself, marking addresses, indenting when inserting a quote, signatures - common or separate for each account and the default account from which new letters will be sent.

As you can see, the mail program on apple phones and tablets allows you to fully configure it for your own needs. Not everyone can boast of such functionality. third party application. Another plus in the treasury of mailers built into the system - both on Android and Apple - is the absence of advertising, which is stuffed with almost all free counterparts. So both programs are quite good.
Use on health!