Hello friends, today's article will be devoted to converting a hard drive. I wrote an article about the fact that. The solution to the problem turned out to be quite simple, it was necessary to convert GPT to MBR. We did this using the utility dispart Unfortunately, the disadvantage of this method is that the data on all partitions is completely destroyed. Recently I received a question: how to convert GPT to MBR without losing data? Today we will do this.
As it turned out, this transformation can be done, but only with the help of third-party software. In this case we need to use the software Paragon Hard Disk Manager. I want to say that the program only works in operating systems, therefore, I do not advise you to remove the OS by formatting the partition with the system. First, do the disk conversion, and then perform the operations you need, whatever you want.
Download this program you can from the official website. It is paid, but there is also trial version, which is quite enough for us. In order to download the program you need to register, a download link will be sent to your email. Install the program and launch it.
The following window opens before our eyes:

In this window we see all connected disks that are converted to GPT and MBR. As a test disk, I took a regular flash drive converted to GPT. I'll show you how to convert it to MBR. This can be done with any hard drive.
So on this disk(flash drive) there are files, after conversion they will remain.

To perform this operation, you need to right-click on the disk. It is the disk, not the partition. A context window will pop up in which we select "Convert base GPT to base MBR".

A window will appear in which you need to click the button "Convert".

Once you do this, you need to apply the changes. To do this, click the button at the top of the program window "Apply".

Hello admin! How to convert GPT to MBR without data loss on a laptop with installed Windows 8.1?
On my laptop, Windows 8.1 is installed on the drive (C:), there is also a drive (D:) with personal files, and I want to completely convert the hard drive from GPT to MBR without losing data, but for Windows 8.1 to boot, the activation does not fail, but that’s all the programs remained working, then I will install the second one Windows system 7.
How can this be accomplished? I understand that the question is very difficult, since I did not find a detailed answer on the Internet, just guesses.
Hello friends! My name is Vladimir and in today’s article I will show you how to convert GPT to MBR without losing data on a laptop with Windows 8.1 installed (nothing will happen to the operating system and your data). But that's what I said in simple words, to put it in technical language, it should sound like this: today we are with you transform the standard for partition table placement hard drive GPT to MBR.
Why do many users disable the UEFI interface on their laptops and convert the hard drive to MBR? I believe that only for Windows installations 7, because seven will not be installed on a new laptop with a GPT disk. But if you disable UEFI, Windows 8.1 will not boot and to install Windows 7 you will have to delete everything from the hard drive, including Win 8.1 itself. Today’s article offers a universal way out of the situation. We will convert your laptop hard drive from GPT to MBR without deleting data, and we will restore Windows 8.1 booting!
- Note: The question is really difficult and the article is given to you primarily for your information! Just in case, before starting work, I recommend that all users (including experienced ones) play it safe and create a complete backup copy laptop hard drive in the program or, or create (best), since the hidden partition with the program to roll back to the store state after converting the hard drive from GPT to MBR will be inoperable.
- If you need the old Windows 7 on your laptop with a UEFI BIOS, then you can do it easier, install it on .
So we have new laptop Acer (UEFI BIOS) with pre-installed factory Windows 8.1.
In Disk Management, all partitions of the hard disk are visible, including hidden ones (the third hidden partition MSR 128 MB is required for GPT disks - it is not visible in Disk Management, but we will see it in Paragon Hard Disk Manager 15).
The drive (C:) has Windows 8.1 installed, and the drive (D:) contains a lot of personal information.

The hard drive is converted to a GUID partition table, abbr. GPT

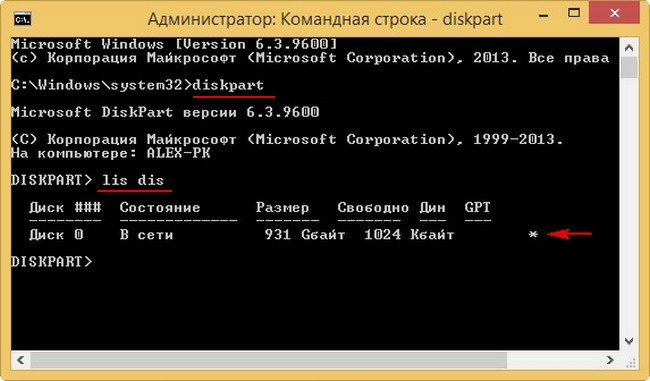
You can also see this on the command line by typing the following commands:
diskpart
lis dis
A GPT hard drive always has an asterisk next to it.
Using a bootable USB flash drive Paragon Hard Disk Manager 15convert a hard drive from GPT to MBR without data loss
First, we will need a bootable flash drive with the Paragon Hard Disk Manager 15 program, it is this program that will convert the hard drive from GPT to MBR without losing data, but after the conversion, Windows 8.1 will not boot and the system will have to be restored to boot, we will do all this in today’s article.
Connecting bootable USB flash drive to the laptop and reboot, enter the BIOS, here we immediately disable UEFI and enable Legacy (I created a normal bootable USB flash drive with the Paragon program, not UEFI),


Reboot and enter the laptop boot menu, select the flash drive with the Paragon Hard Disk Manager 15 program to boot

In the main program window we see the laptop’s hard drive, all partitions are visible, including hidden ones (the third hidden partition MSR 128 MB, required for GPT disks, is now visible). Click on the small arrow to display disks and partitions in a more convenient list.


To avoid creating an Additional partition with logical drives on your hard drive, we delete all hidden partitions on the laptop (you don’t have to delete anything at all, read the information at the end of the article), leaving only the partition with Windows 8.1 installed, to which the program assigned the letter (E:) ( former C:) and the section with our files,to which the program assigned the letter (F:)(former D:) .
Right-click on the first hidden section and select “Delete”

Check the box “Do not request a volume label next time” "and press the button"Yes."

The first hidden section has been removed.
Right-click on the second hidden section and select “Delete”

Click on the “Yes” button.

Click "Yes".

The second hidden section has been removed.
Right-click on the third hidden section and select “Delete”

Click on the “Yes” button.

"You are going to destroy system partition. The system may not boot. Do you really want to perform the operation?
Click "Yes".
The third hidden section has been removed.
Right-click on the fourth hidden section and select “Delete”. This section contains the factory settings of the laptop.

"Yes"

The time has come Convert GPT to MBR without data loss.
Right-click on the laptop hard drive and select “ Convert Basic GPT to Basic MBR disk» .

Click "Convert"

"Yes"

Paragon Hard Disk Manager 15 works in deferred operation mode, click “Apply” and the program will begin to carry out all the operations we have specified.

GPT to MBR conversion without data loss completed successfully!


Create a hidden System Reserved partition (Reserved by the system, volume 300 MB) with files Windows boot 8.1 and make it active
Friends, now all we have to do is create a hidden active System Reserved partition in the program (Reserved by the system, volume 300 MB) with Windows 8.1 download files. By the way, you can do this on the command line by booting from installation disk Windows 8.1, but in this article we are working with Paragon Hard Disk Manager 15.
Right-click on the unallocated area of the hard drive and select “Create Partition”.

The program shows the unallocated space from which we can create a partition.

We take the delimiter from the right edge and compress the unallocated space, creating a 300 MB partition at the very beginning of the hard drive. We take the file system NTFS.
Click "Yes"

Making the section active.
Right-click on the newly created partition (F:) and select “Make the section active.”

“Are you sure you want to make this section active?”

Click "Apply"

Click “Yes” and the program starts working.


An active hidden System Reserved partition has been created on the laptop’s hard drive (Reserved by the system, volume 300 MB) and now we will copy the Windows 8.1 download files to it.
Creating a boot configuration for Windows 8.1
In the initial system installation window, open the command line using the keyboard shortcut Shift+F10.

Enter the following commands on the command line:
diskpart
lis vol (displays all partitions of the hard drive)
exit
We see that the recovery environment has assigned a drive letter (F:) to the partition with Windows 8.1 installed, so we enter the following command
bcdboot F:\Windows (create a boot configuration for Windows 8.1)

Reboot and enter Windows 8.1
Windows 8.1 booted fine on the MBR drive. Nothing happened with activation. All programs work.
Disk properties. The hard drive has a Master Boot Record (MBR).

Disk management

Article on this topic:
It's no secret that in order to write and read files on a hard drive, the latter must be marked up. Partitioning is a standard for placing partition tables on physical media. It determines the structure of the disk, thanks to which the user can create logical partitions on it, format them into the desired file system, write and read data. There are two markup standards - MBR And GPT. The first is usually used on computers with a regular BIOS and relatively small disks, the second is more common on PCs with a modern BIOS UEFI interface.
Compared to MBR disks, GPT disks have a number of advantages; in particular, GPT partitioning allows you to work with media larger than 2 TB. On such disks boot record and partition table information is backed up, which increases OS fault tolerance; in addition, a GPT disk can contain as many logical volumes as desired. Currently, disks with GPT markup are actively replacing MBR media, which often causes various problems for users, the most common of which is the inability to install Windows on a GPT disk. The cause of the error is usually a discrepancy between the HDD layout standard and the requirements of the software, in this case the operating system. The error is not fatal; it can be resolved by converting GPT to MBR.
Changing the layout when installing Windows 7/10
There are several ways to convert GPT to MBR, including saving it on the target storage medium. First, we will consider the option of converting the markup at the initial stage of Windows installation with loss of data on the disk.
The first option is simpler, but in this case the “System Reserved” partition will not be created on the disk, which will reduce the fault tolerance of Windows. If this scenario does not suit you or the installation still fails, change the markup manually. Click on your keyboard Shift+F10 and sequentially execute the following commands in the console that opens:
diskpart
list disk
select disk 0
clean
convert mbr
exit


The first command is to launch the utility Diskpart, the second we get a list of physical disks (GPT media will be marked with an asterisk), the third we select the desired disk (if there is only one, leave 0), the fourth command we clean it up, the fifth we convert the partitioning style from GPT to MBR. The sixth command terminates Diskpart. Done, now close the console and continue installing Windows as normal. We remind you once again that when using the described method, all data on the disk, including logical partitions, will be deleted. If there is important data on it, it must be copied to removable media, or third-party programs should be used to convert the disk from GPT to MBR.
If you are going to install 32-bit Windows, before converting GPT to MBR, you must enable Legacy mode in the BIOS and disable Security boot protection.
Converting GPT to MBR using Windows
Above, we looked at how to convert GPT partitions to MBR at the initial stage of installing Windows 7/10, now let's try to change the partition using system tools from running Windows. True, this method is only suitable for non-systemic physical hard drives. As in the previous case, partitions and data written to the disk will be lost. To convert a disk from GPT to MBR, you can again use command line, but in this case it will be much easier to resort to the standard disk management equipment.
Run it with the command diskmgmt.msc or through the context menu of the Start button.

Then click on the schematic image of the partition of the converted disk RMB and select “Delete volume”.

If the disk has multiple logical partitions, remove them as well to get a single unallocated space. Now bring up the menu for the disk and select the “Convert to MBR disk” option.

Done, now you can create partitions on the disk and install a second operating system and so on.
Using third party programs
Both of the above methods have one significant drawback, namely the inevitable loss of data stored on the disk. Fortunately, there are programs that allow you to convert a GPT disk to MBR without losing data. The most well-known commercial software are applications Acronis Disk Director And Paragon Hard Disk Manager Professional, among the free ones - AOMEI Partition Assistant Standard Edition. The sequence of actions in all these programs is approximately the same.
In the case of working with non-system physical disks, just select the media with the mouse and select in the menu the option to convert the disk from GPT to MBR, and all this while running Windows.


You can also convert a disk from GPT to MBR using the programs created in these programs bootable media. Their advantage is the ability to convert the markup style on a PC with one physical disk, since the program requires exclusive access to it to perform the operation.
Let's take an example of how to convert GPT to MBR without losing data using boot disk AOMEI Partition Assistant. After the computer is booted from it, select the desired disk and select “Convert to MBR” from the menu on the left.

Good day!
If you have new computer(relatively) with UEFI support - then during installation new Windows You may find yourself needing to convert (convert) your MBR disk to GPT. For example, during installation you may receive an error like: “On EFI systems, Windows can only be installed on a GPT disk!”
In this case, there are two solutions: either switch UEFI to Leagcy Mode compatibility mode (not good, because UEFI shows higher performance. Windows boots faster); or convert the partition table from MBR to GPT (fortunately, there are programs that do this without losing data on the media).
Actually, in this article I will consider the second option. So, ...

Converting an MBR disk to GPT (without losing data on it)
For further work you will need one small program - AOMEI Partition Assistant.
Excellent program for working with disks! First of all, it's free for home use, supports Russian language and runs on all popular OS Windows 7, 8, 10 (32/64 bit).
Secondly, it has several interesting wizards who will do the entire routine process of setting up and setting parameters for you. For example:
- disk copy wizard;
- Partition Copy Wizard;
- Partition Recovery Wizard;
- OS transfer wizard from HDD to SSD (recently relevant);
- bootable media creation wizard.
Naturally, the program can format hard drives, change the structure of MBR to GPT (and vice versa) and so on.
So, after starting the program, select your drive that you want to convert (you need to select the name “Disk 1” for example), and then right-click on it and select the “Convert to GPT” function (as in Fig. 1).

Rice. 1. Convert MBR disk to GPT.

Rice. 2. We agree with the transformation!
Then you need to click the “Apply” button (in the upper left corner of the screen. For some reason, many people get lost at this step, expecting that the program has already started working - this is not the case!).

Rice. 3. Apply changes to disk.
Then AOMEI Partition Assistant It will show you a list of actions that it will perform if you give your consent. If the disk is chosen correctly, then just agree.

Rice. 4. Start conversion.
Typically, the conversion process from MBR to GPT is quick. For example, a 500 GB drive was converted in a couple of minutes! During this time, it is better not to touch the PC and not interfere with the program doing its job. At the end, you will see a message indicating that the conversion is complete (as in Figure 5).

Rice. 5. The disk was converted to GPT successfully!
Pros:
- quick conversion, literally a few minutes;
- conversion occurs without data loss - all files and folders on the disk are intact;
- no need to have any special skills. knowledge, you don’t need to enter any codes, etc. The whole operation comes down to a few clicks of the mouse!
Cons:
- It is impossible to convert the disk from which the program was launched (i.e. from which Windows was loaded). But you can get out - see. below;
- if you only have one disk, then in order to convert it you need to connect it to another computer, or create a bootable flash drive (disk) and convert from it. By the way, in AOMEI Partition Assistant There is a special wizard for creating such a flash drive.
Conclusion: Overall, the program copes with this task perfectly! (The given disadvantages can be given to any other similar program, because cannot be converted system disk, from which the download was made).
Converting from MBR to GPT during Windows Setup
This method will unfortunately delete all data on your storage device! Use it only when there is no valuable data on the disk.
If you are installing Windows and an error appears in front of you that the OS can only be installed on a GPT disk, then you can convert the disk directly during the installation process (Attention! The data on it will be deleted, if the method is not suitable - use the first recommendation from this article).
An example of the error is shown in the figure below.

Rice. 6. Error with MBR when installing Windows.
So, when you see an error like this, you can do this:
1) Press the Shift+F10 buttons (if you have a laptop, then maybe you should try Fn+Shift+F10). After pressing the buttons, the command line should appear!
2) Enter the Diskpart command and press ENTER (Fig. 7).

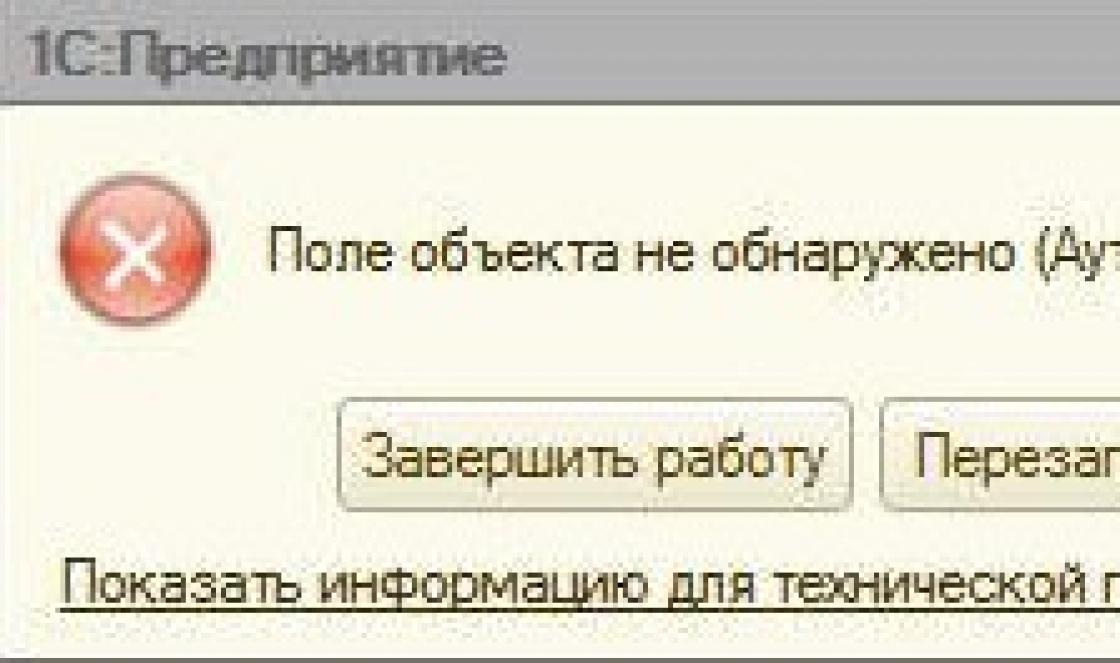
When might it be necessary to convert GPT to MBR? The most likely situation is to display an error message like this:
This can happen when you try to install Windows system 7 with x86 architecture onto a logical disk with partitions under the GPT system. Sometimes the reason may be the lack of UEFI BIOS on the PC.
There are also standard Windows utilities(including those working during installation) and special software from third parties to solve this common problem. In this guide we will try to explain as clearly as possible options for changing GPT to MBR. It’s also worth knowing that it doesn’t exist effective way GPT to MBR conversion on a logical disk with the system, without possible loss of information on it.
This option is feasible if you have already received the dialog box described above about incompatible GPT partition styles. The obvious advantage of this method is that it can be used not only when installing a “clean” system, but also while working in it (only if hard drive not systemic).
Attention! All information contained on the HDD will be erased! Knowing this in advance, you can follow this sequence:
- By time new installation Windows (at the stage of being able to select volumes for installation), you need to hold down the Shift + F10 buttons to open the command line window.
- Type the command diskpart, after that - list disk. These actions will make it possible to display a list of all physical disks on this computer
- Run a new command - select disk N, the letter N in this case is the number of the disk that will be converted.
- Next, you are given two options to choose from: score the team clean, for complete disk cleanup (deleting all partitions) or the option to delete specific partitions selectively using commands select volume, detail disk, and delete volume(the picture shows exactly this moment). The first option is preferable due to speed and simplicity.
- After deleting the partitions, enter convert mbr on the command line - this will change the style of the disk partition to MBR.
- When finished, type Exit to exit Diskpart, close the command prompt window and you can continue with the current installation of the system - the error about partition styles will no longer bother you! You will also still have the opportunity to create new partitions - just click “set up disk” in the partition setup window.

This option is only suitable for a non-system physical hard disk. To do this, you need a valid operating system (Windows 7, 8, 8.1).
From the desktop, hold down the Win + R keys to launch the Run window and enter diskmgmt.msc in the input field and go to the system disk management routine.

In the Disk Management view that opens, you need to find the disk that requires conversion. It is necessary to delete absolutely all partitions on it. This is done by right-clicking on the required partition and selecting the “Delete volume” option. This procedure must be performed for each hard drive partition!

At the end of the above described manipulations, you need to click on the disk name item using the right button and in the context list click the option “ Convert to MBR disk».

As a result, you will have the opportunity to develop the required volume structure on the HDD yourself.
Specialized paid utilities for changing GPT and MBR partitions with the ability to save all data on logical volumes.
In addition to the above-described “native” options provided in the system itself, for any conversion of GPT partitions to MBR and MBR to GPT, there are programs from third-party manufacturers - Minitool Partition Wizard and Acronis Disk Director. The only disadvantage of this software is that they are paid.

There is another free analogue of programs with similar capabilities - Aomei Partition Assistant. But this program cannot be recommended by our experts. To ensure 100% data retention when updating section styles, especially if the information is on HDD disk important, we strongly recommend contacting our service center "